A guide to the Utilitia features available from a user account: creating an account, running analyses, reading WCAG reports, checking PDF and Office documents, recurring analyses, working in an organisation and API access. The administrator panel is not covered here.
1. What Utilitia is
Utilitia checks whether websites and documents are accessible to people with disabilities, in line with the WCAG (Web Content Accessibility Guidelines) and the PDF/UA standard for PDF files. The tool combines the results of several testing engines:
- axe-core and IBM Equal Access — automated WCAG accessibility rules for web pages,
- Nu Html Checker (VNU) — validity of HTML and CSS code,
- veraPDF — conformance of PDF files with the PDF/UA-1 profile,
- a validator for Office and ODF documents (with LibreOffice conversion, among others),
- IRIS — detection of flashes and patterns that may trigger photosensitive epileptic seizures (WCAG 2.3.1).
Important: automated tests catch a large share of the problems, but they do not replace an audit performed by a human. Messages marked as an error are treated as certain, warnings require manual verification, and information items describe technical matters or the file format.
Utilitia runs entirely in the browser — you can use it both on a computer and on a phone or tablet (in a mobile browser). There is nothing to install.
2. Account: registration, sign-in, two-factor authentication
Analysis without an account (guest mode)
Without signing in you can run an analysis of a single page (without crawling the whole site) and check a single document. A guest report is public — available to anyone who knows its link — and is automatically deleted after the retention period (30 days by default). To analyse a whole site, use the history and the advanced features, create an account.
Registration
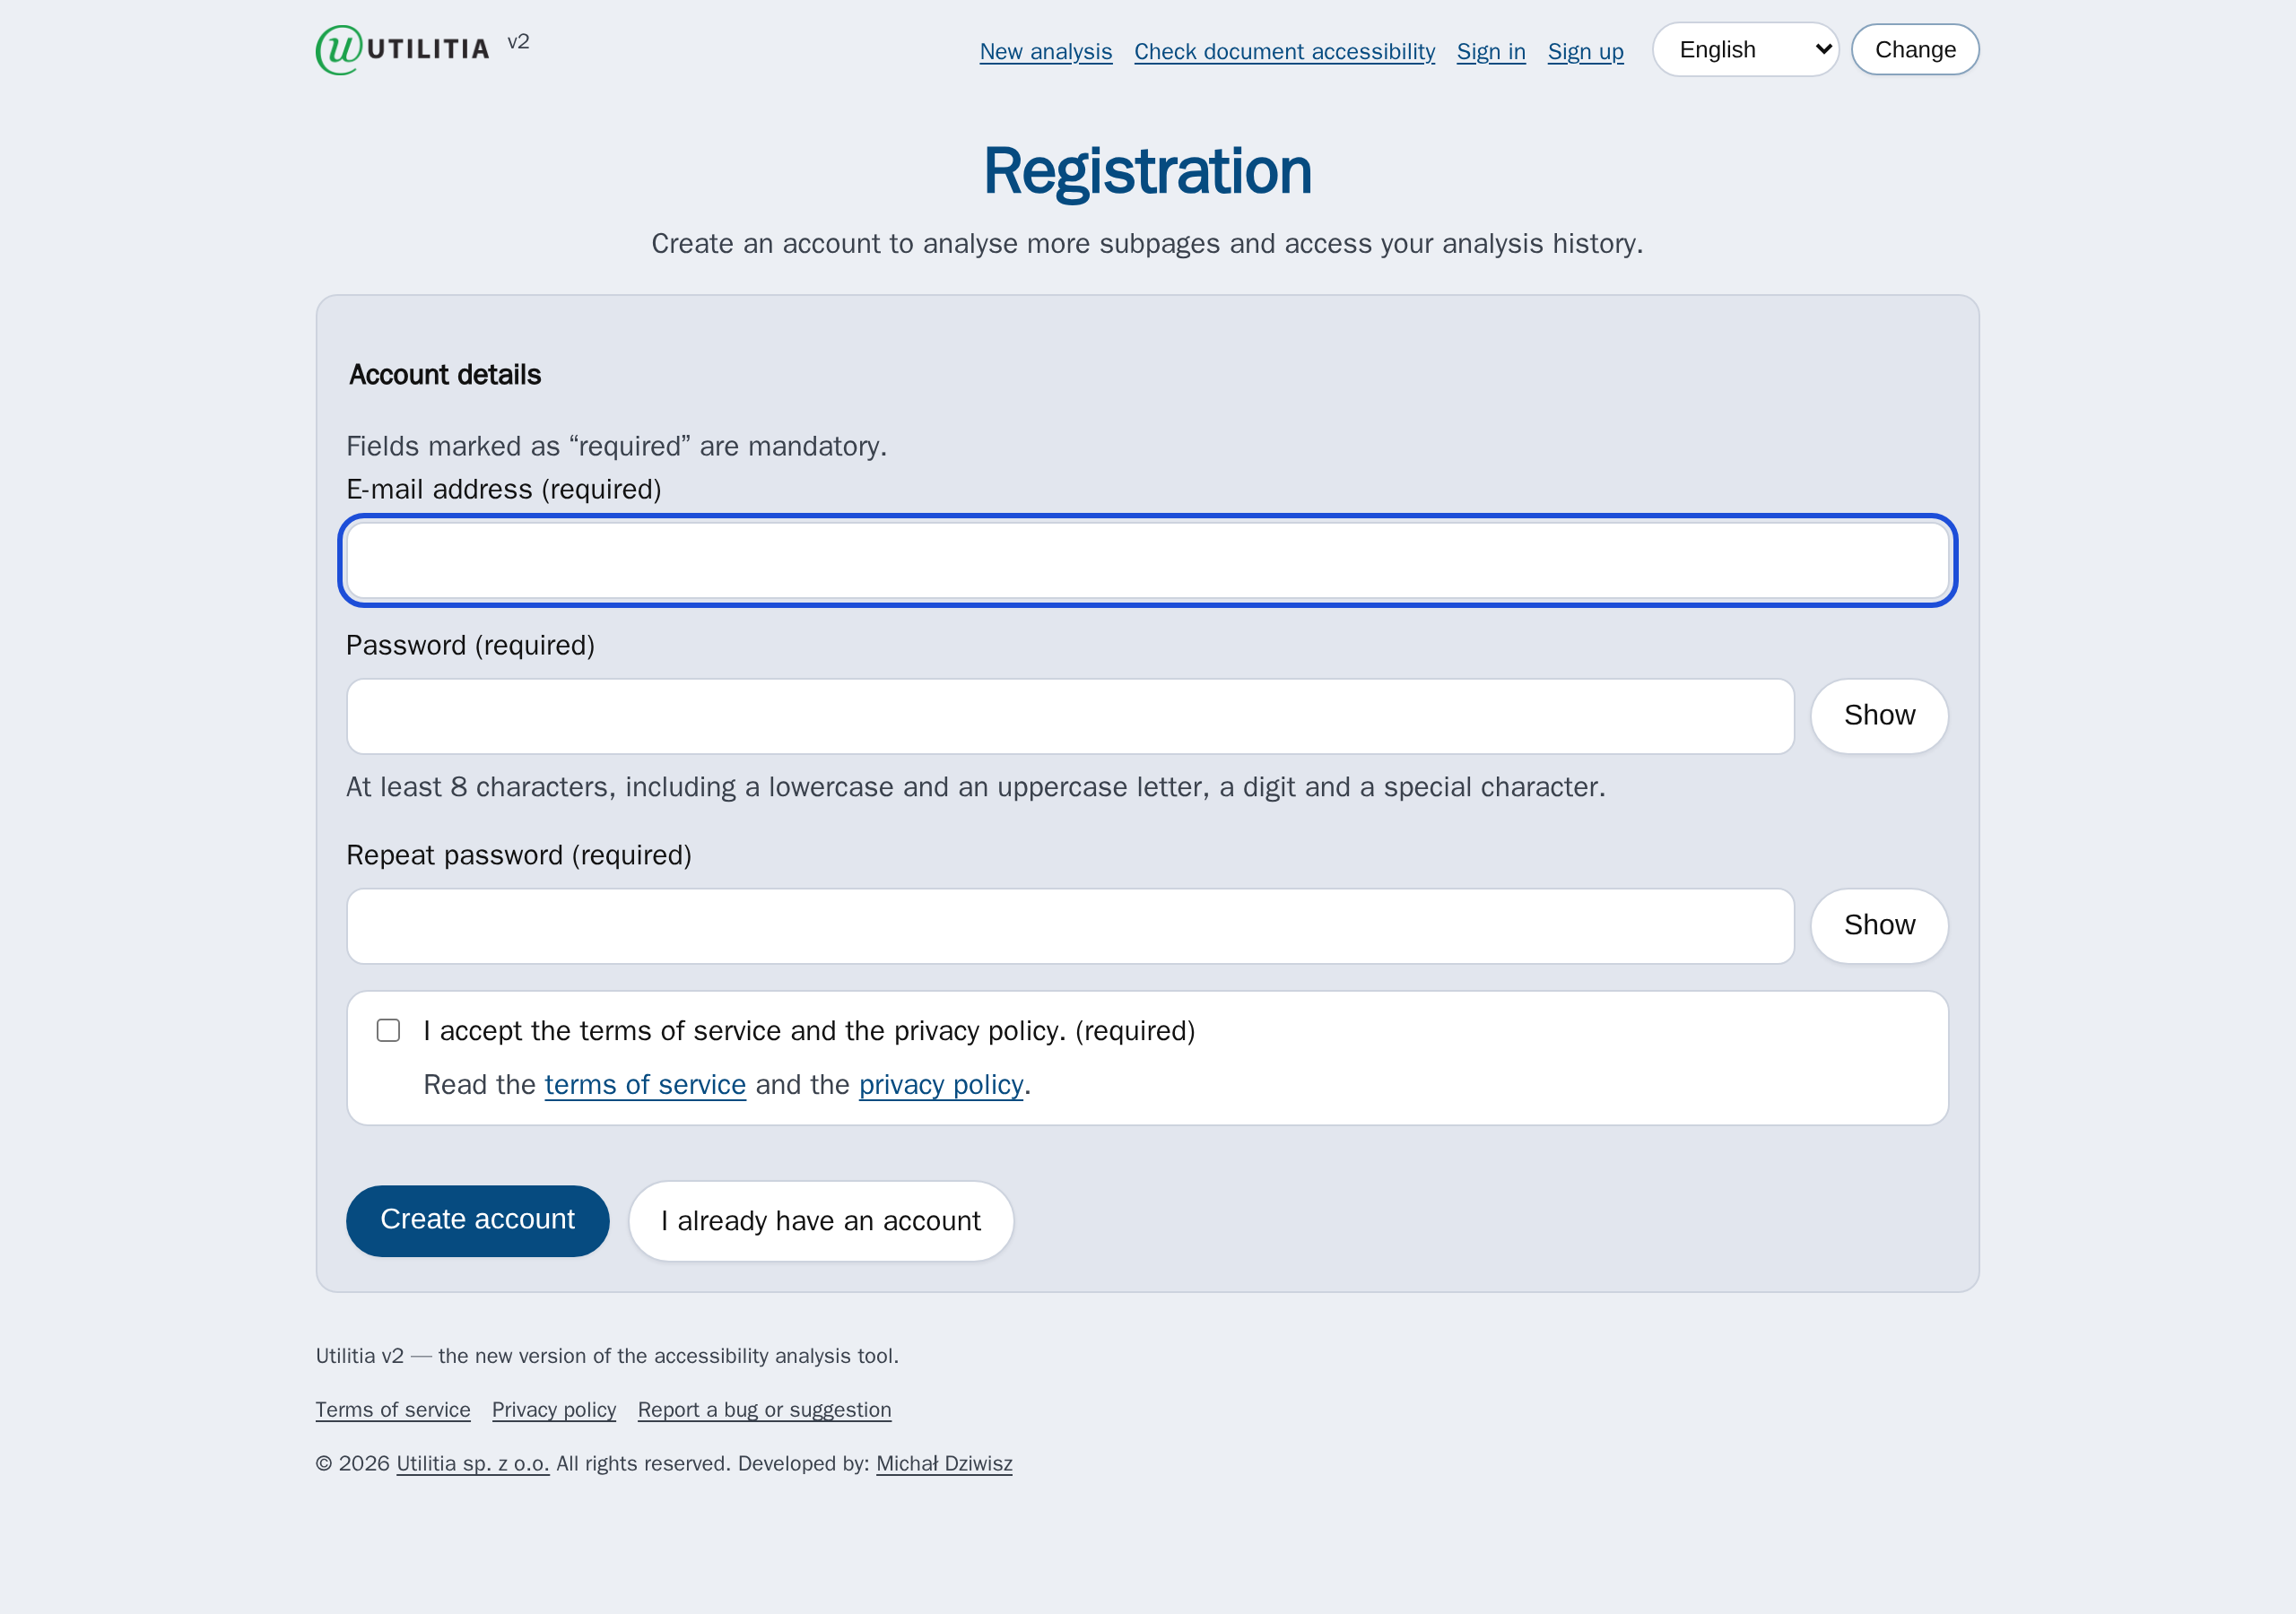
- Click Sign up in the top right corner.
- Enter your e-mail address, type a password and repeat it in the second field (use the Show button to reveal the characters you type). The password must be at least 8 characters long and include a lower-case letter, an upper-case letter, a digit and a special character.
- Tick the consent to the terms of service and privacy policy (required), then click Create account.
- A message with an e-mail verification link will be sent to the address you provided — click it to activate the account.
Signing in
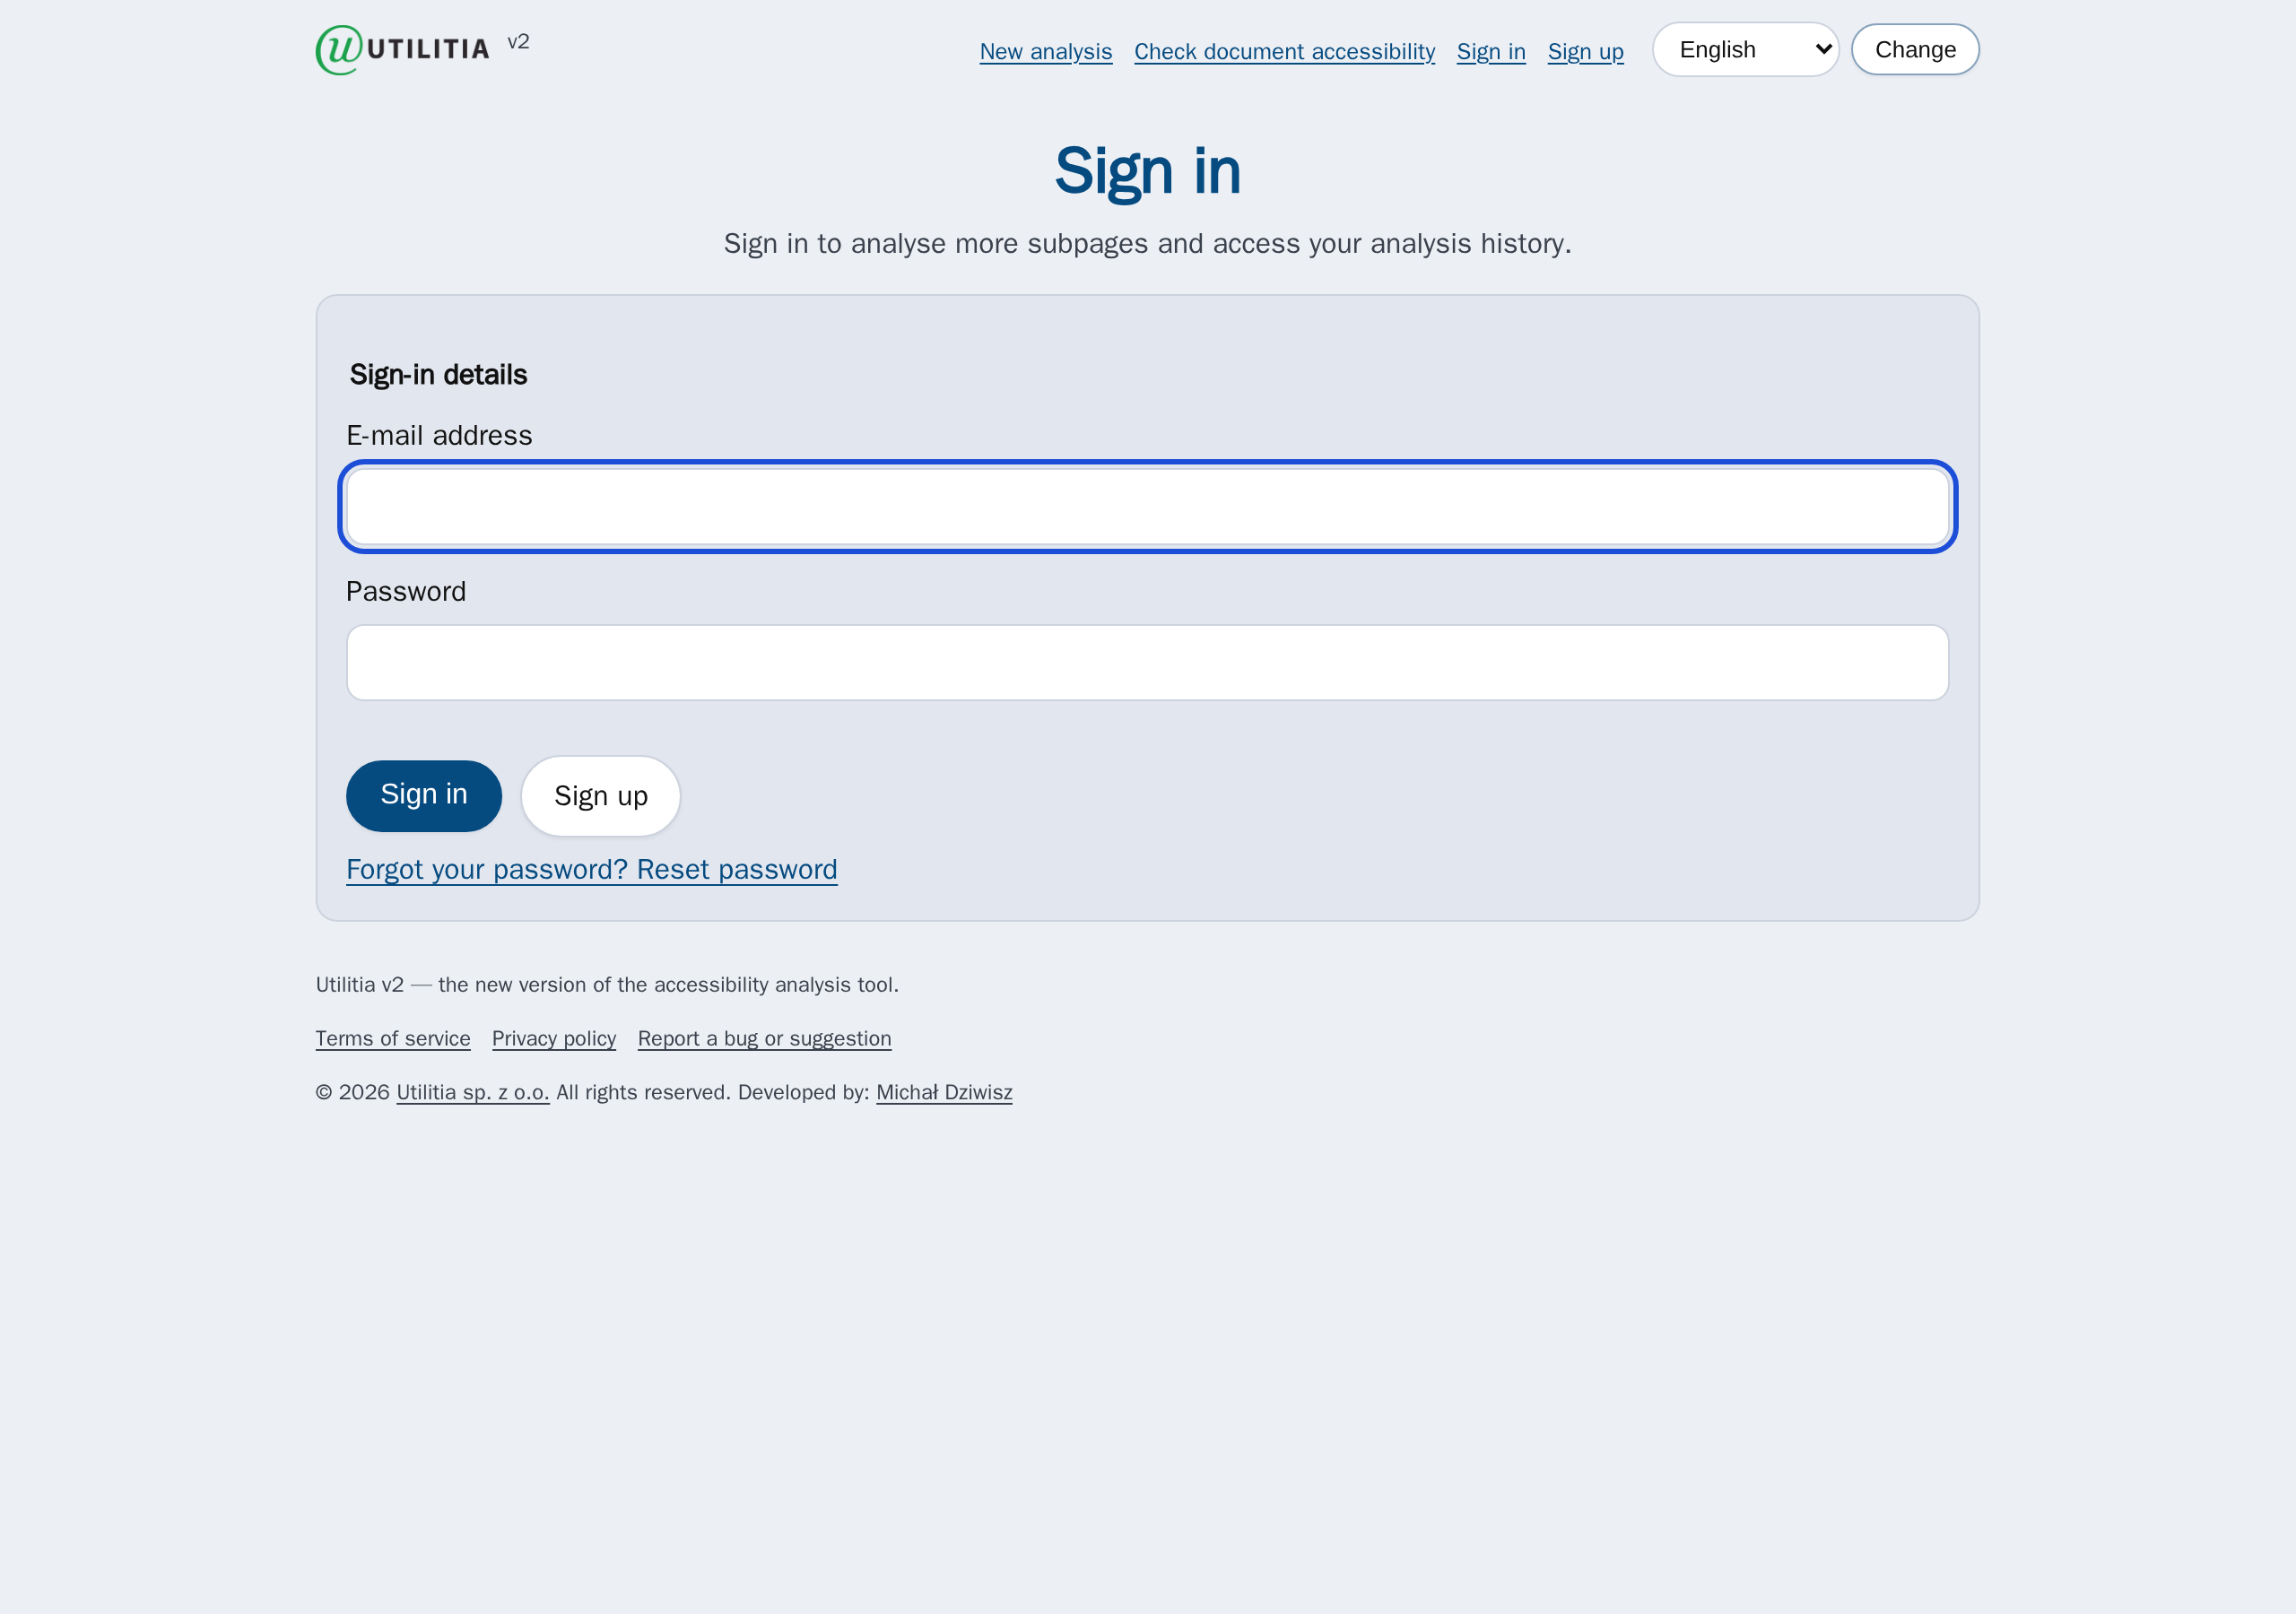
If you forget your password, use the Reset password link. A link to set a new password will be sent to your e-mail address.
Account and security
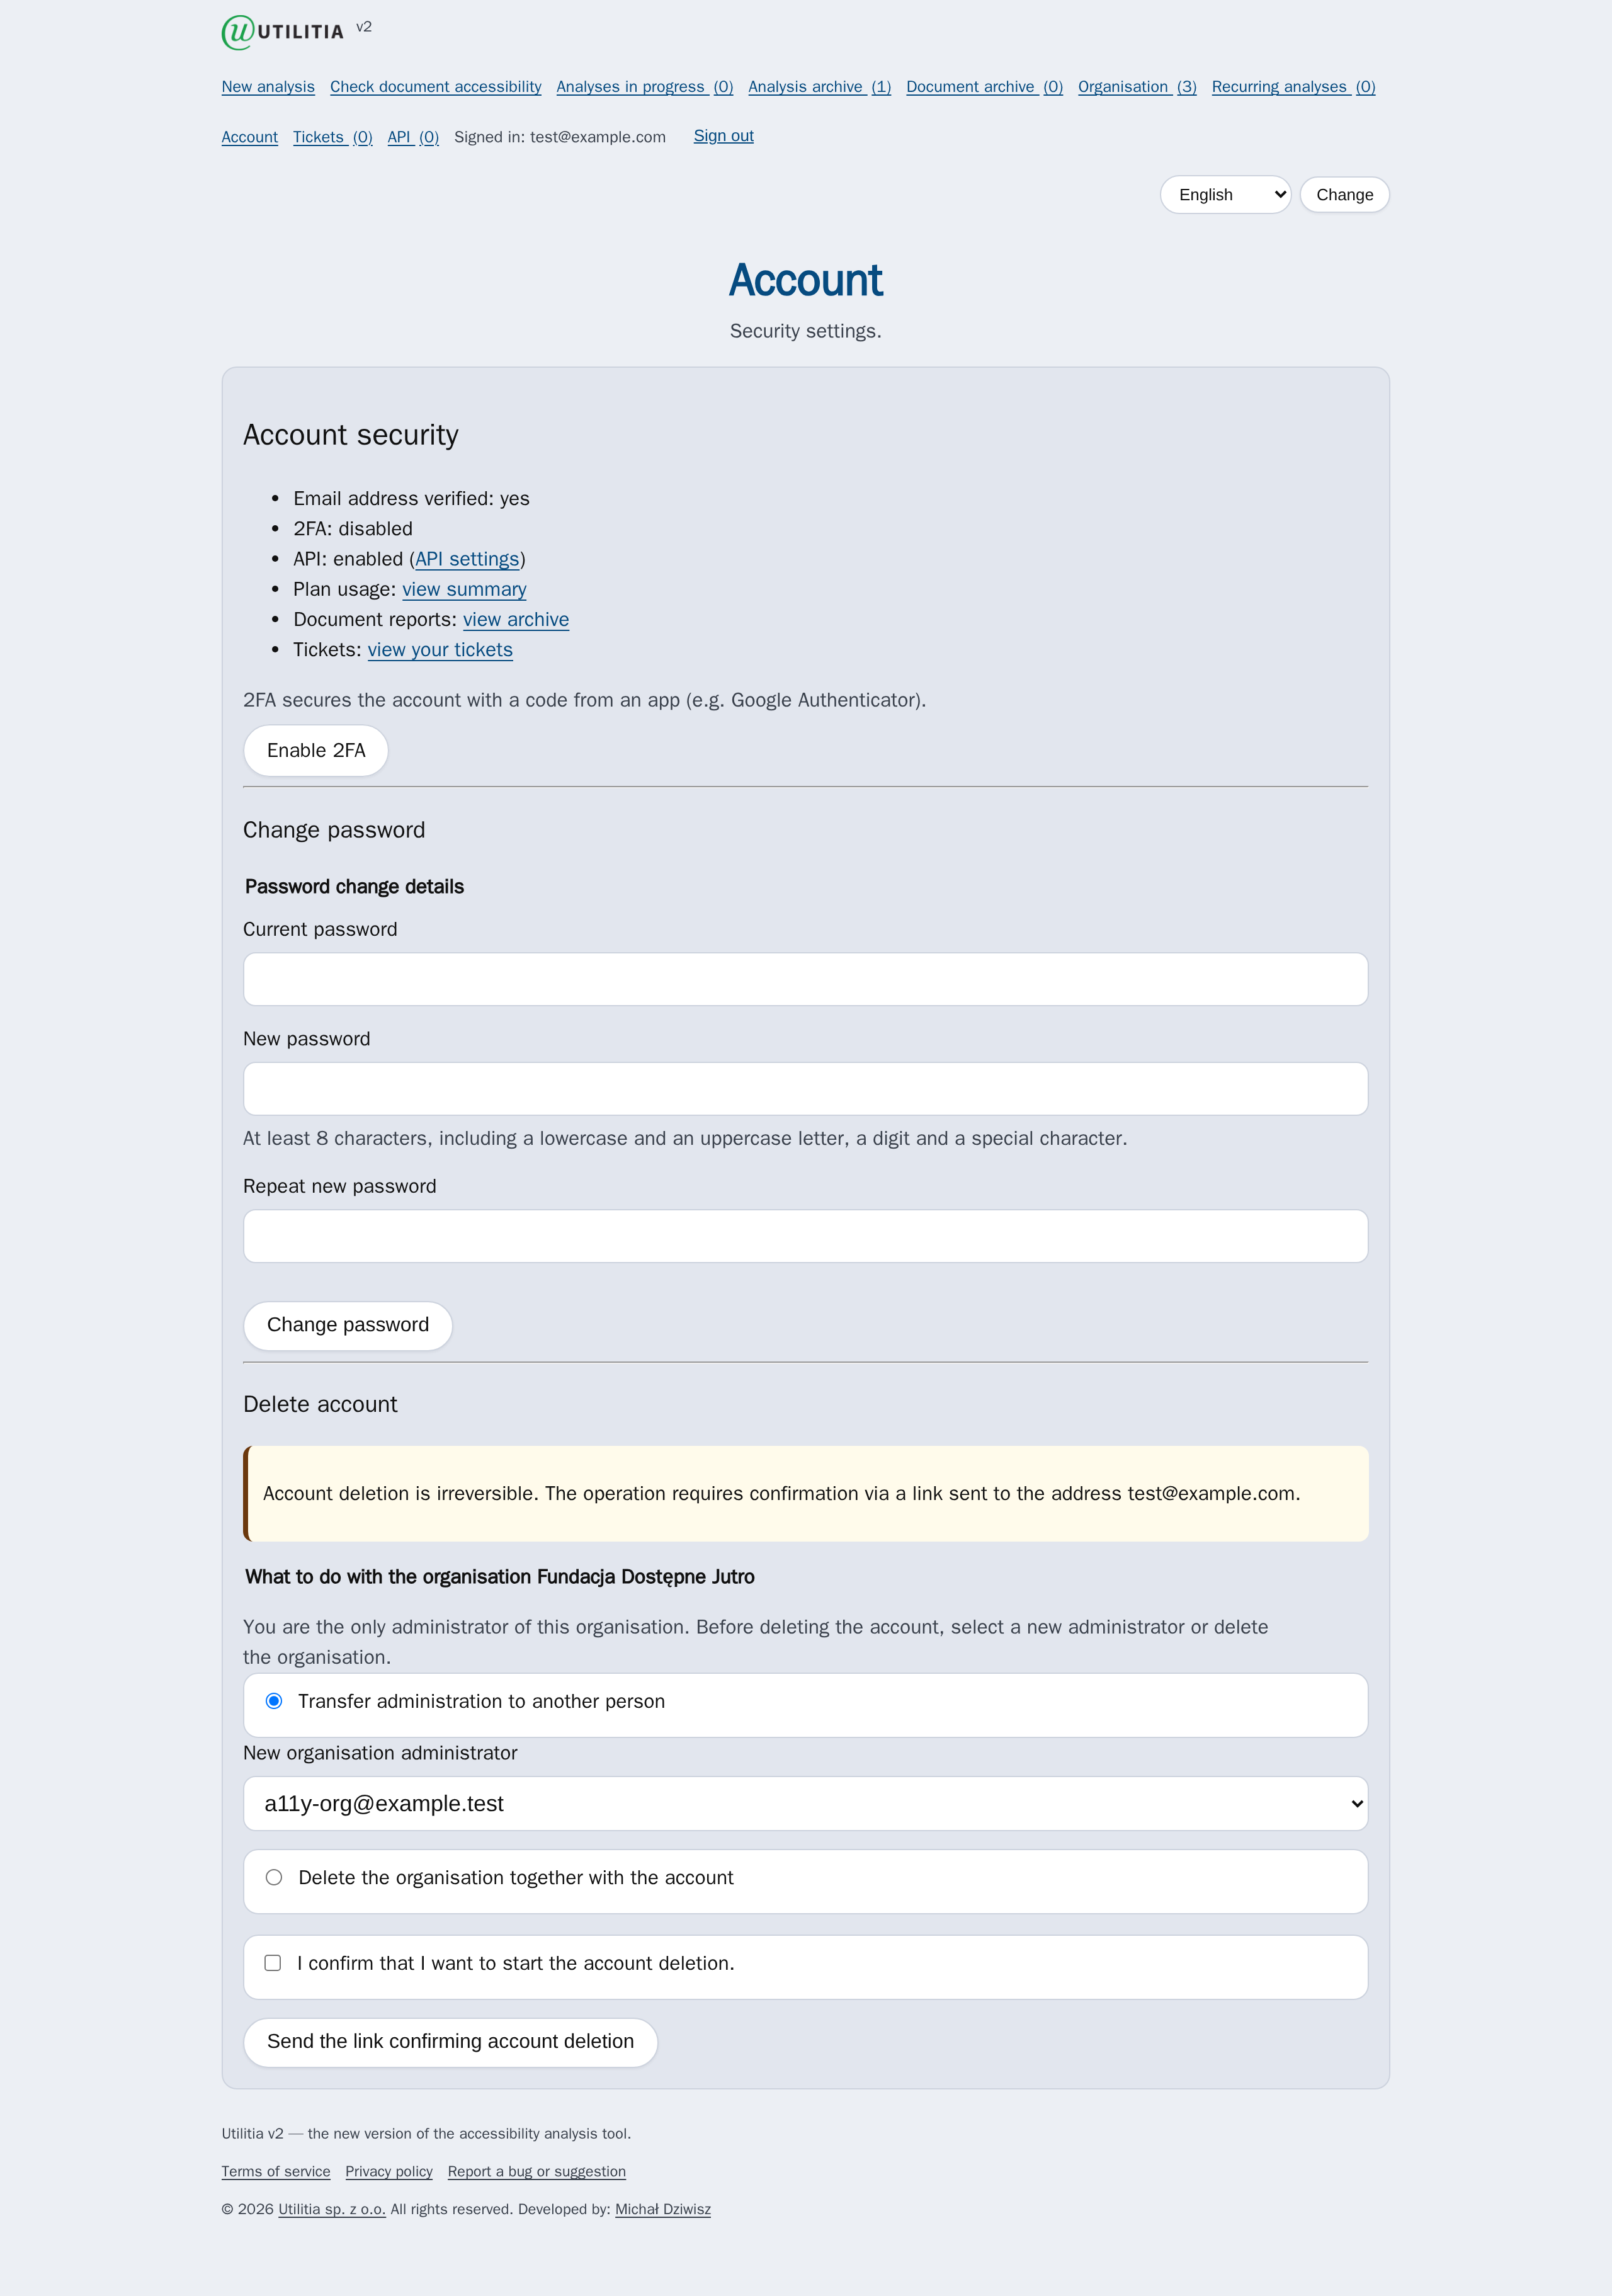
The Account page (top menu) starts with a security status (whether the e-mail is verified, whether 2FA and the API are active) and with shortcuts to plan usage, the document archive and tickets. Below you can:
- Enable two-factor authentication (2FA) — after scanning a QR code in an authenticator app, signing in will require an additional one-time code.
- Change your password. The new password must be at least 8 characters long and contain a lower-case letter, an upper-case letter, a digit and a special character.
- Delete your account together with its data (the operation requires confirmation via a link sent to your e-mail address).
Once 2FA is enabled, the next sign-in will show an additional screen asking for a six-digit code from your authenticator app.
If you delete your account and you are the only administrator of an organisation, before deletion you must decide what to do with the organisation: transfer administration to someone else or delete the organisation along with the account.
3. Website digital accessibility analysis (WCAG)
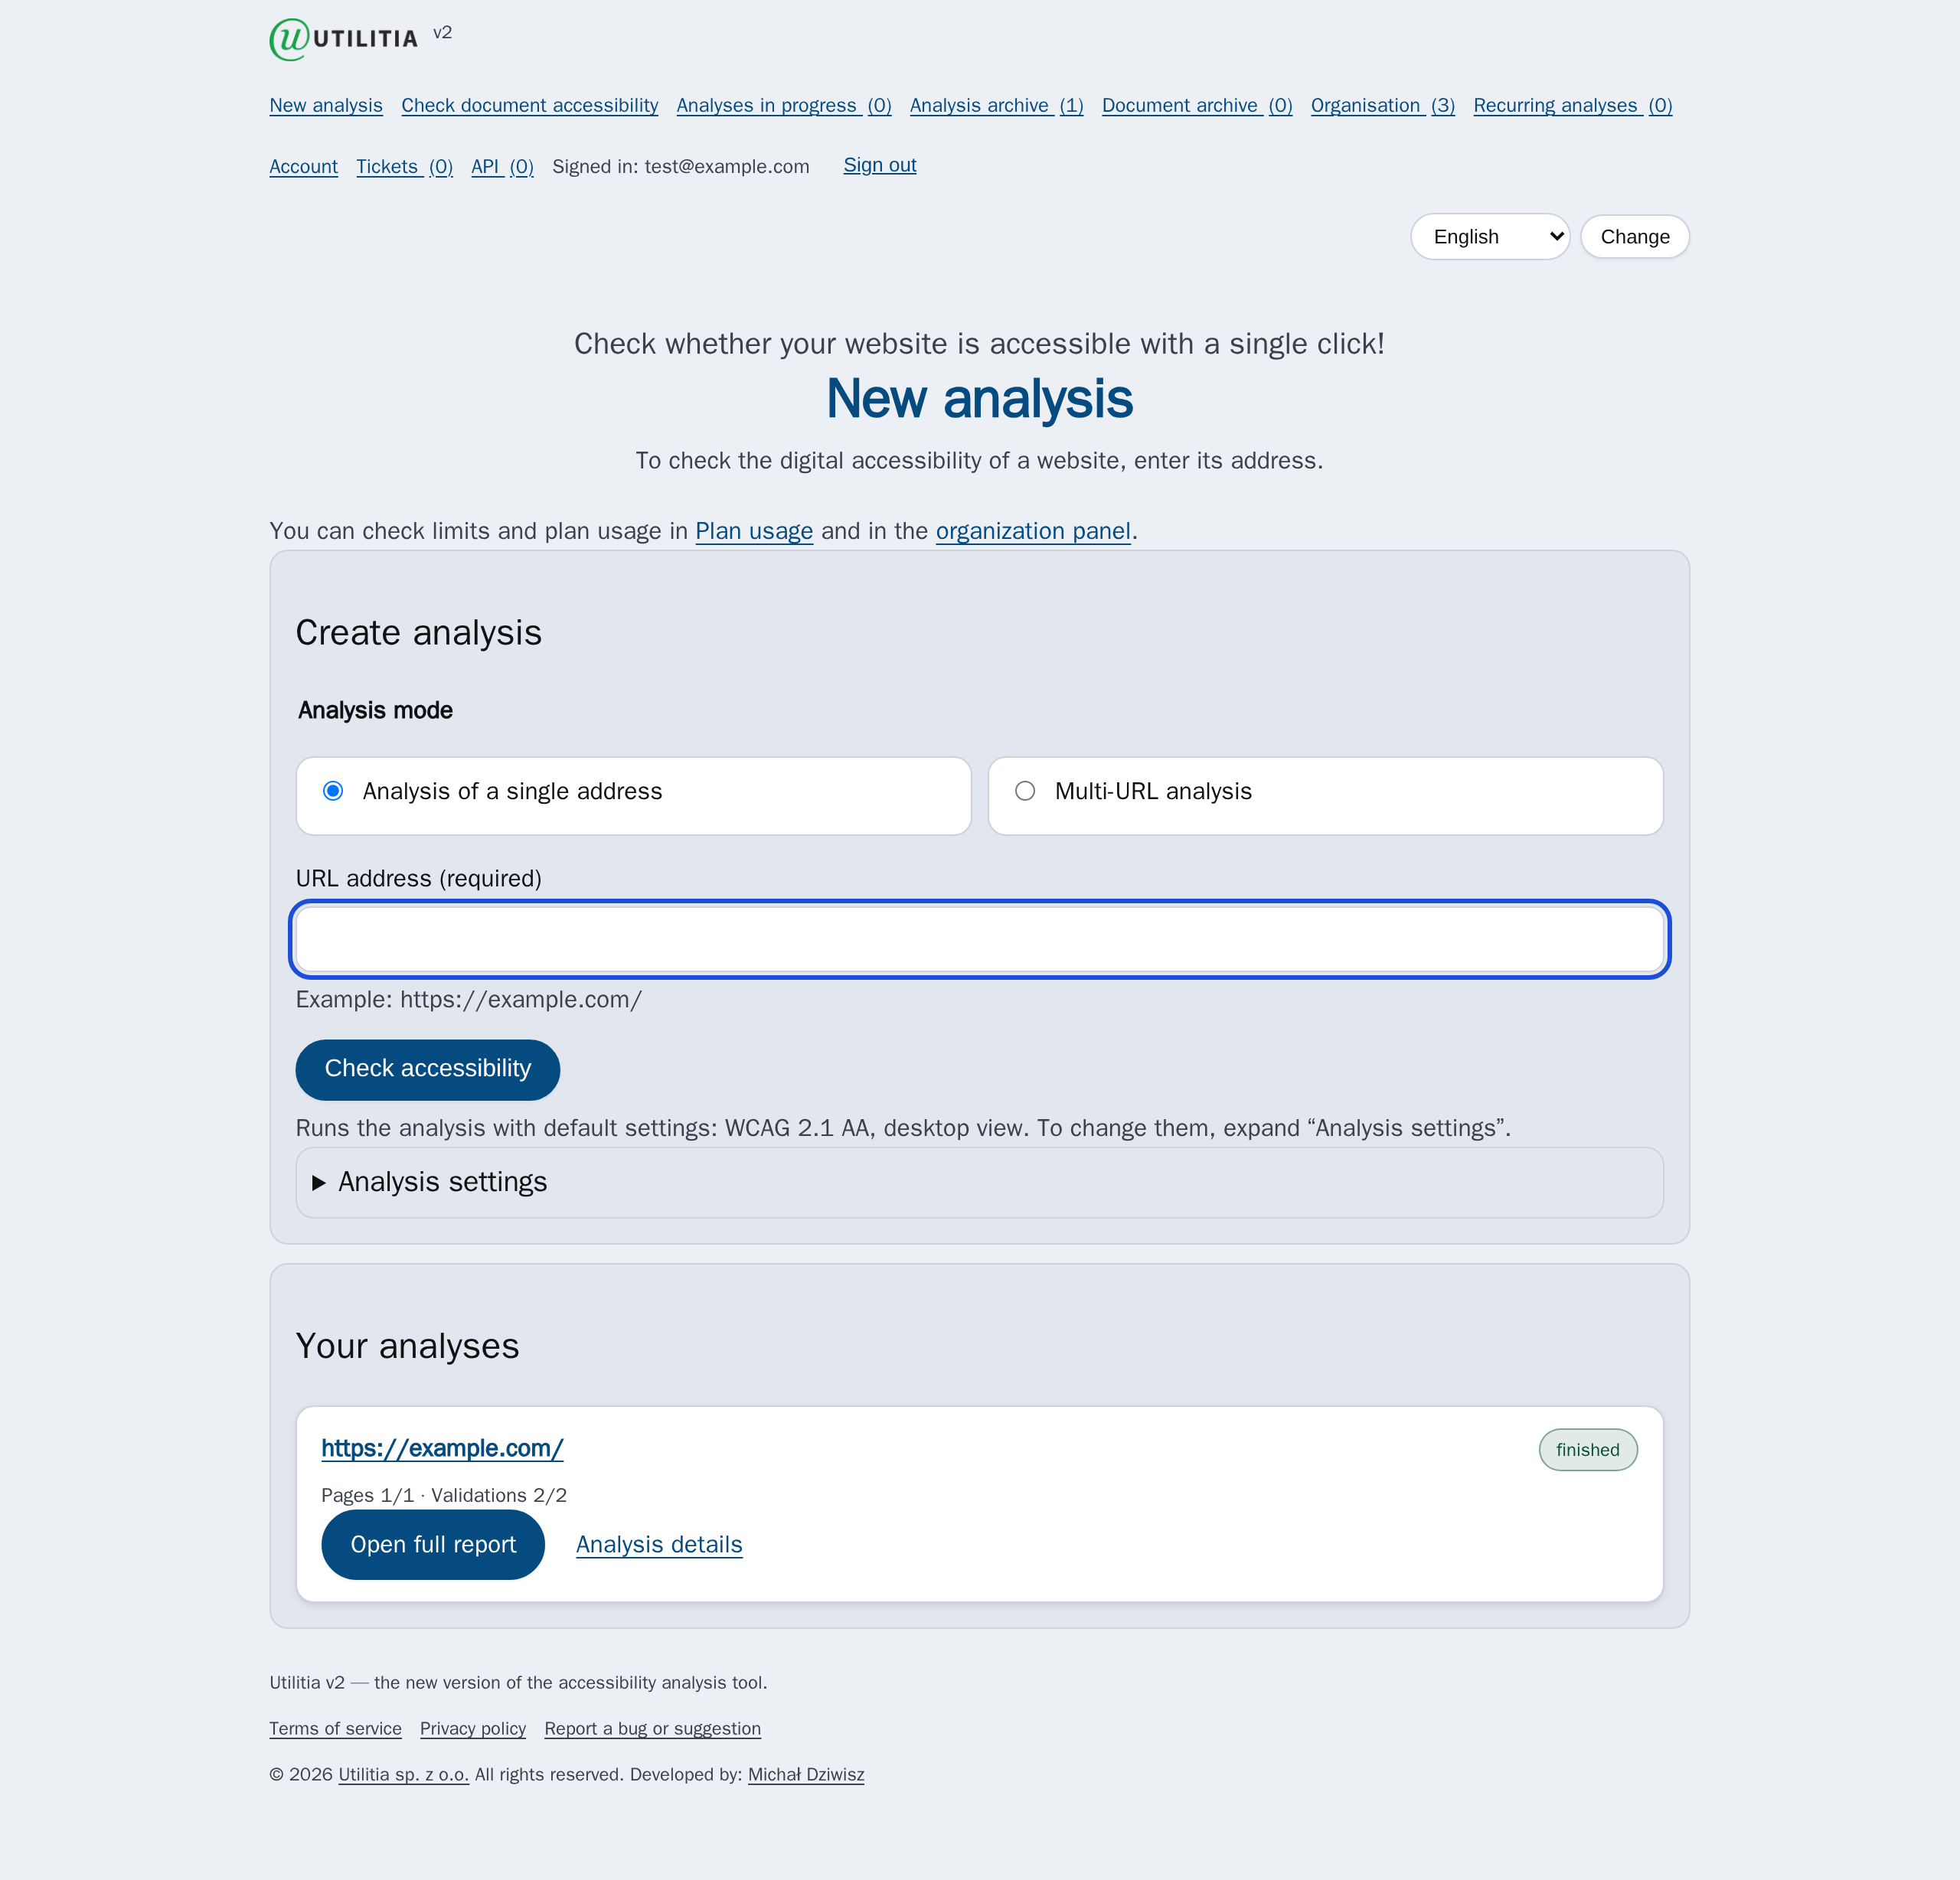
You open the New analysis page right after signing in (or by clicking the logo or “New analysis” in the menu). This is where you start a website accessibility check.
The simplest path
By default the form is short — you do not have to configure anything:
- Enter the website's URL (e.g.
https://example.com/). - Click Check accessibility.
The analysis starts with the default settings: WCAG 2.1 AA and the desktop view. That is enough in most cases. If you want to change something, expand Analysis settings (see below).
Analysis settings (expandable)
Below the button there is a collapsed Analysis settings section. Once expanded, you can set:
- the subpage limit to scan (for signed-in users; the maximum depends on the plan),
- the view of the analysed page — the resolution at which the page is tested: Desktop, Tablet, Phone or a custom width,
- the accessibility analysis scope (WCAG level) and the code validators,
- the nested Advanced settings (described in section 5).
After you change the settings, the button that starts the analysis is labelled Change analysis scope.
Accessibility analysis scope (WCAG level)
You choose the scope from a drop-down list. The options are:
- None — skip the accessibility tests (e.g. when you only want to check HTML/CSS code or a PDF),
- WCAG 2.1 at level A, AA or AAA (default WCAG 2.1 AA),
- WCAG 2.2 at level A, AA or AAA.
The AA level includes all criteria from level A. The AAA level includes criteria from levels A and AA. The WCAG check is performed jointly by the axe-core and IBM Equal Access engines.
Additional validators (code and documents)
- HTML validity — validation of the page code,
- CSS validity — validation of the style sheets,
- Document accessibility — checking of files (including PDFs against the PDF/UA-1 profile) found on the page.
You can select them individually or with the Select all code validators toggle.
4. Analysis modes: single address and list of addresses
Signed-in users on a suitable plan can choose the analysis mode at the top of the form.
Single-address analysis
You provide one address and Utilitia crawls the site up to the set subpage limit. This is the default mode.
Multiple-address analysis (list)
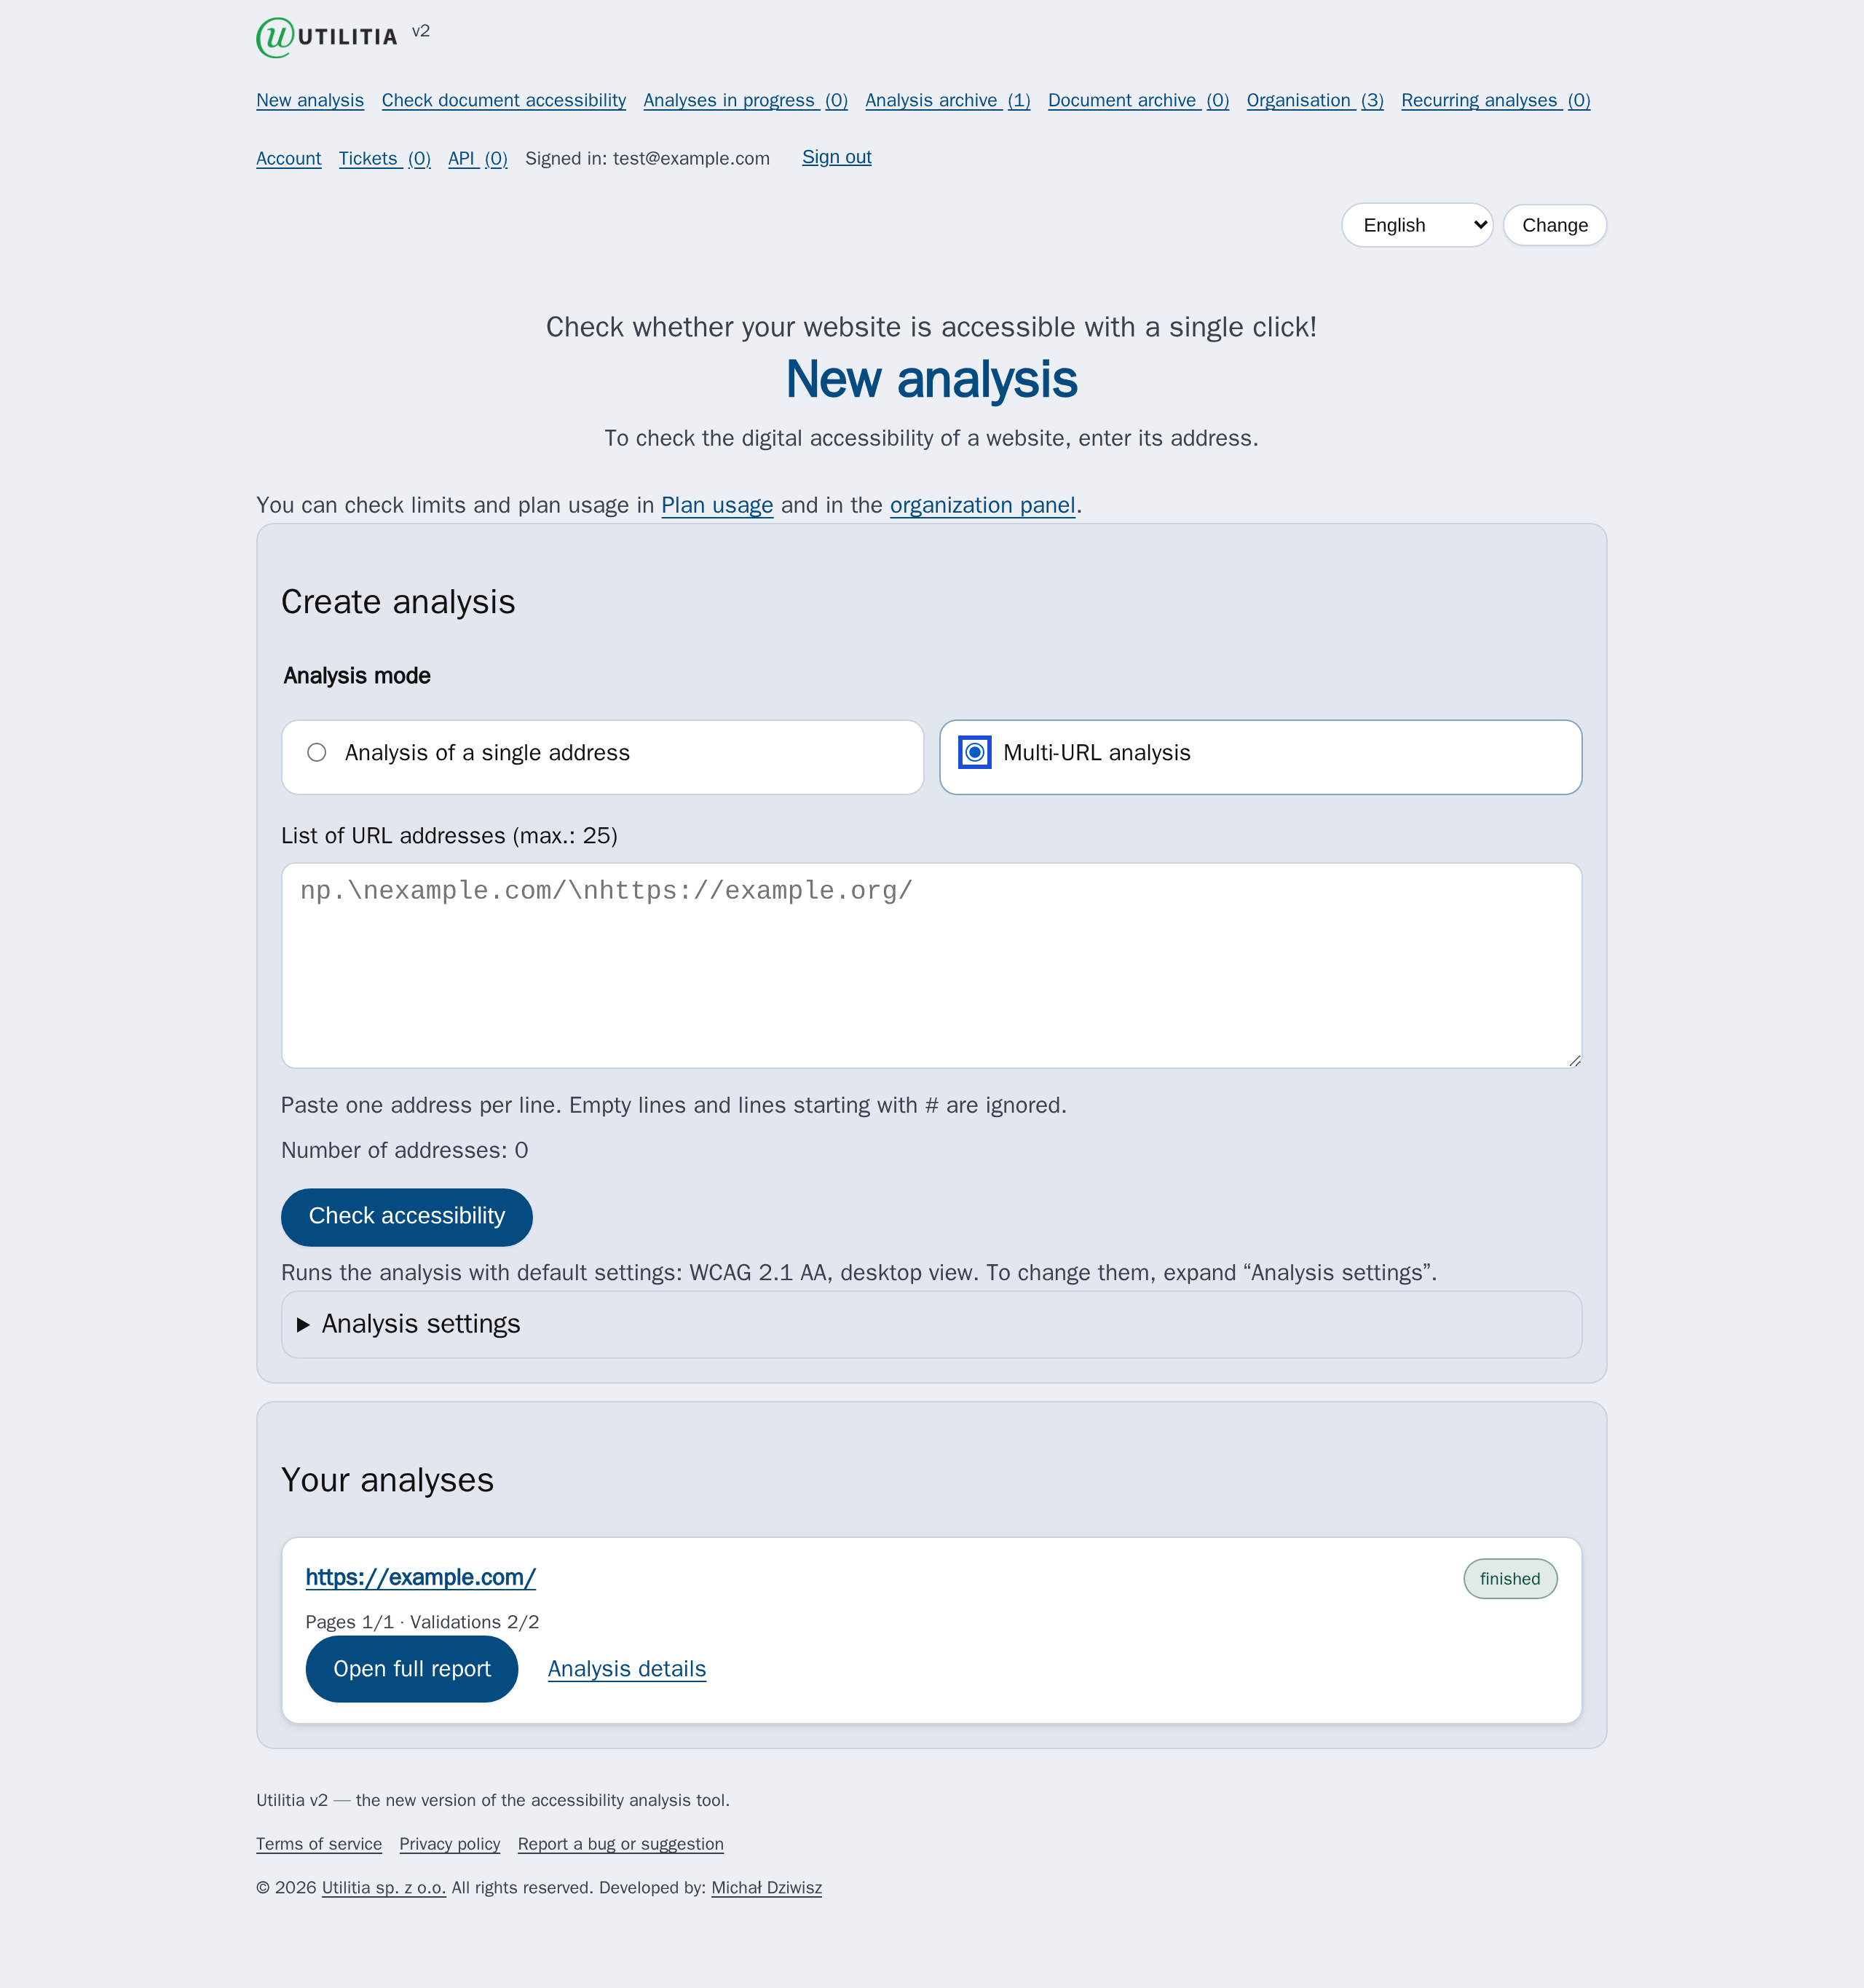
In this mode you type or paste a list of addresses — one per line:
- empty lines and lines starting with
#are skipped, - a counter shows the number of addresses in real time,
- a maximum number of addresses applies, depending on the plan (e.g. 25),
- the subpage limit then applies to a single analysis from the list.
The list mode and recurring analyses are available on higher plans (e.g. Business, Enterprise). If you do not see the mode switch, your plan covers only single-address analysis.
5. Advanced settings
Advanced settings is a separate, nested section inside Analysis settings (first expand Analysis settings, then Advanced settings). Here you will find options useful when you know WCAG: page authentication, selecting specific rules instead of a whole profile, title checking and the flash test.
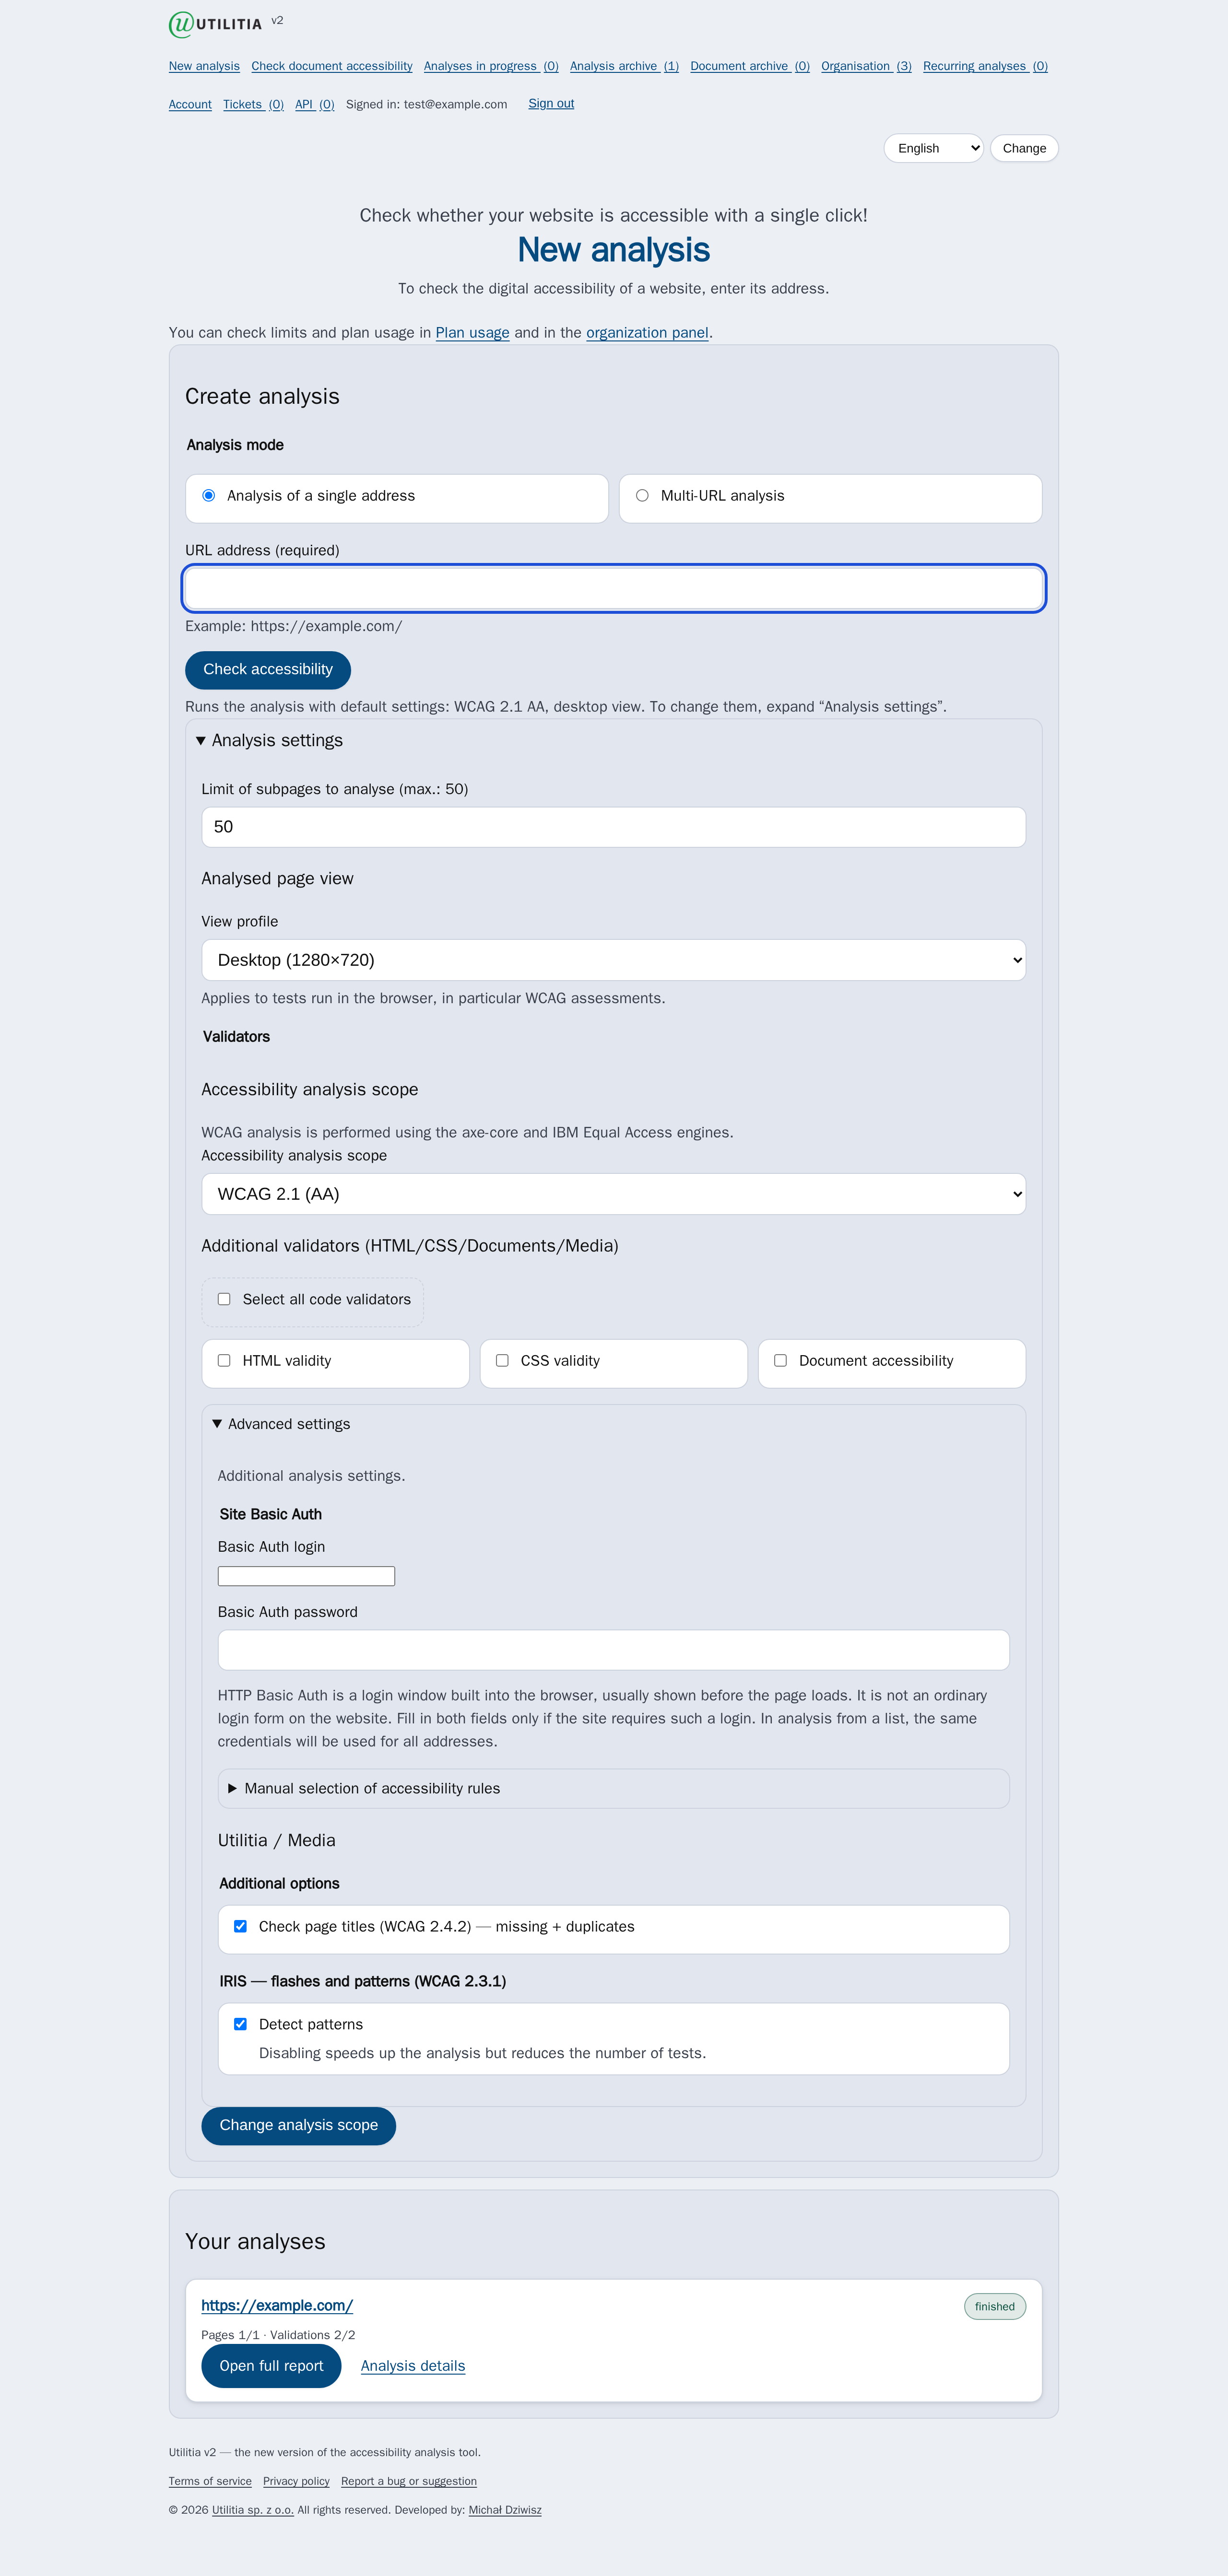
- Page Basic Auth
- The username and password for pages protected by the browser's built-in login prompt (HTTP Basic Auth). This is not an ordinary sign-in form on the site. In a list analysis these credentials are used for all addresses.
- Manual selection of accessibility rules
- Instead of a whole WCAG profile you can point to specific axe-core and IBM Equal Access rules (with a search box and “Select visible” / “Clear” buttons). For IBM Equal Access rules you still need to choose a WCAG profile above, because it determines the version and level of the standard.
- Check page titles (WCAG 2.4.2)
- Detects missing and duplicated subpage titles.
- IRIS — flashes and patterns (WCAG 2.3.1)
- The Detect patterns option can be turned off to speed up the analysis (at the cost of fewer tests).
6. Tracking an analysis: “running” and “archive”
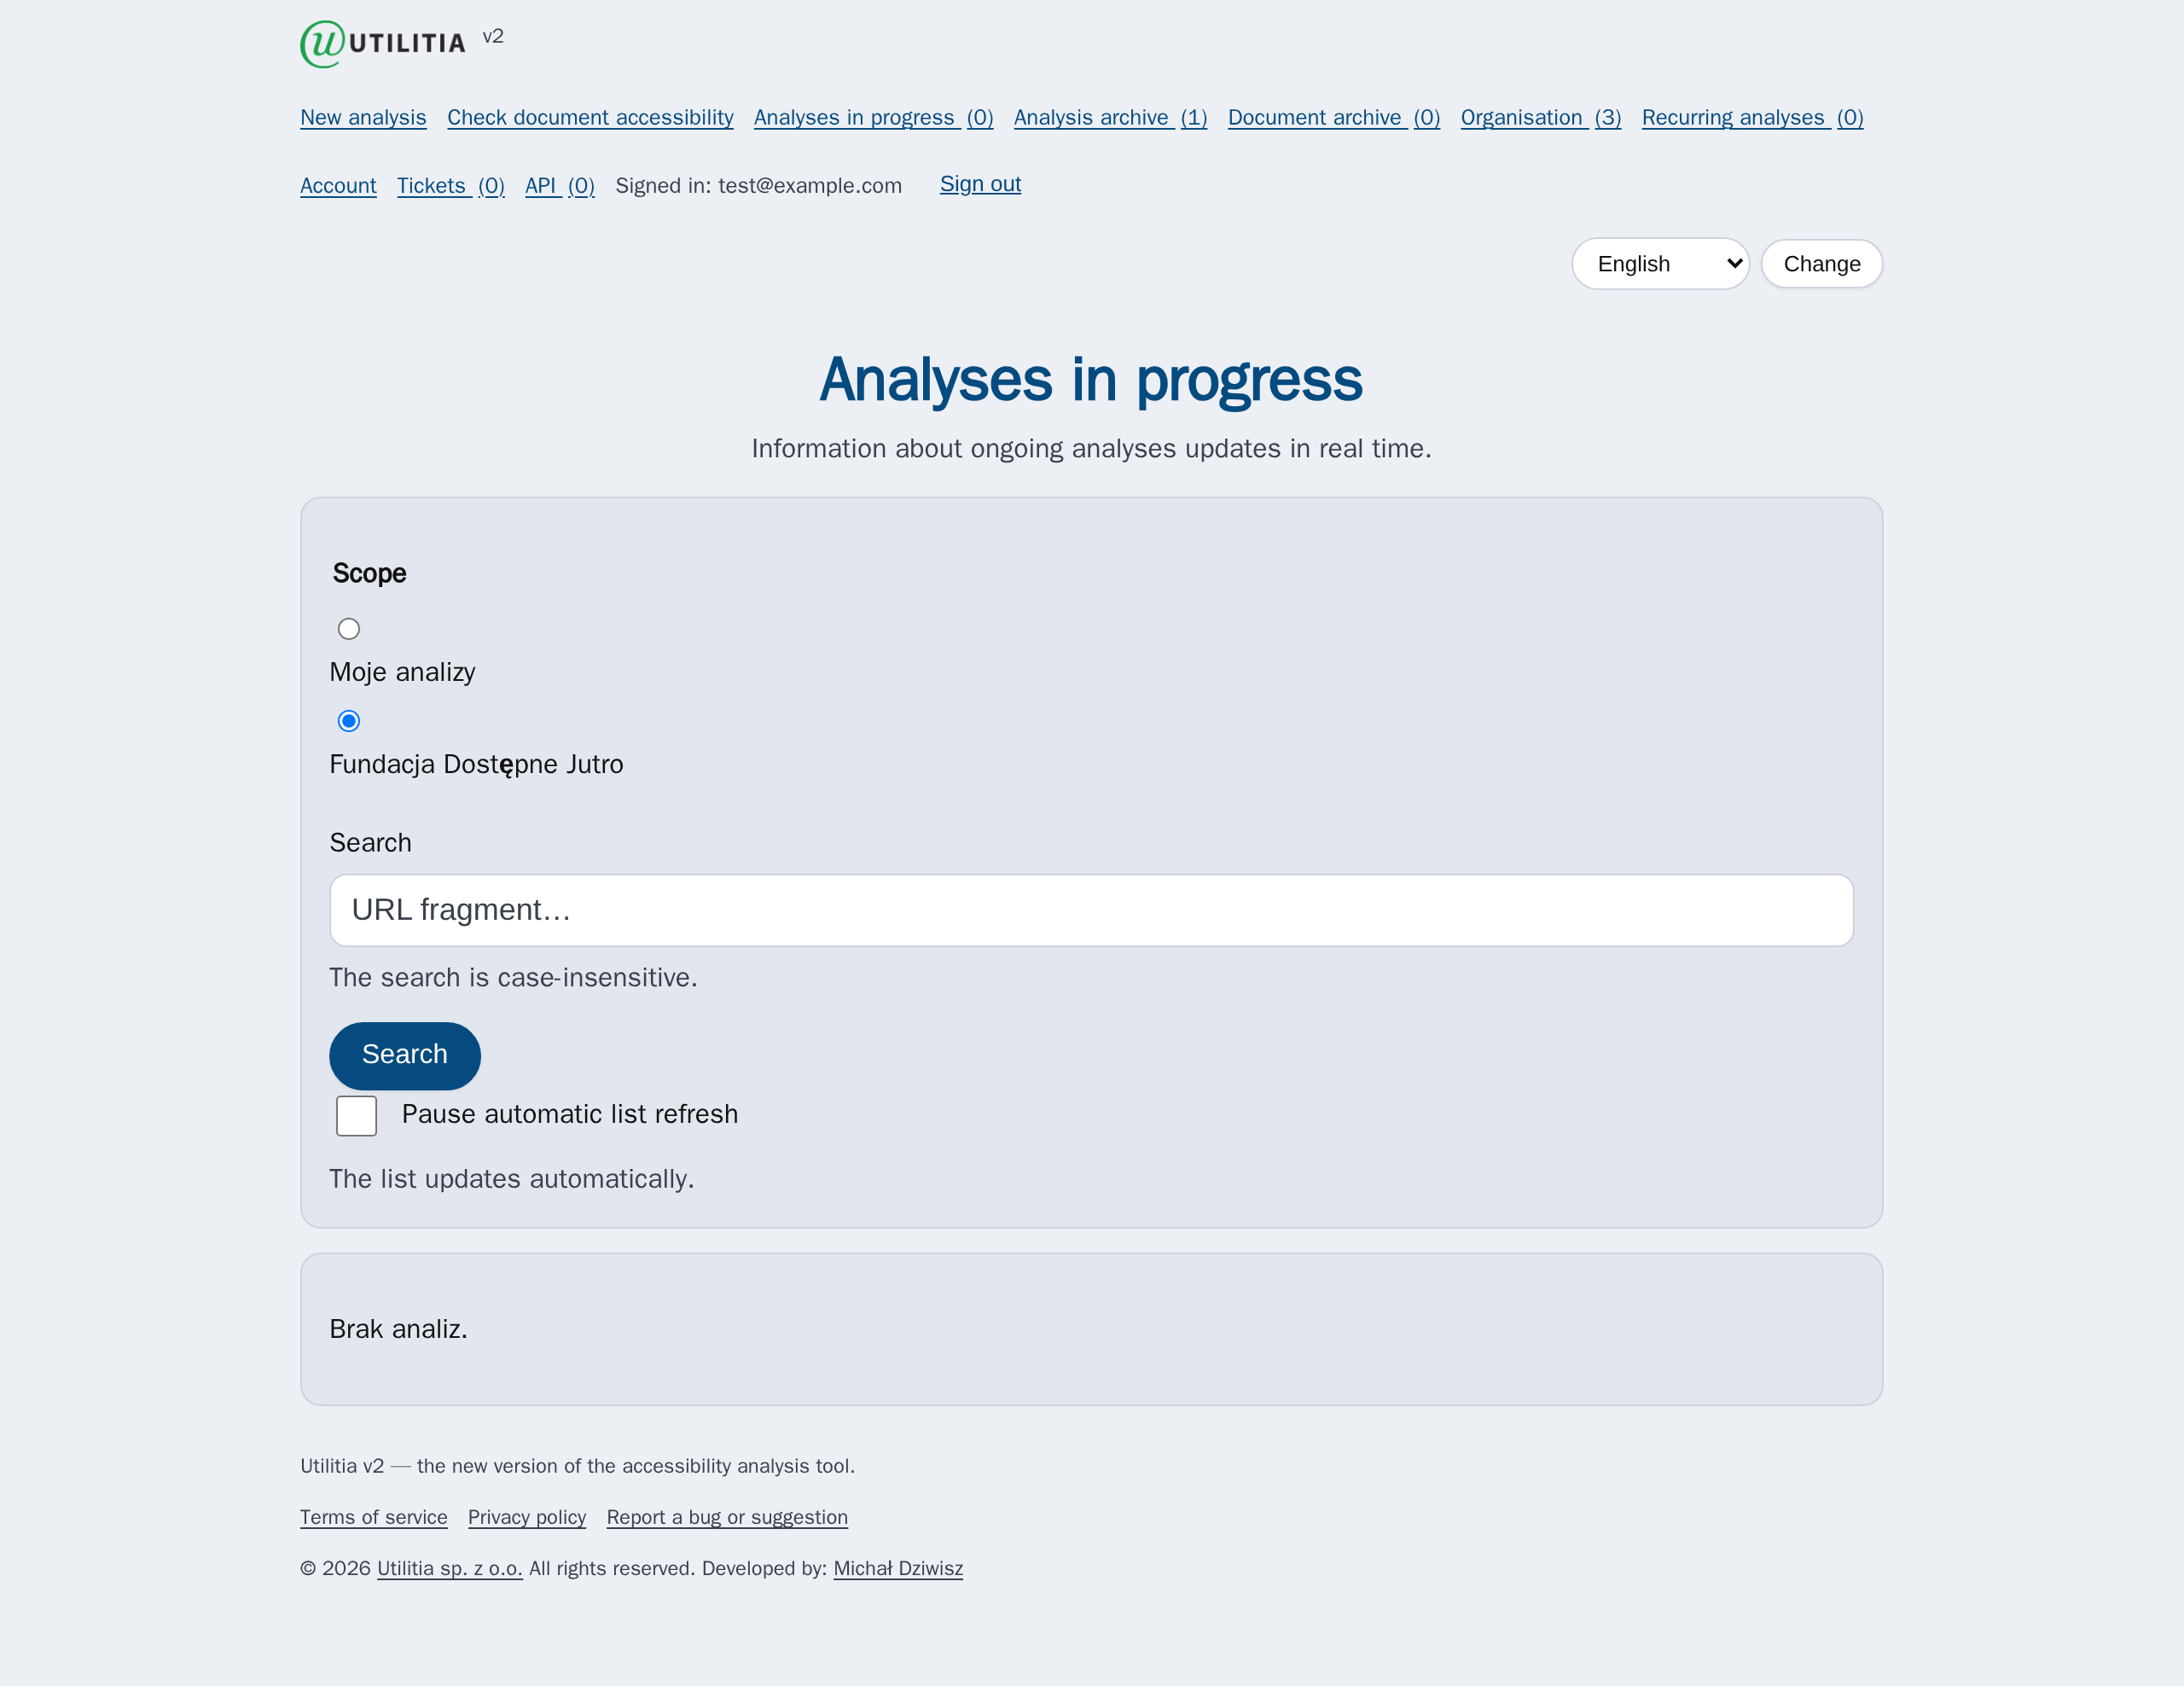
Once started, an analysis goes into a queue and runs in the background.
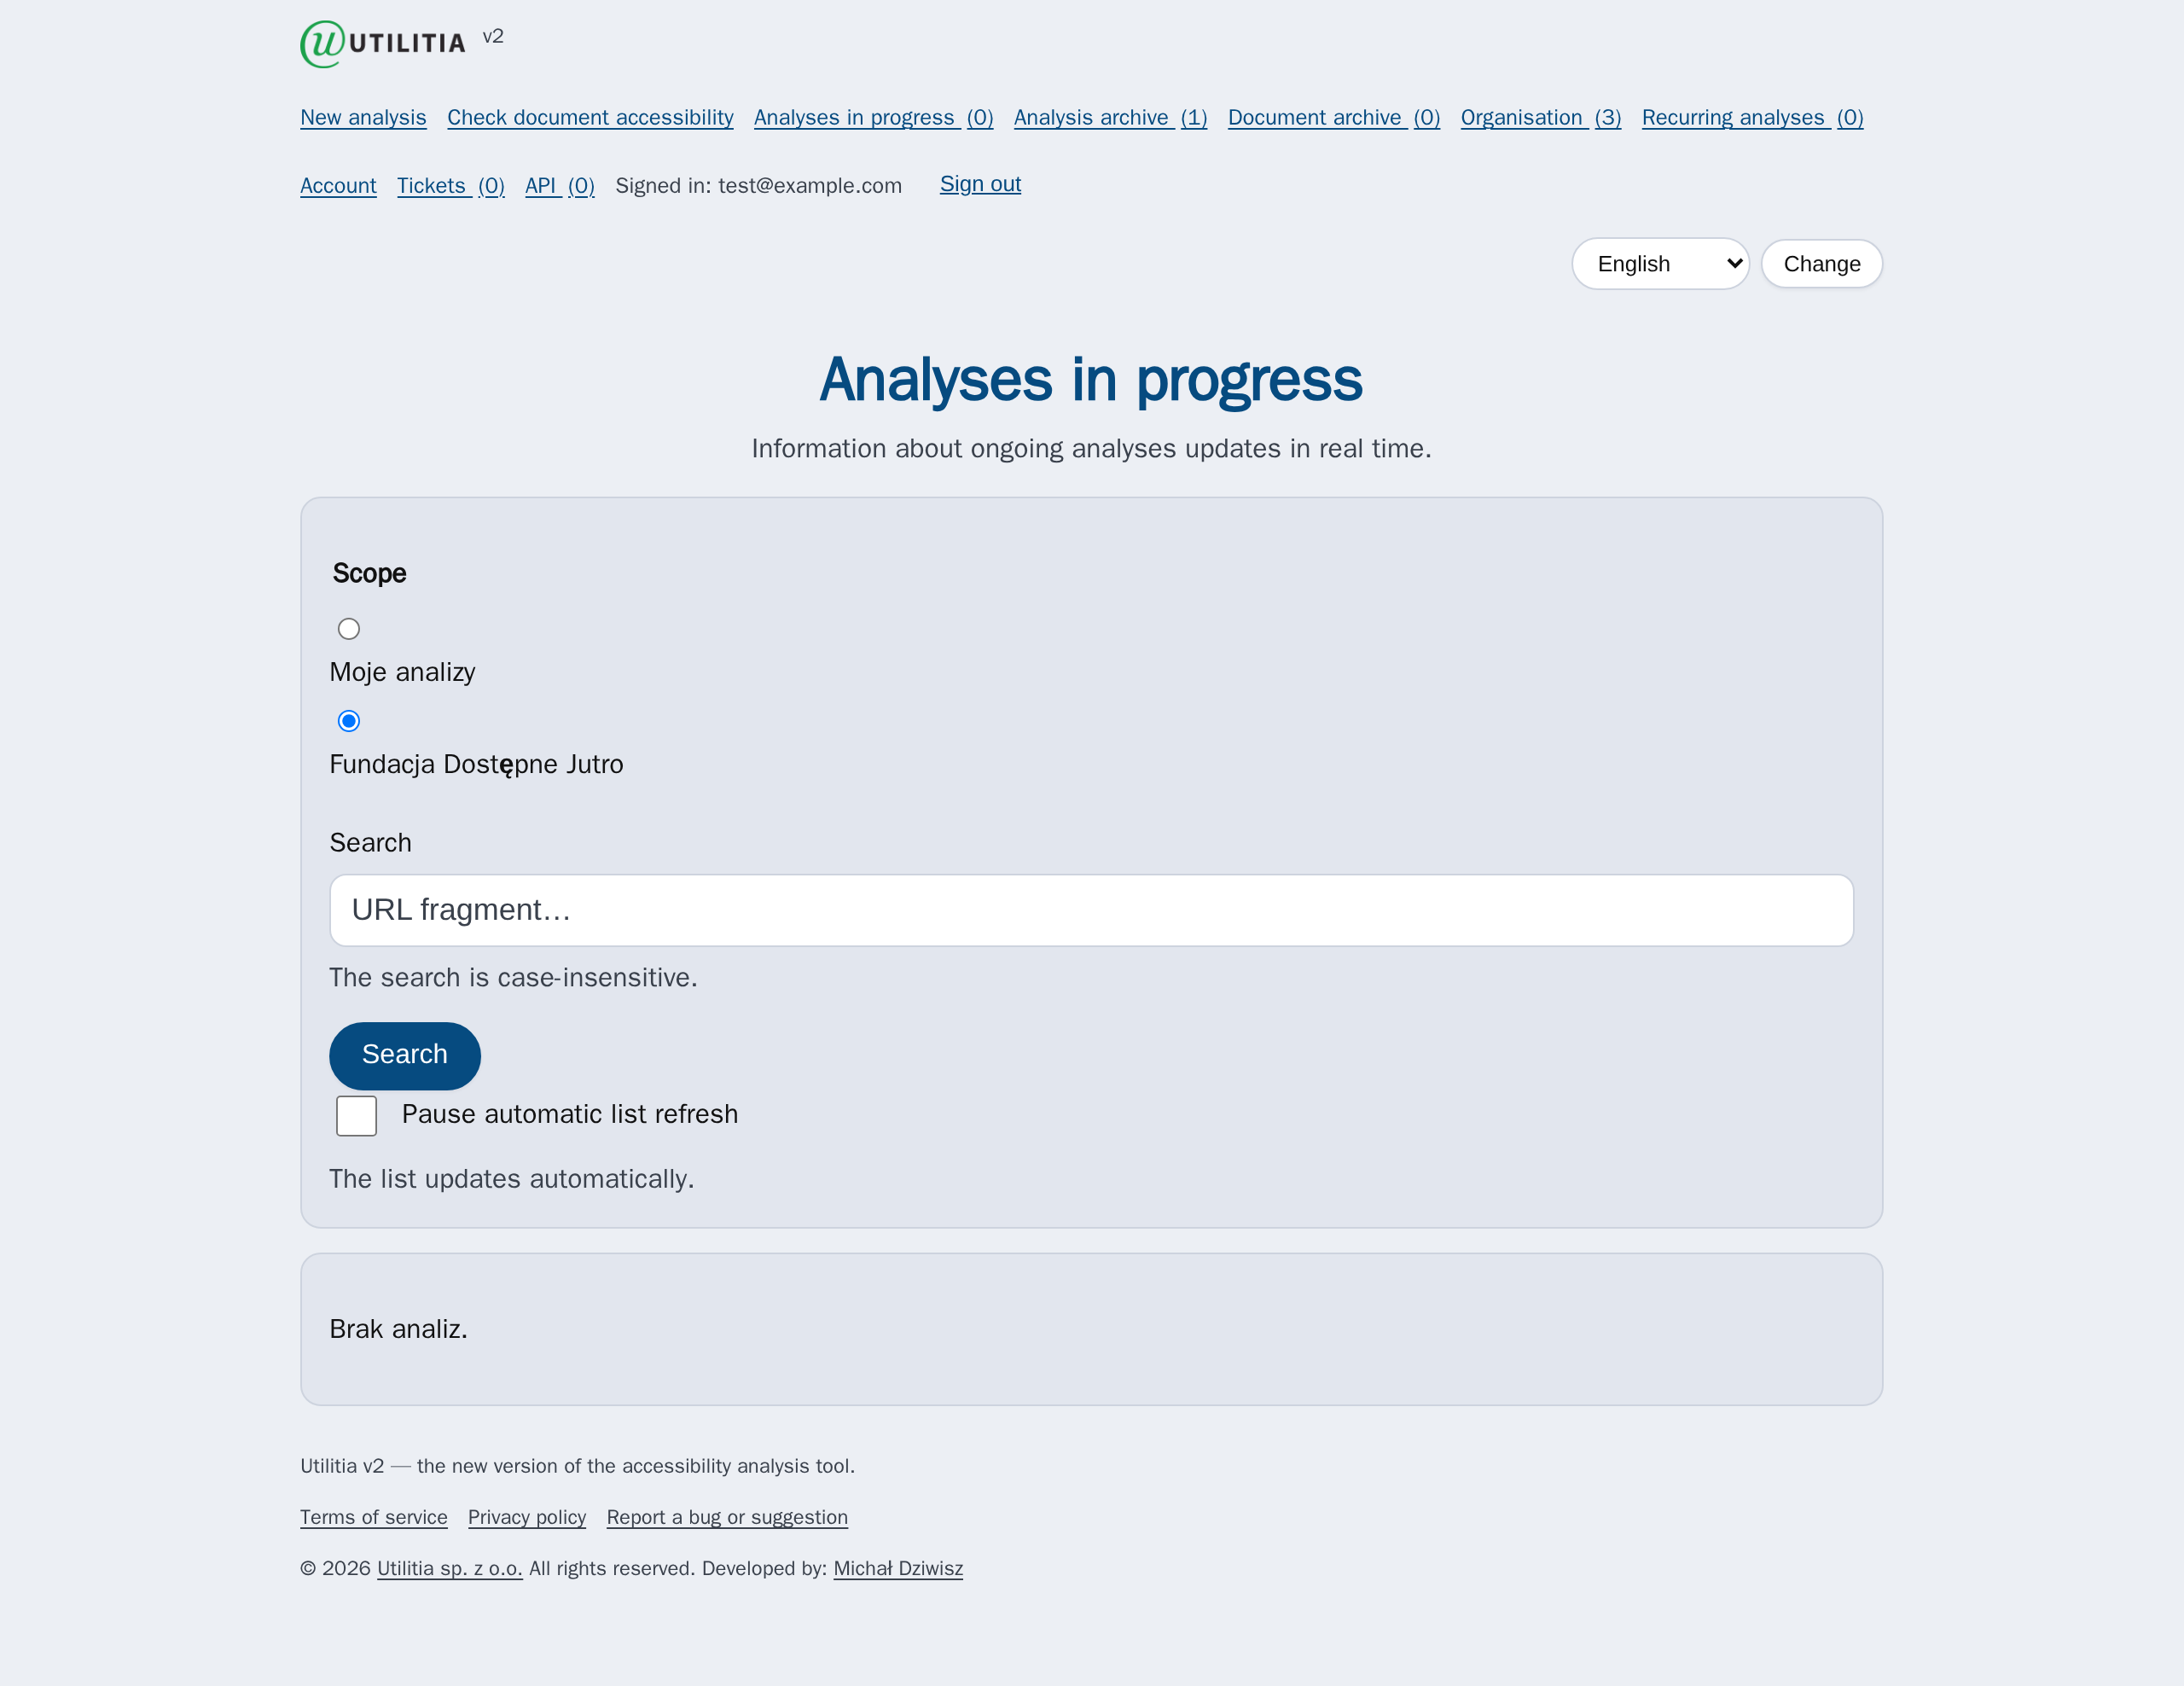
Running analyses
Analysis archive
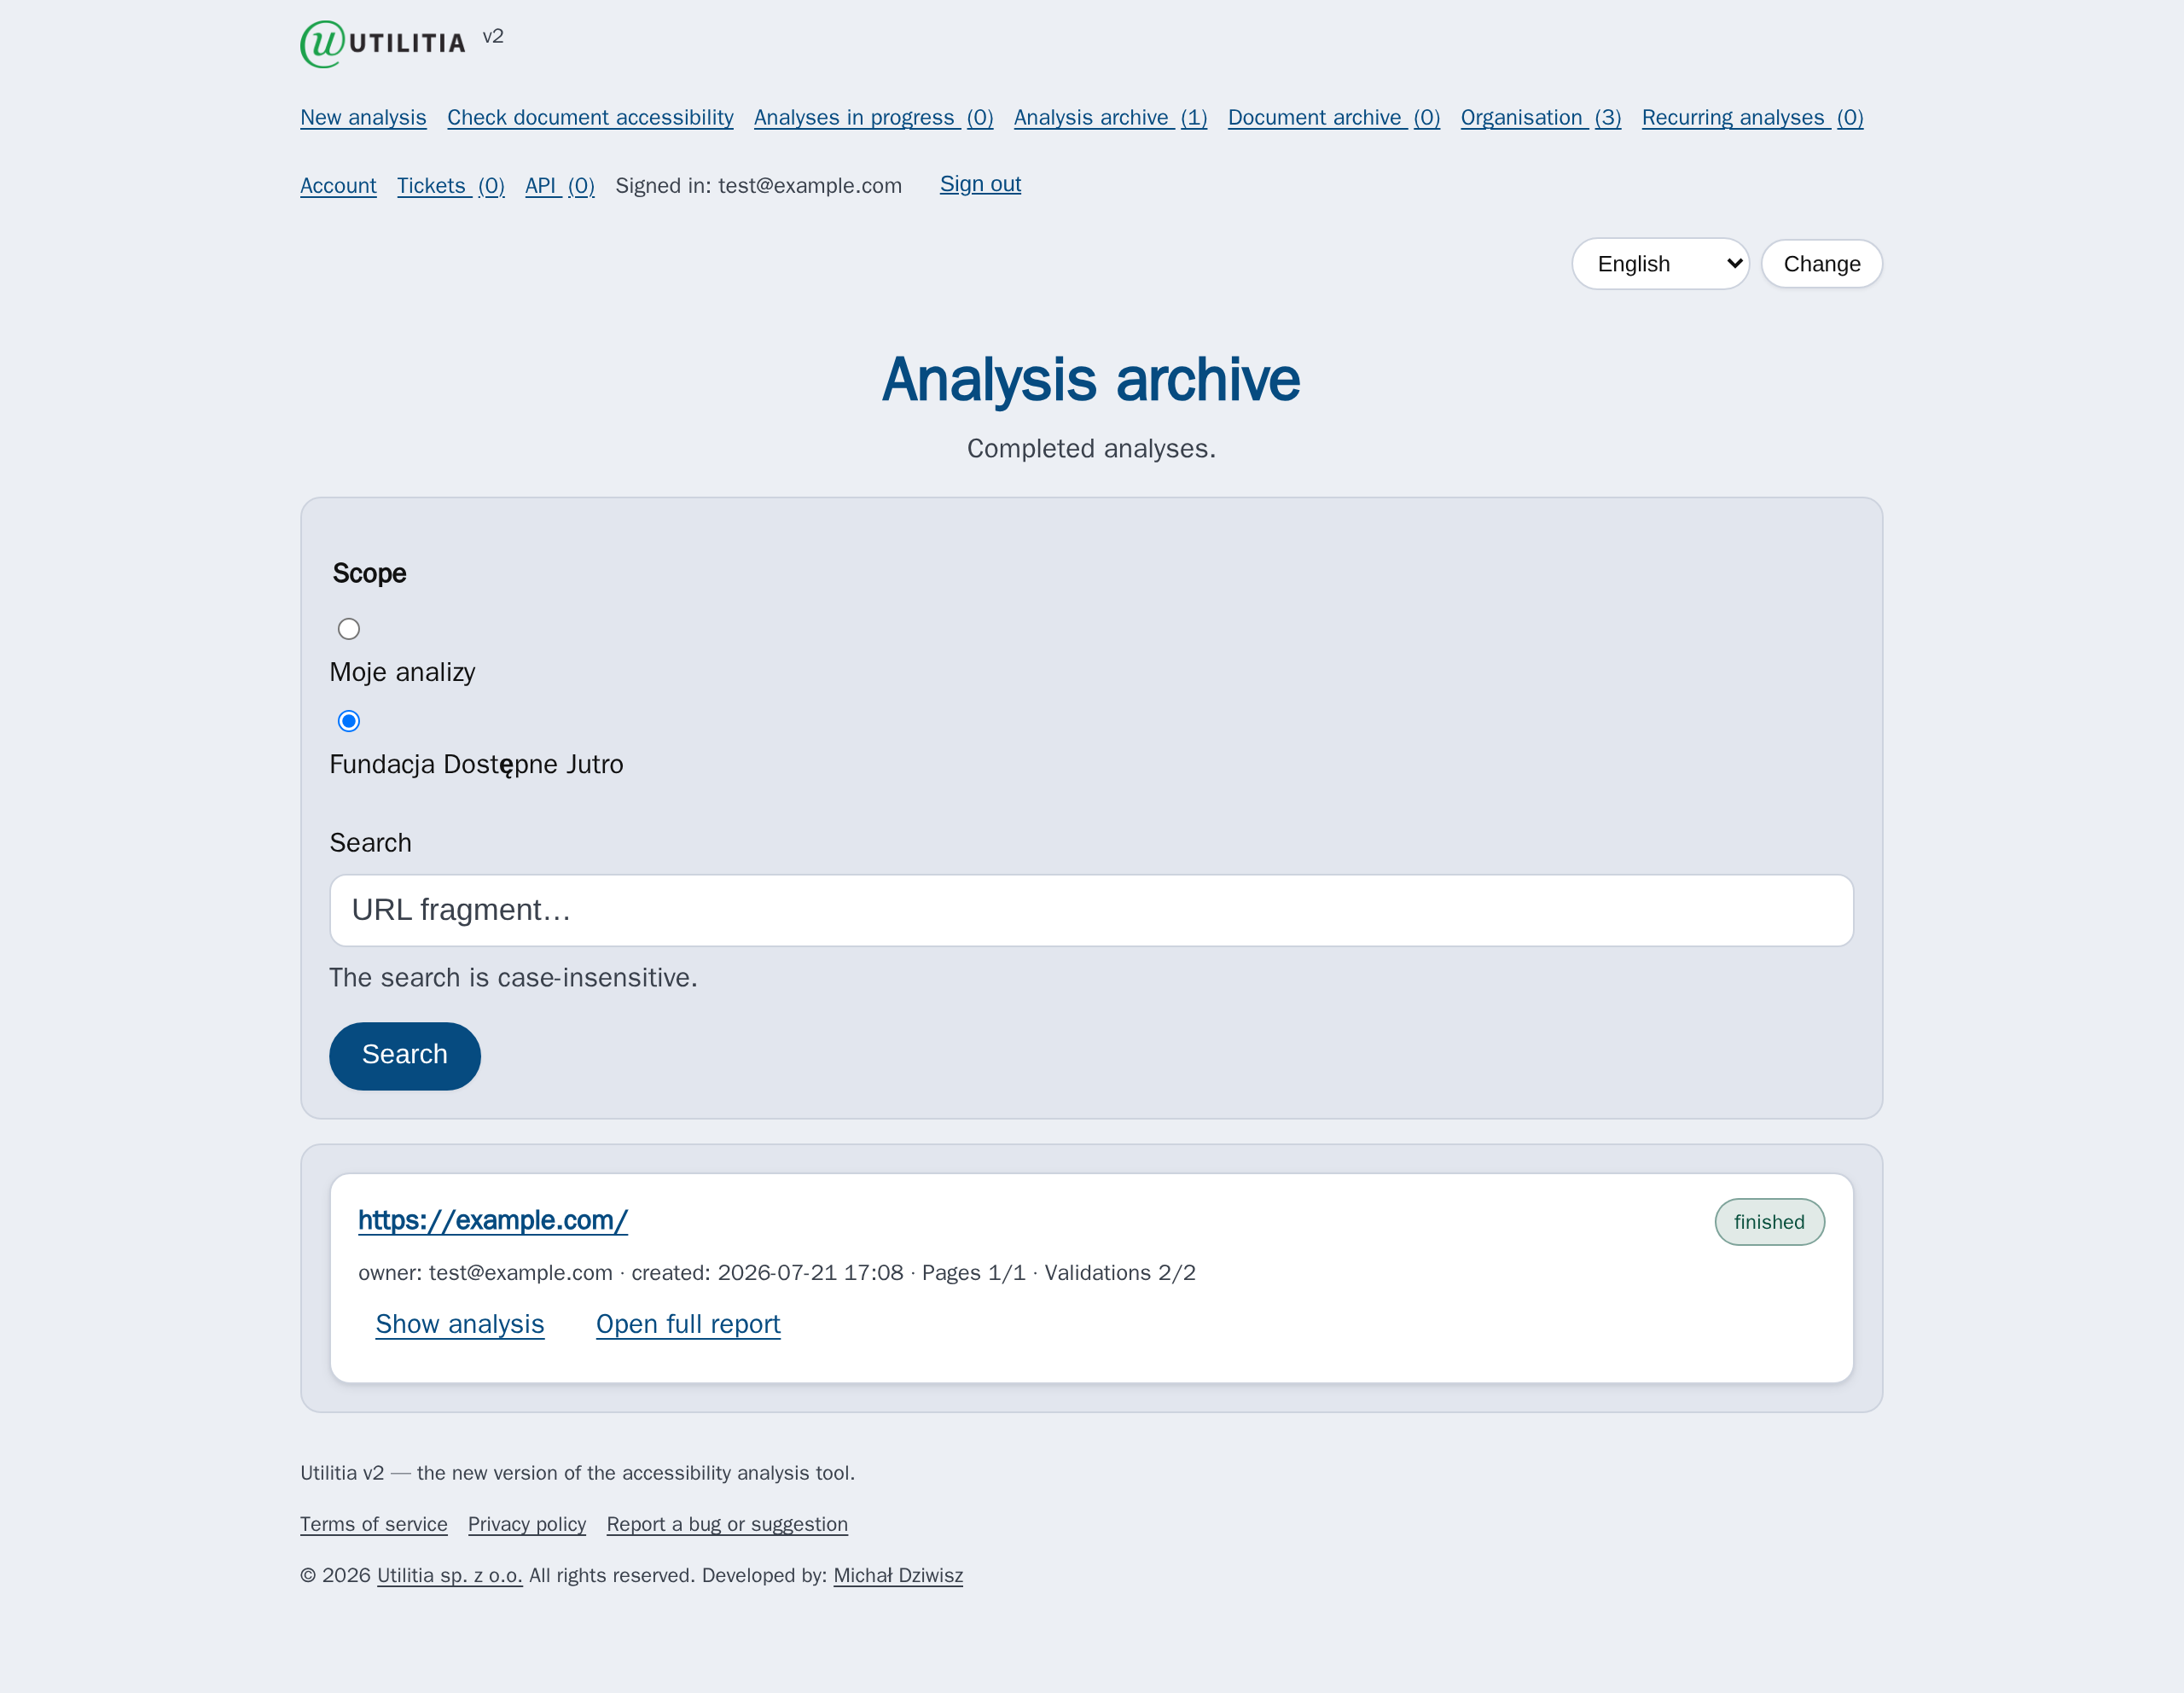
The numbers in parentheses next to menu items (e.g. “Analysis archive (1)”) show the number of entries. Analyses are retained for a period that depends on the plan.
Analysis details
The verdict: “Accessibility check result”
Once the analysis is complete, a verdict appears at the top of the details page. It states directly whether the automatically tested pages meet the chosen standard:
- when no blocking errors were found at the chosen level — “the site meets the requirements of the WCAG standard” in the given version and at the given level,
- when critical errors are present — “the site is not digitally accessible”,
- in other cases — “the site does not meet the WCAG standard” in the given version and at the given level.
In the Polish language version the verdict also states whether, within the scope of the automated check, the site complies with the Polish Act on the digital accessibility of websites and mobile applications of public entities. Below the verdict you will find a See which Success Criteria are analysed link, together with the counts of errors, warnings and information items, and a breakdown of errors by WCAG level (A, AA, AAA).
The verdict concerns only what the automated check detects. It is not an accessibility statement or a formal ruling — as the tool itself notes, the result may differ from the actual state, which is ultimately confirmed by an expert audit. The verdict appears only after the analysis is complete.
The details screen also shows:
- the status (e.g. queued, running, completed) and progress (number of pages and validations),
- the view of the analysed page and information about Basic Auth,
- visibility: private or public — with the Share publicly button you can generate a link to share with others,
- unmet WCAG success criteria — a short list with the number of errors,
- the validation summary — the result of each validator for each page,
- the Open full report button.
7. Reading the accessibility report
The full report is the most important outcome of an analysis. It consists of a summary, a filter panel and a detailed list of results.
Summary
At the top you will see the counted errors, warnings and information items, a breakdown of errors by WCAG level (A, AA, AAA), the test view used and the number of analysed files. The expandable How to interpret WCAG levels section explains the differences between levels.
Filtering results
The Results panel lets you narrow the report (filtering works locally in the browser):
- Report view: Pages, Errors / rules, or WCAG criteria,
- Scope: All, WCAG only, or Others,
- the Filter field (search by address or message content) and selecting a specific Page,
- Message level: Errors, Warnings, Information,
- WCAG level: A, AA, AAA, Not applicable,
- the Apply filters, Clear filters and Expand all buttons.
A single result
Each message usually contains:
- the level (error/warning/information) and the related WCAG criterion,
- the What it means, Why it matters, How to fix it and Automated-test limitations sections,
- a Rule details link (opens the help page for the rule — axe-core, IBM Equal Access, or a description of the WCAG criterion with links to W3C),
- the element's location: CSS selector, XPath and position on the page,
- the HTML snippet and HTML context of the problematic element.
Export and download
Above the summary there is a bar of buttons:
- Back to analysis — return to the details page,
- HTML export — a report version for printing or archiving,
- Download HTML — the report file,
- Download JSON — the report data for further processing,
- Download TSV — the data in a tabular format (e.g. for a spreadsheet),
- New analysis — go to the new analysis form.
The WCAG criteria view is especially useful when preparing an accessibility statement — it groups non-conformities by success criteria (e.g. 2.4.1 “Bypass Blocks”).
8. Checking document accessibility (PDF, Office, ODF, EPUB)
You open the Check document accessibility page from the menu. It also works without signing in.
Supported formats
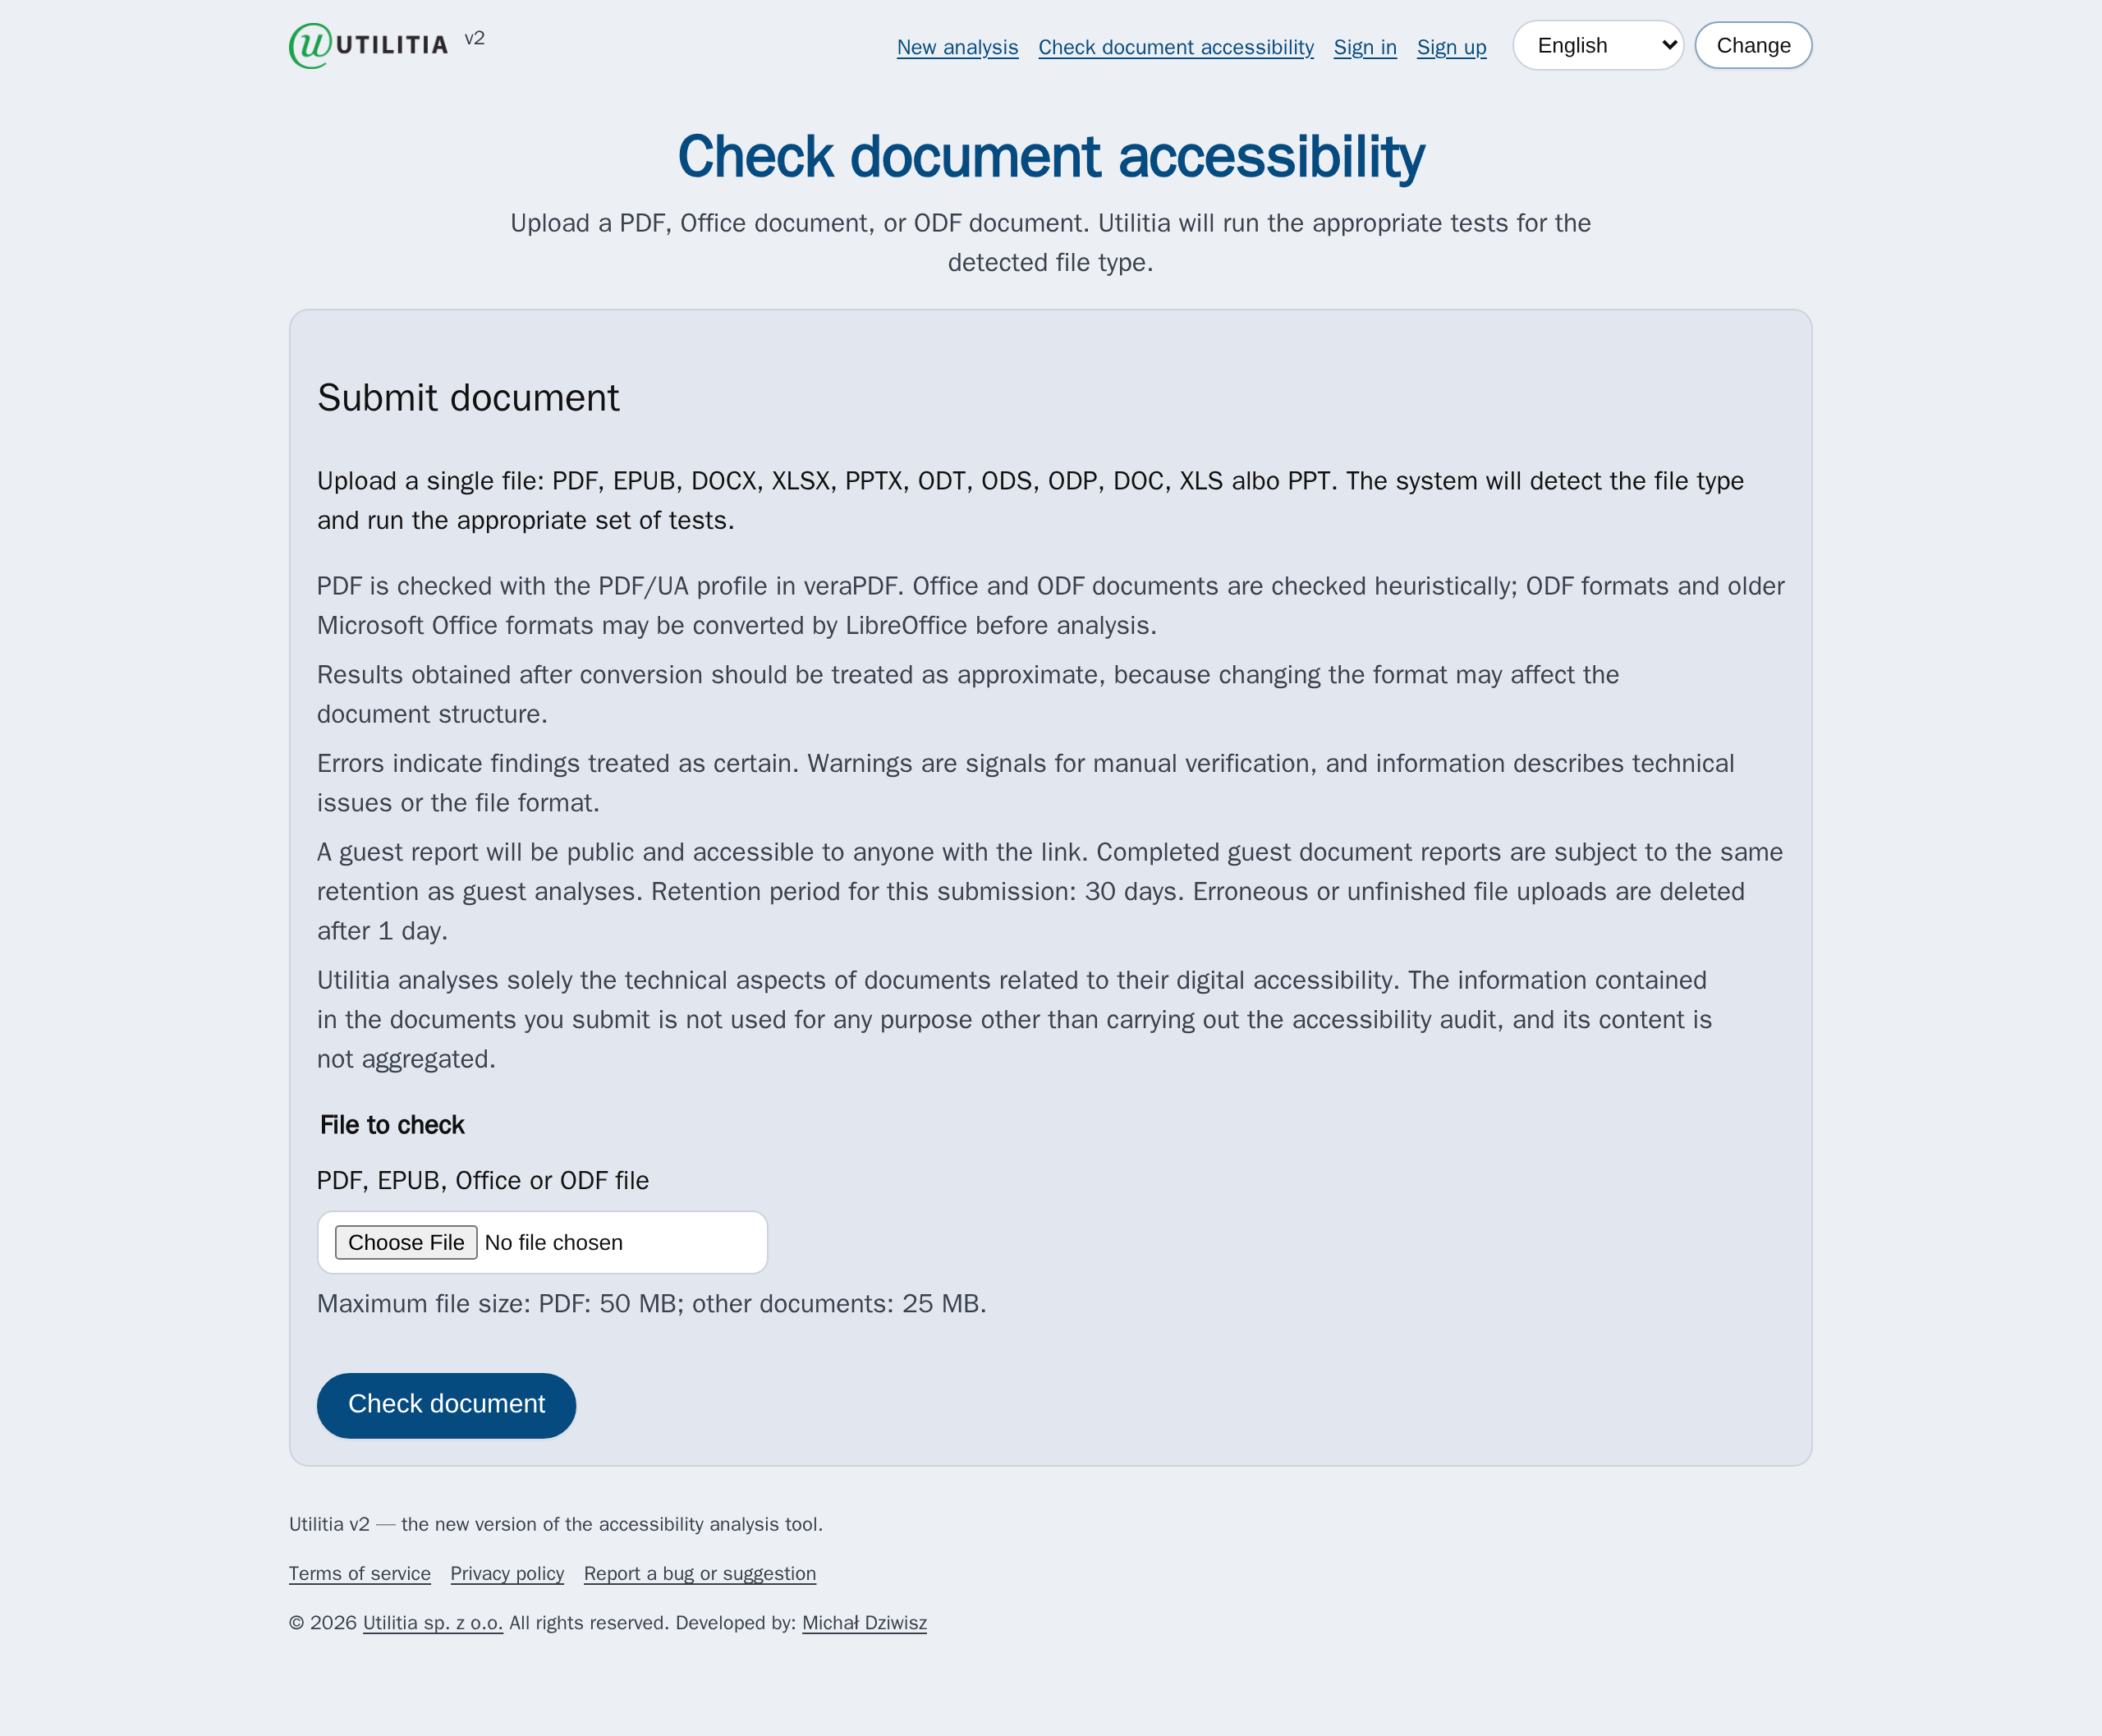
Upload a single file in one of the formats:
- PDF — checked against the PDF/UA-1 profile in the veraPDF engine,
- EPUB (e-books) — tested with the Ace (DAISY) engine; this is a preliminary check, not a full audit,
- Microsoft Office: DOCX, XLSX, PPTX and the older DOC, XLS, PPT,
- OpenDocument (ODF): ODT, ODS, ODP.
The system detects the file type automatically and runs the appropriate set of tests.
To upload a document: click the file-selection button in the File to check section, choose the document and press Check document.
Size limits: PDF up to 50 MB, other documents up to 25 MB.
ODF documents and older Microsoft Office formats may be converted by LibreOffice before analysis. Results obtained after conversion should be treated as approximate, because changing the format may affect the document's structure.
Document report and archive
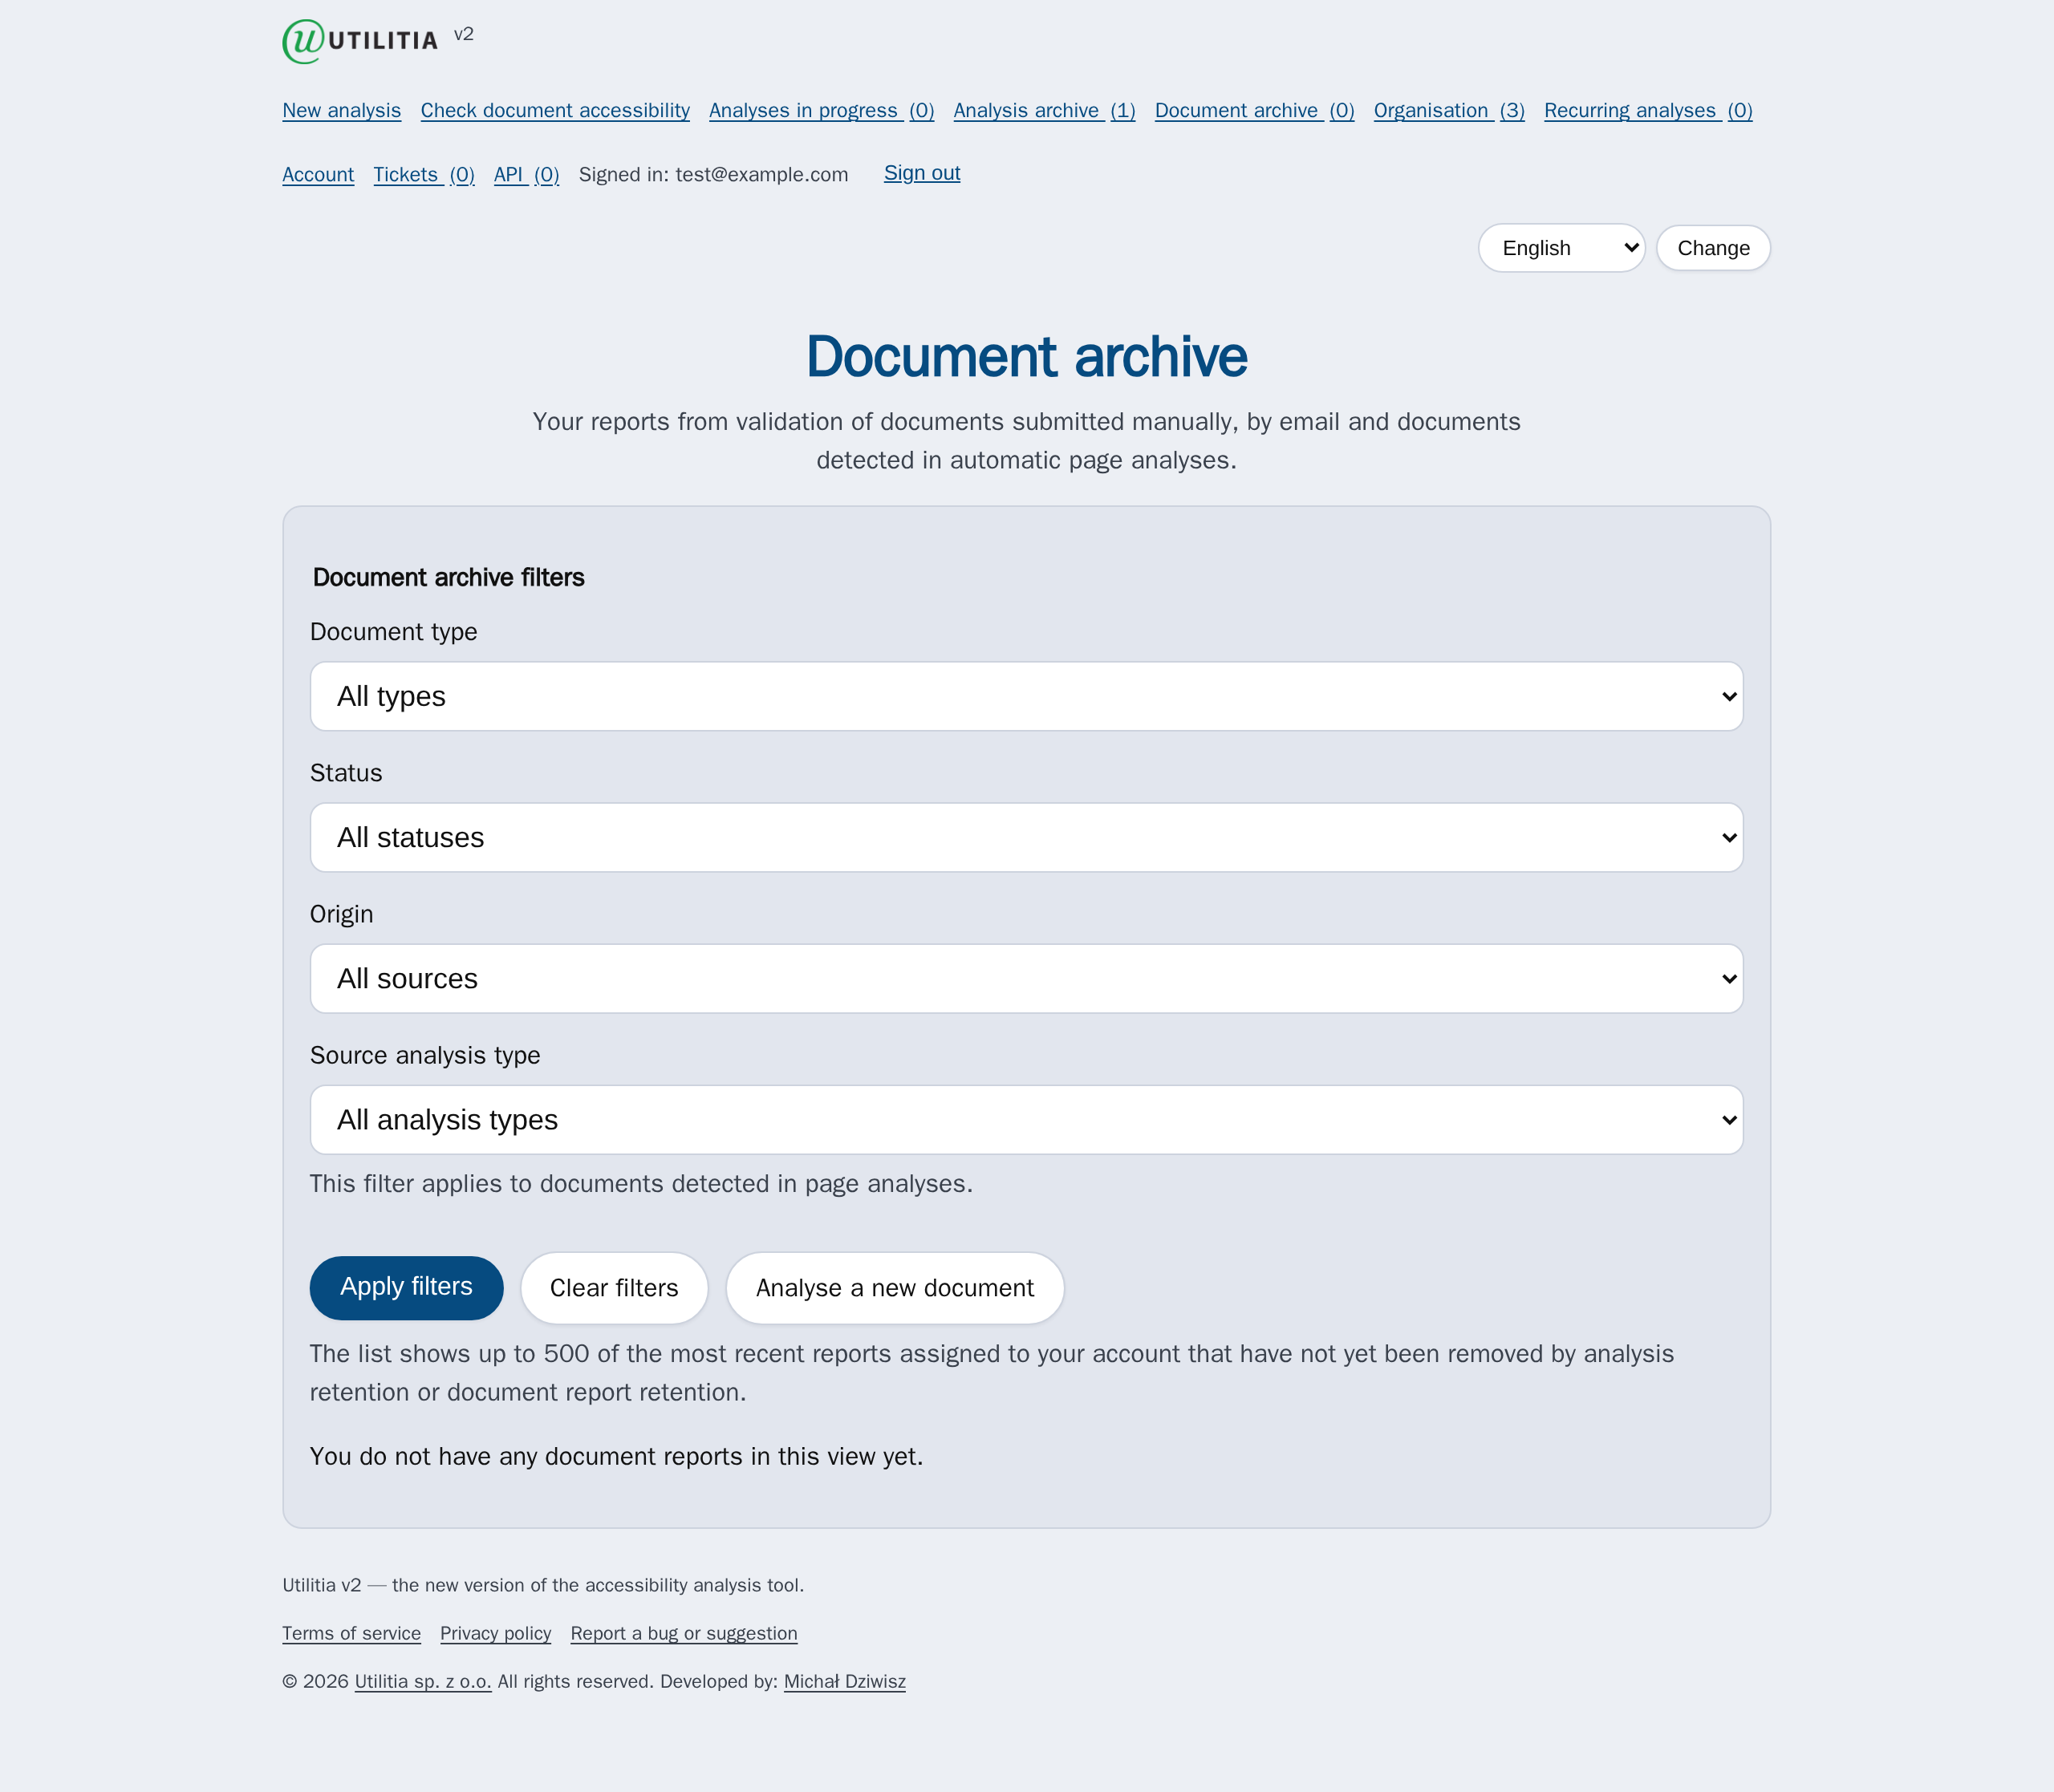
A document report has a structure similar to a website report (errors, warnings, information) and can also be exported. Signed-in users have access to the Document archive.
A report for a document uploaded as a guest is public (available via a link) and is subject to the same retention period as guest analyses. Failed or incomplete uploads are deleted after 1 day.
Dedicated addresses: alongside the universal /dokumenty page there are also /pdf (PDF files only) and /office (Office and ODF documents only).
Sending a document by e-mail
You can check a document without opening the site — just send it as an attachment to the e-mail address matching the language:
- Polish: dokumenty@utilitia.pl,
- English: documents@utilitia.pl,
- Danish: dokumenter@utilitia.pl.
- Write a message to the chosen address and attach a file in a supported format (PDF, EPUB, Office or ODF).
- After a few moments Utilitia will send a reply — the information about the document's accessibility will be in the body of that message.
The address only determines the language of the reply — the check is the same. You can also see the current address on the Check document accessibility page in the note “Files can also be sent by e-mail to: …”.
E-mail submissions are subject to limits on the number of documents in a time window (hourly by default), counted separately for the sender's address and for the domain. Once a limit is exceeded, further files must be sent later. The same size limits as in the form apply (PDF up to 50 MB, others up to 25 MB).
9. Recurring analyses
Recurring analyses (schedules) automatically repeat the check of a chosen page at fixed intervals — useful for monitoring accessibility over time. The feature is available on higher plans.
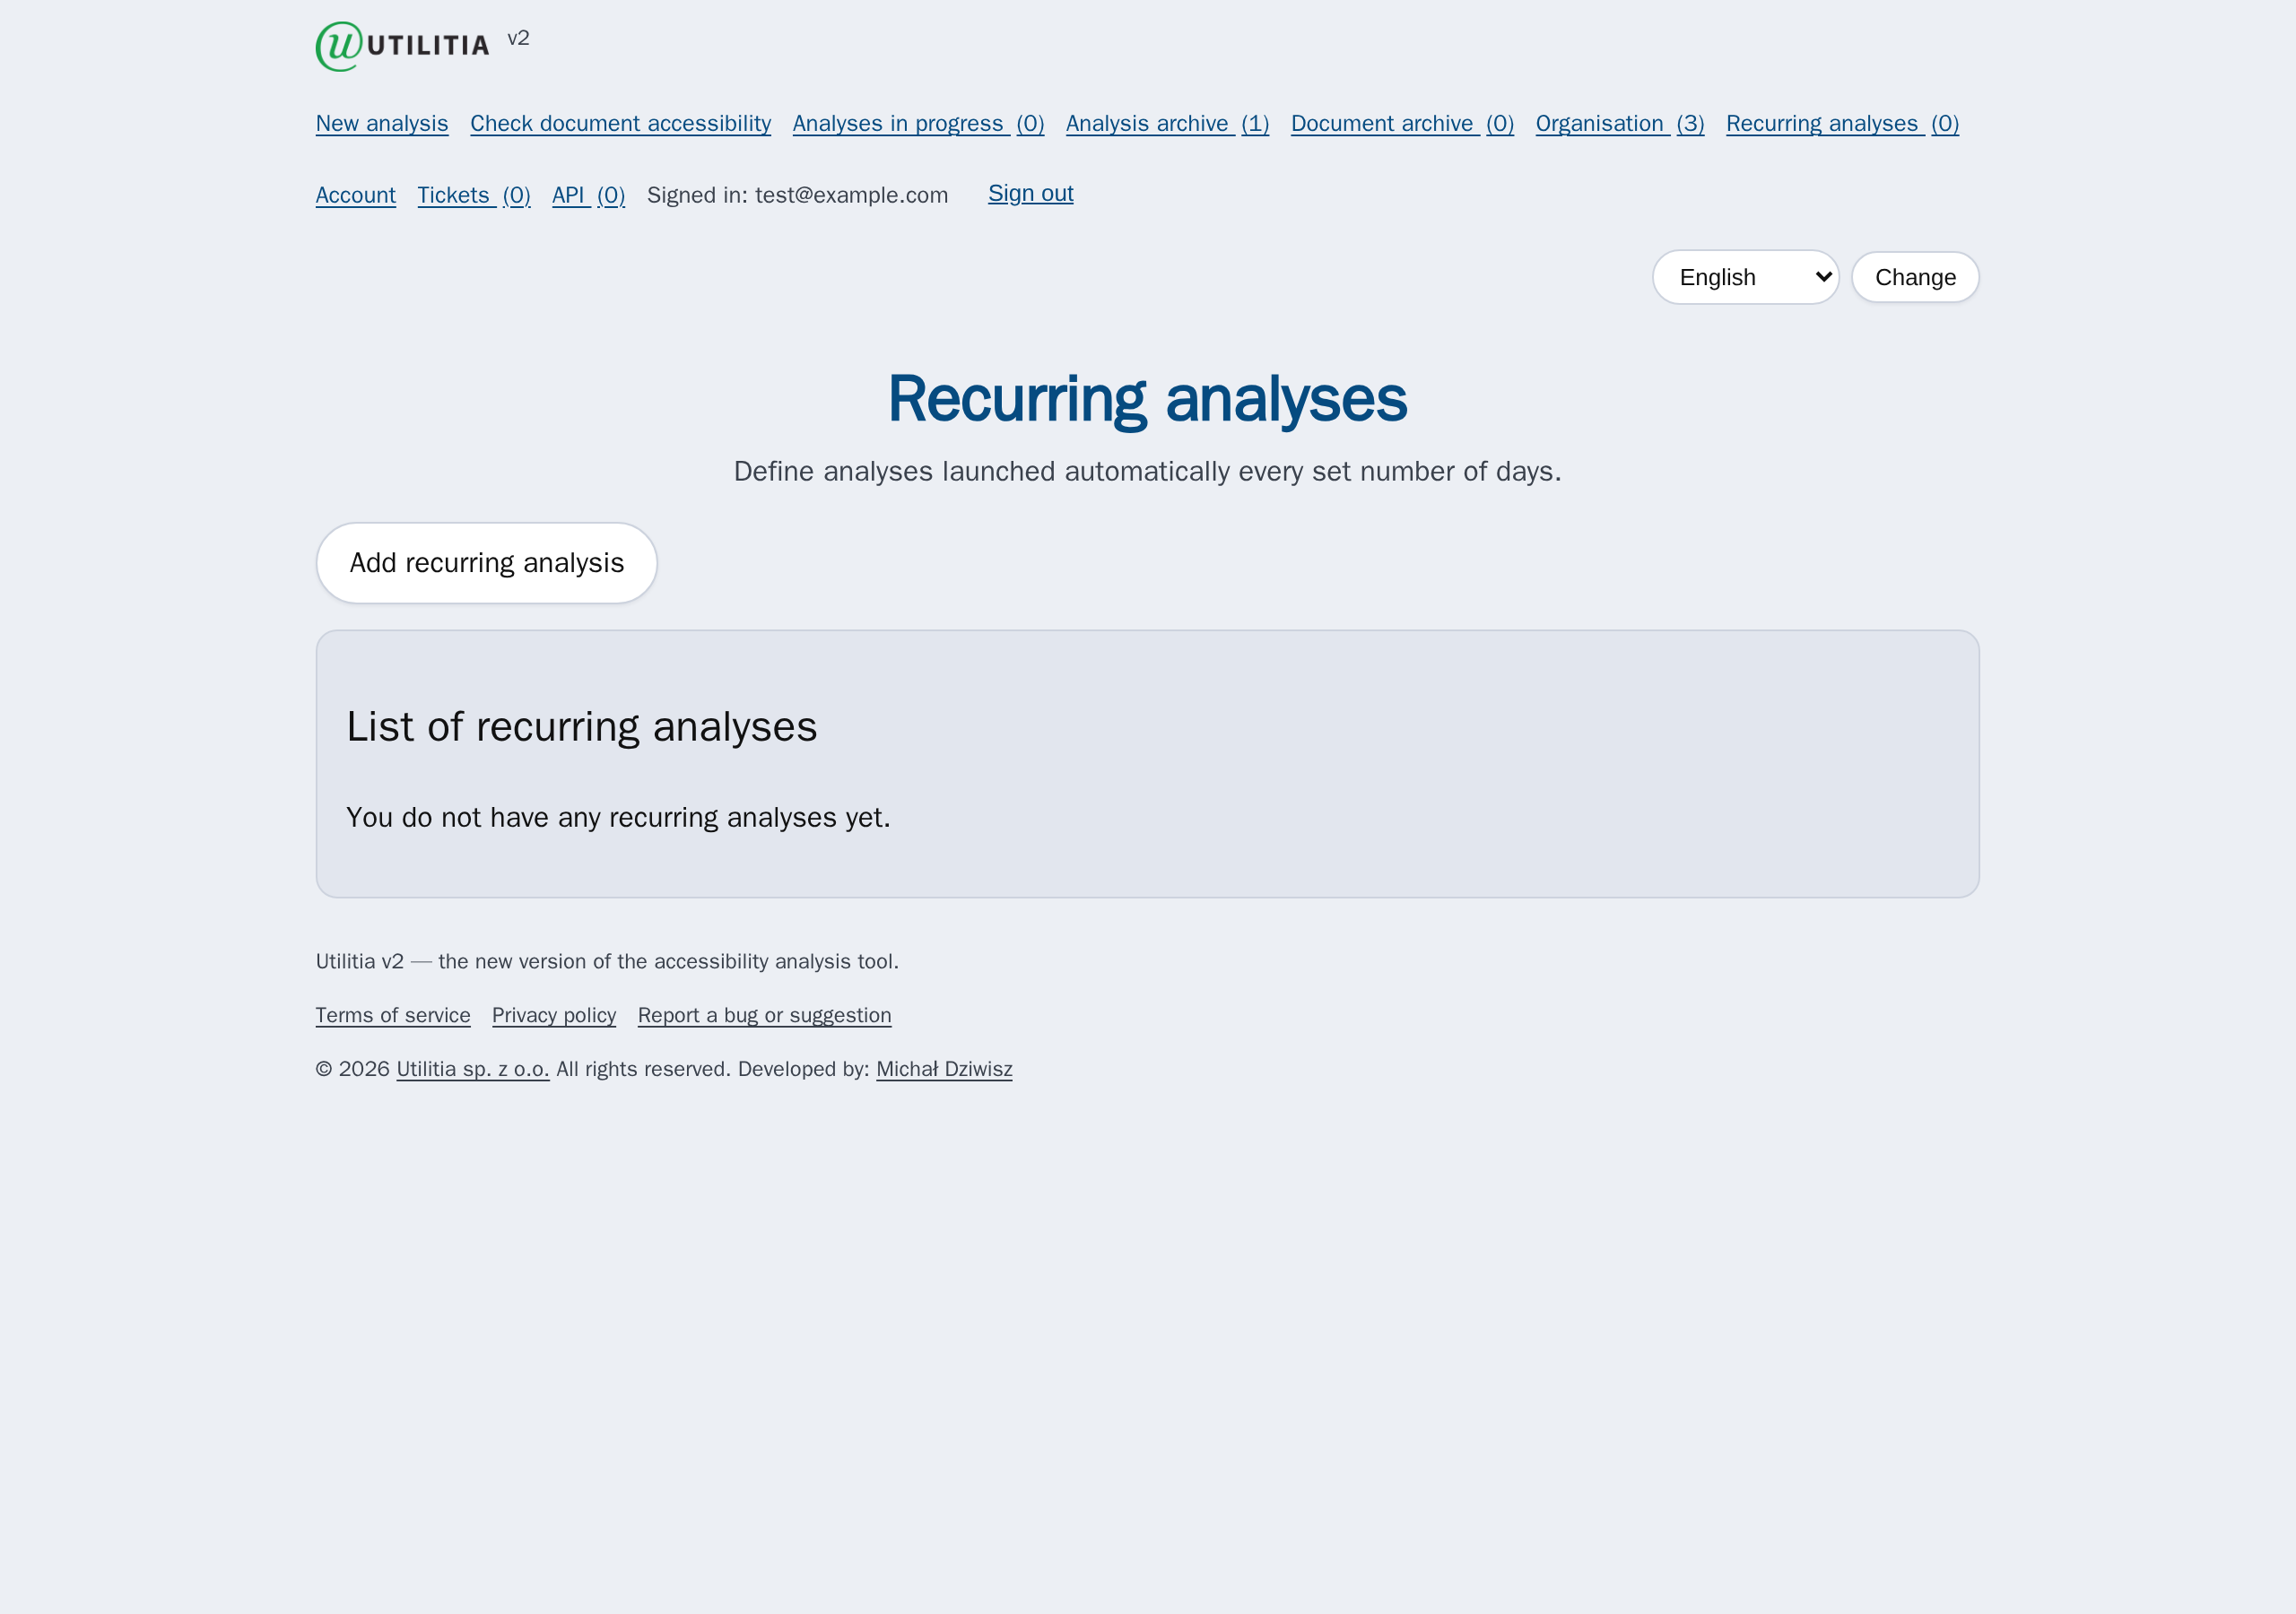
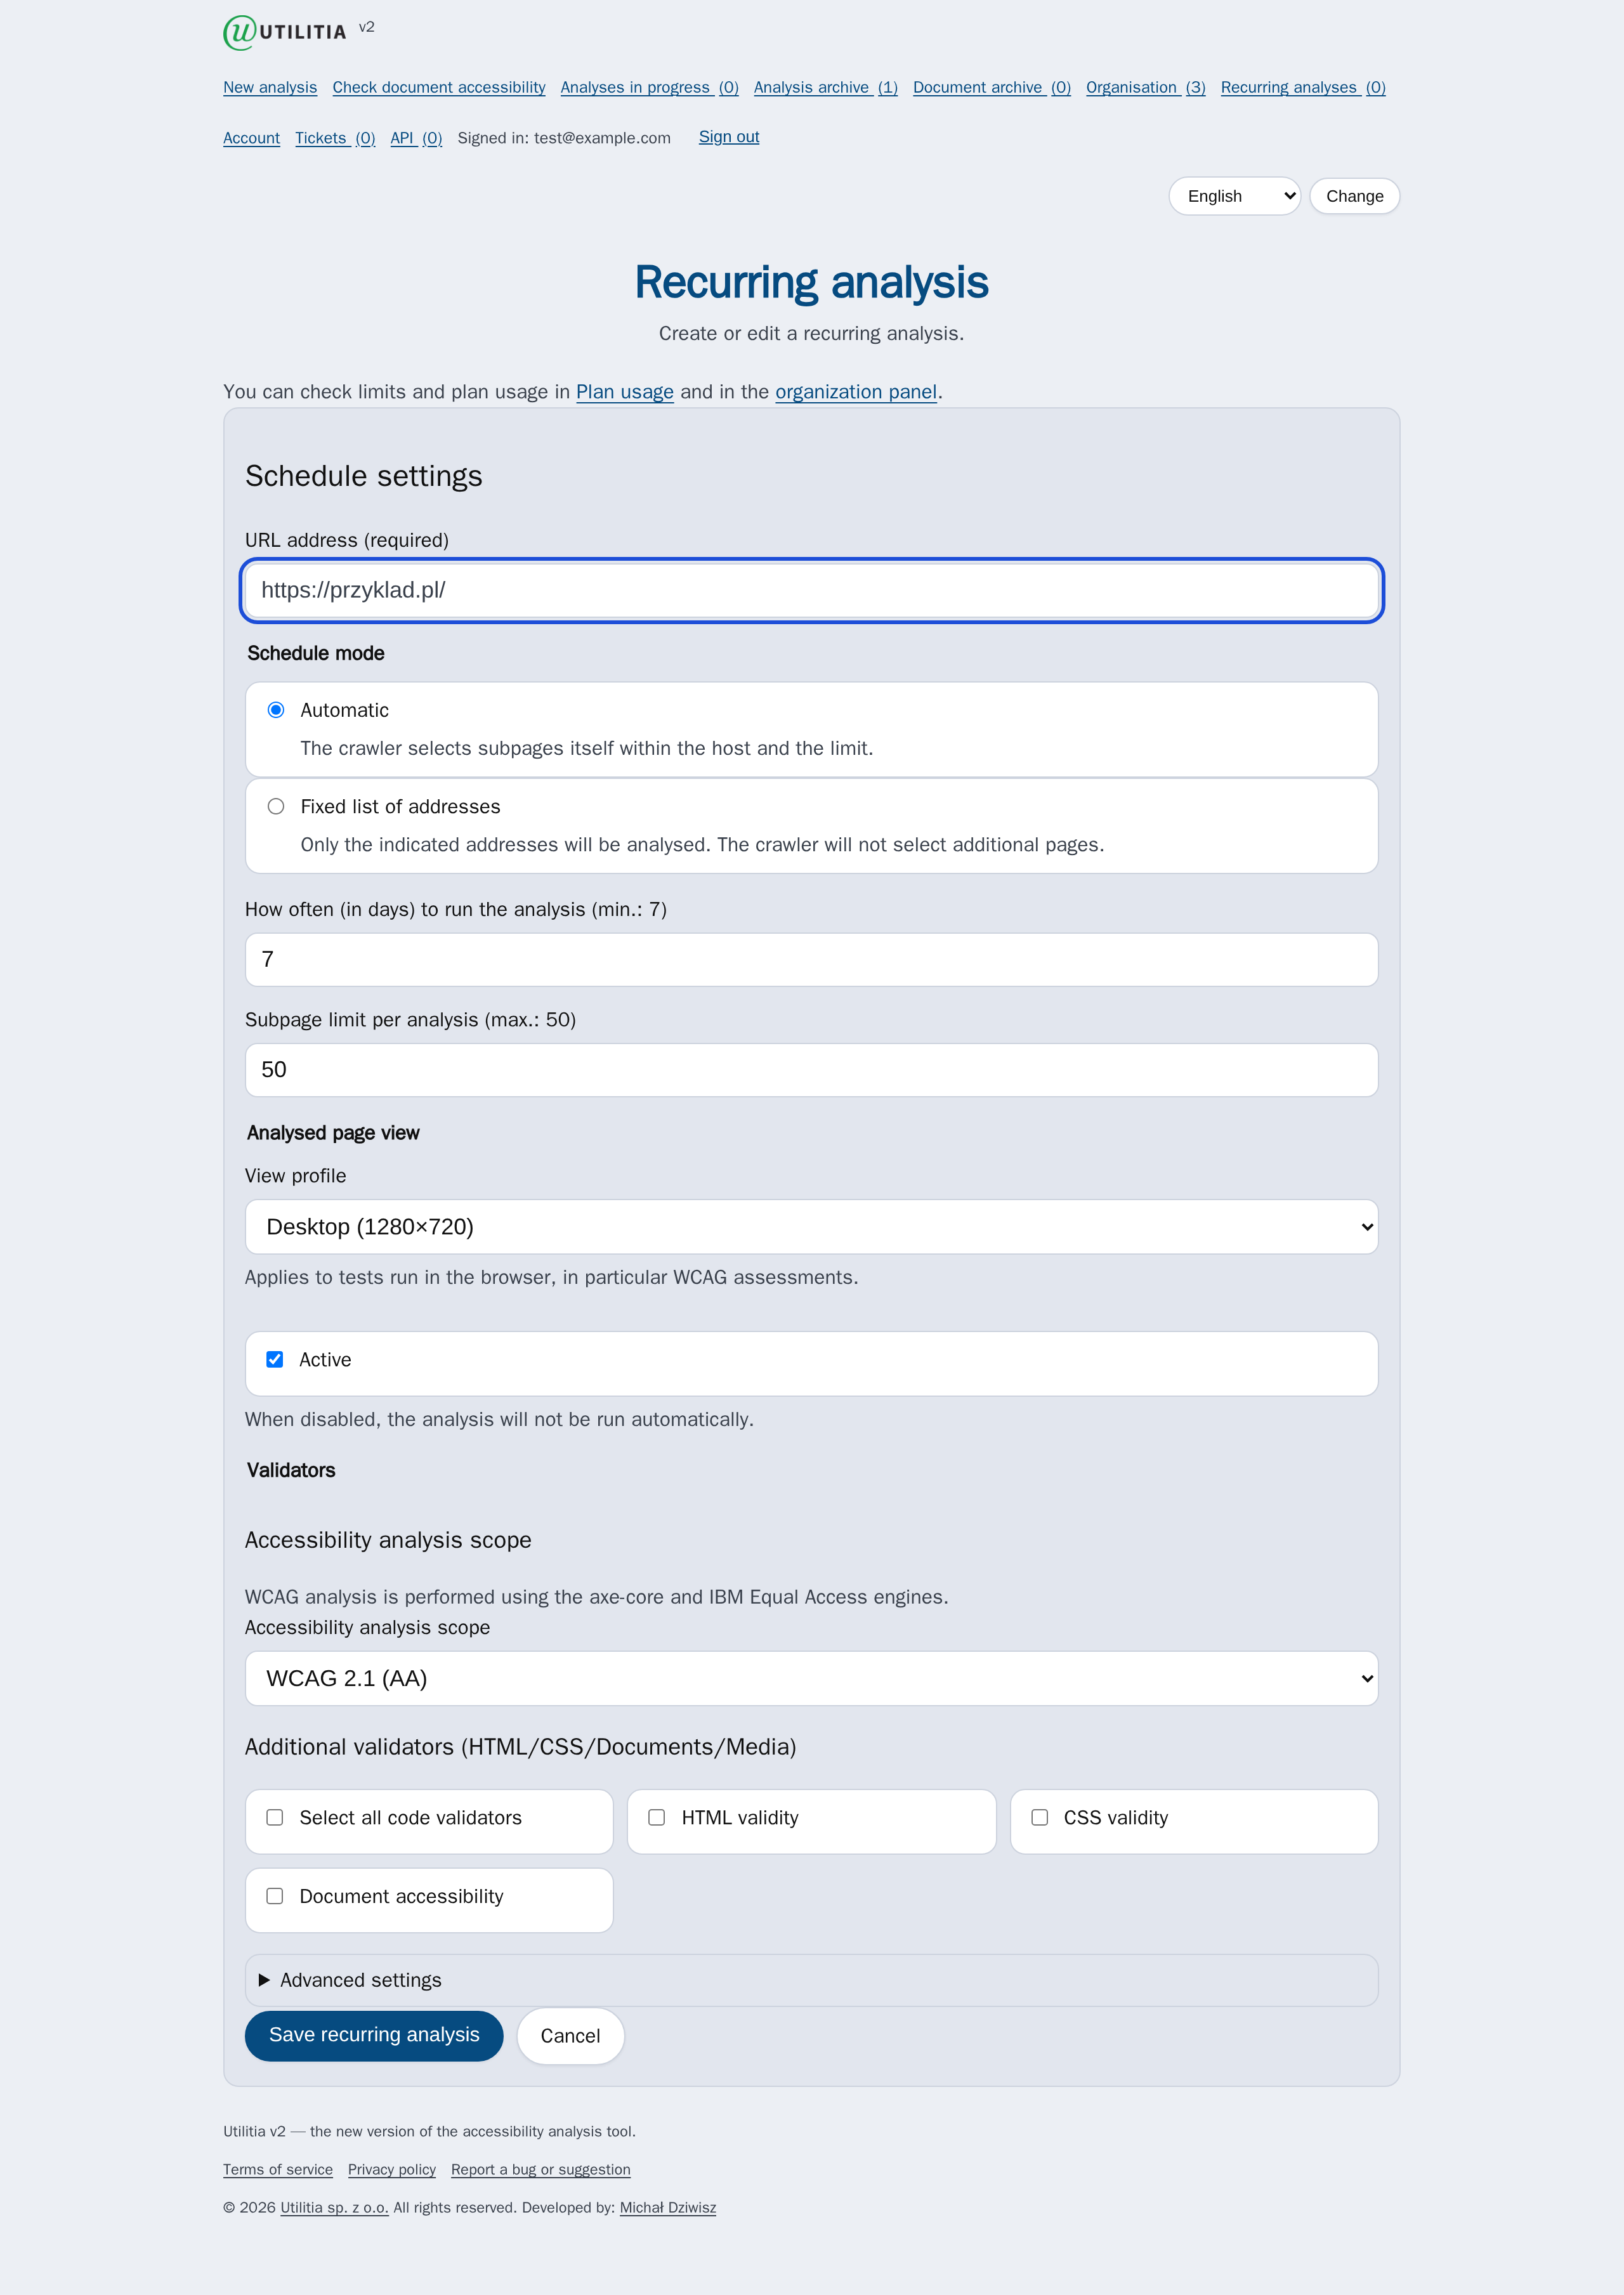
When defining a schedule you set the address, the frequency and the analysis parameters (similar to an ordinary check). Each run creates a separate report, which you will find in the archive. A minimum interval between runs applies, depending on the plan.
10. Working in an organisation
Accounts can be grouped into an organisation — a shared account for a team or company. Members then use a shared plan and shared limits, and the people managing it have insight into usage and the team's composition. When your account belongs to an organisation, an Organisation item appears in the menu.
Roles and permissions
There are four roles in an organisation. They decide what each person can see and do:
| Role | Organisation panel | Operational details and export | Managing members and API keys |
|---|---|---|---|
| Accessibility specialist | no (uses Utilitia normally) | no | no |
| Board / view | yes (view only) | no | no |
| Manager / director | yes | yes | no |
| Organisation administrator | yes | yes | yes |
“Operational details” means, among other things, the usage of individual members, feature availability across the team, the organisation's API keys, activity and recent analyses. Export of the summary to CSV/JSON is available to the Manager / director and Organisation administrator roles.
The organisation panel
The panel (address /organization) is divided into sections. The most important ones are below.
Summary and plan parameters
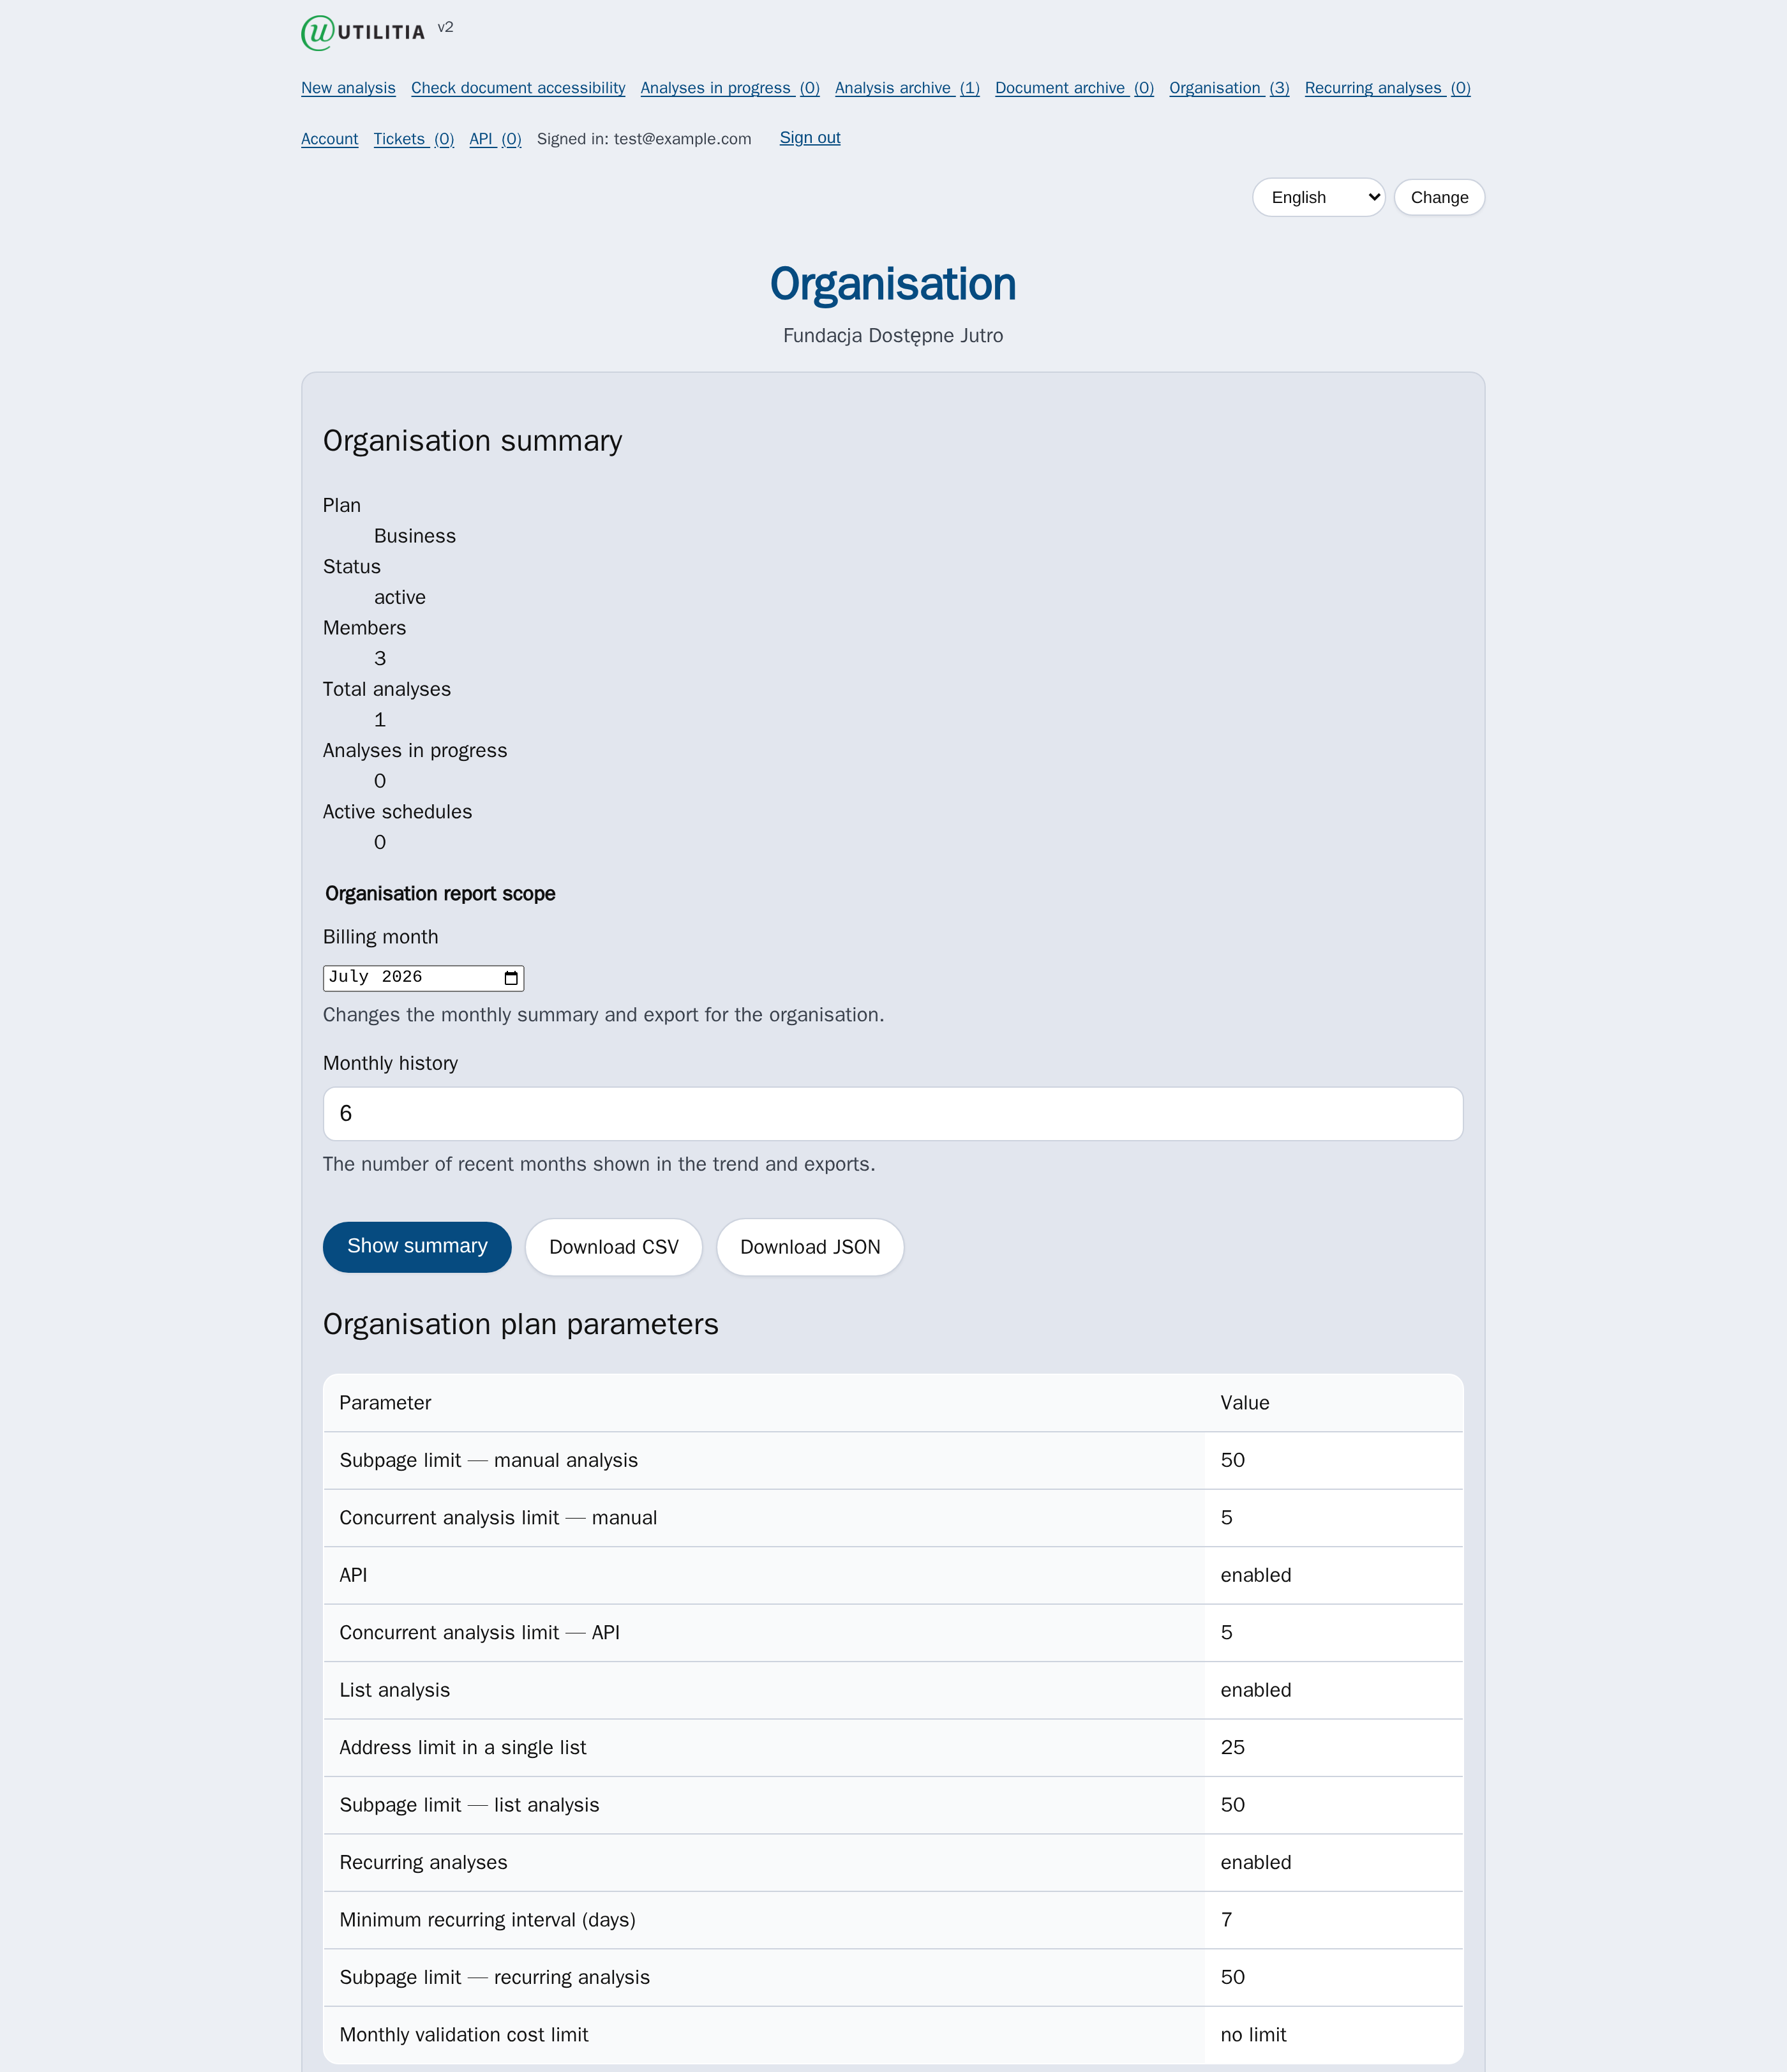
- Organisation summary: plan, status, number of members, analyses in total, running, active schedules,
- Organisation report scope: choosing the billing month and the number of history months, export to CSV/JSON,
- Organisation plan parameters: subpage limits (manual/list/recurring), concurrent-analysis limits (manual/API), API enablement, list analyses, the address limit in a list, recurring analyses with a minimum interval, and the monthly validation cost limit.
Team usage and limits
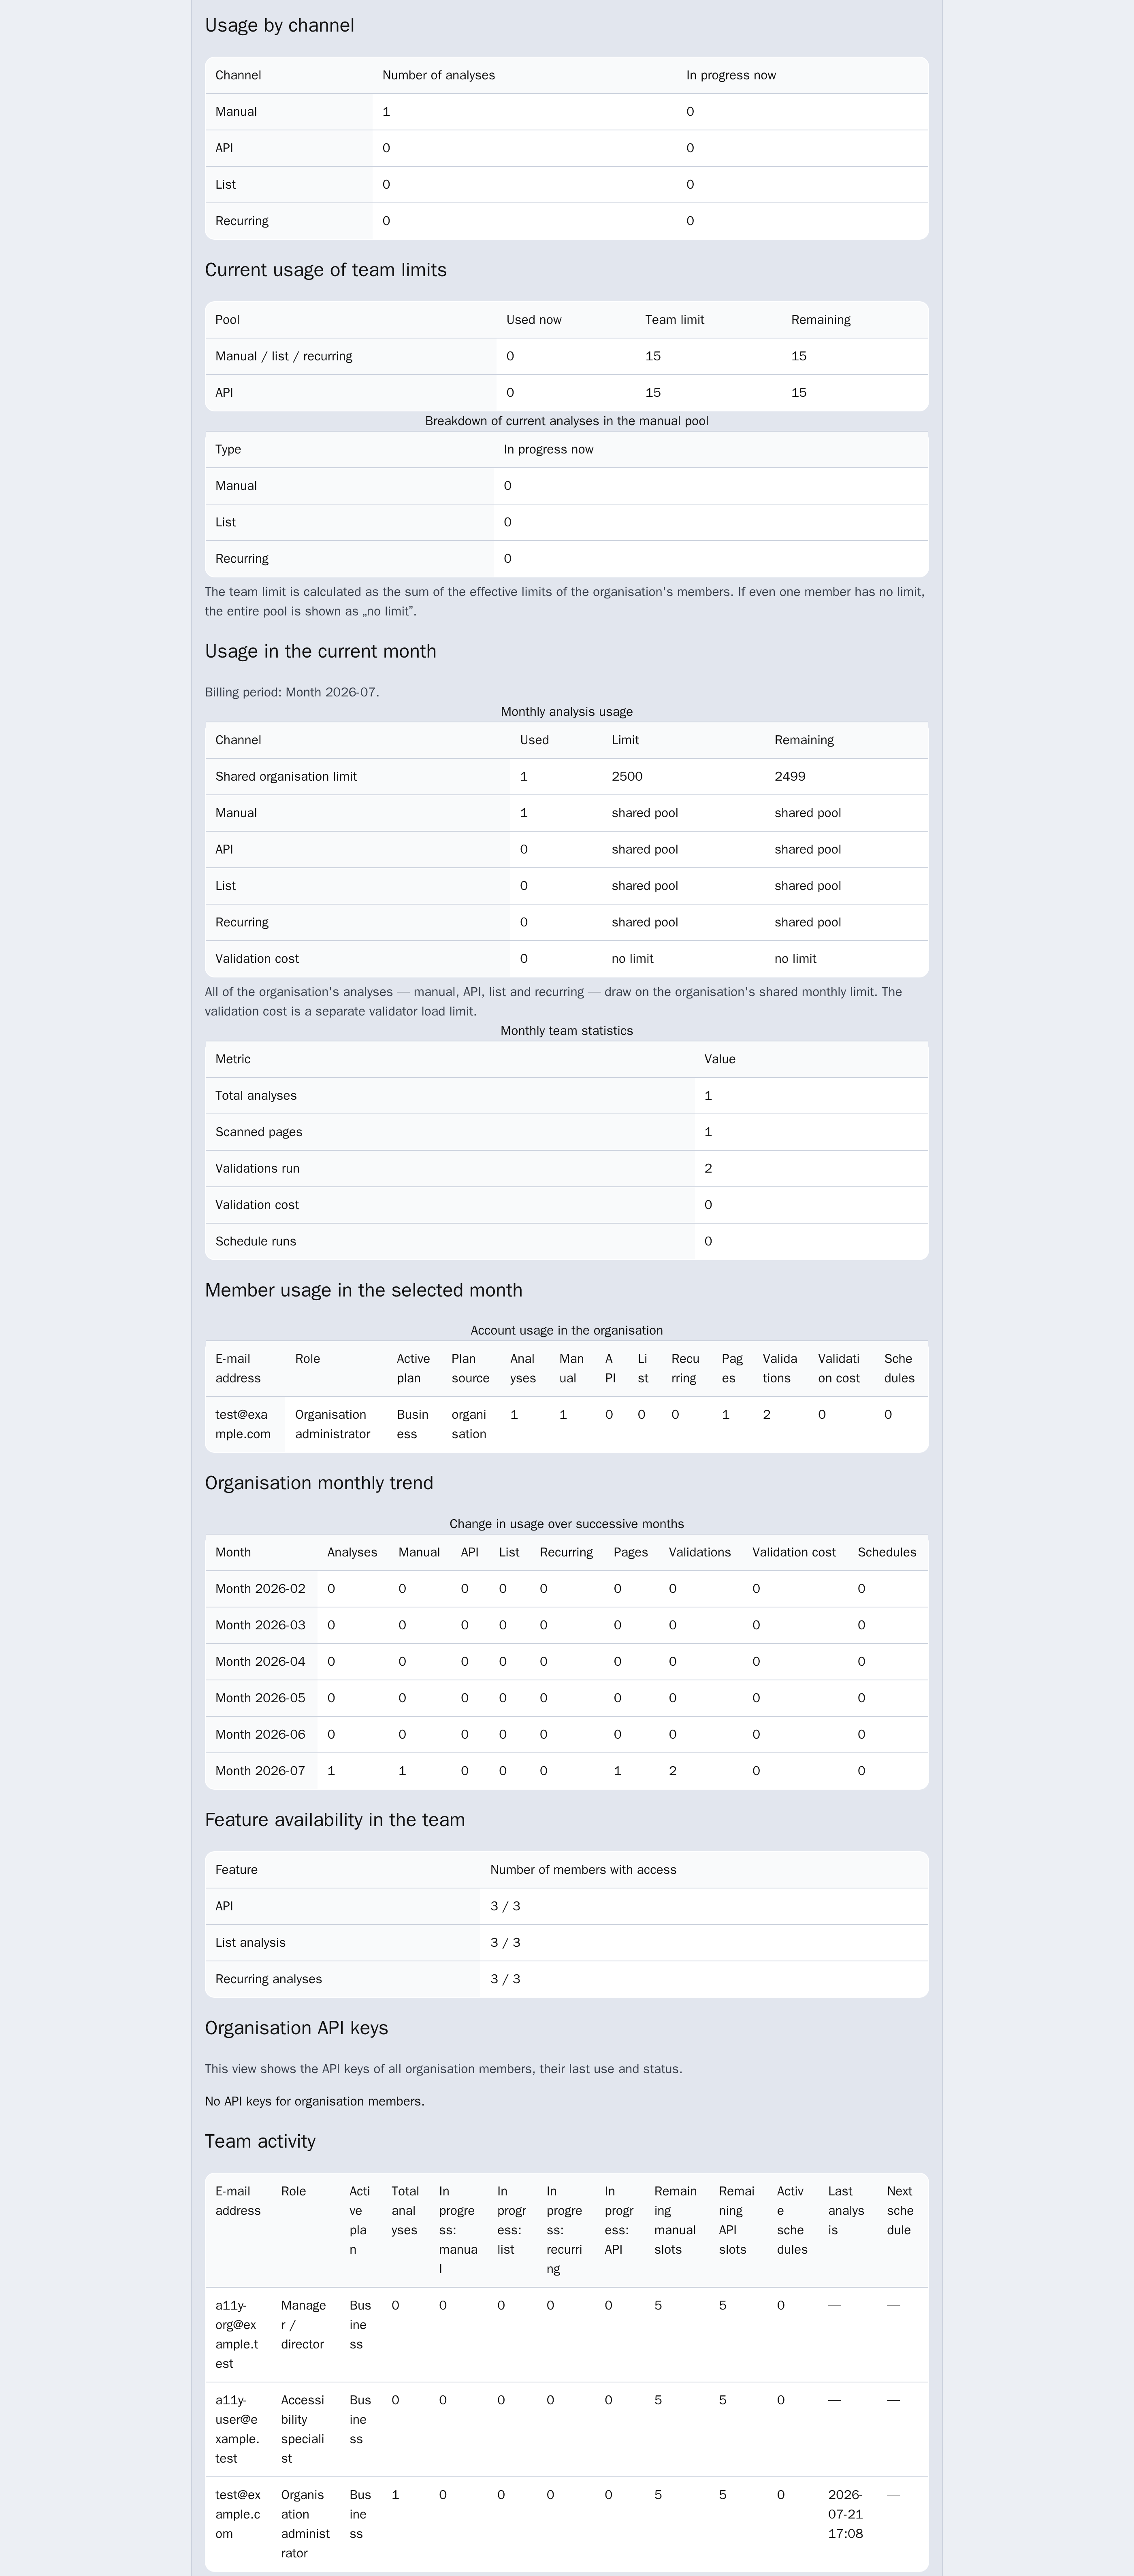
On team plans the limits are shared across the whole organisation — they are counted as the sum of all members' usage. If even one member has an unlimited allowance, the whole pool is shown as “unlimited”. The panel also shows the monthly trend and feature availability across the team.
Managing members and invitations
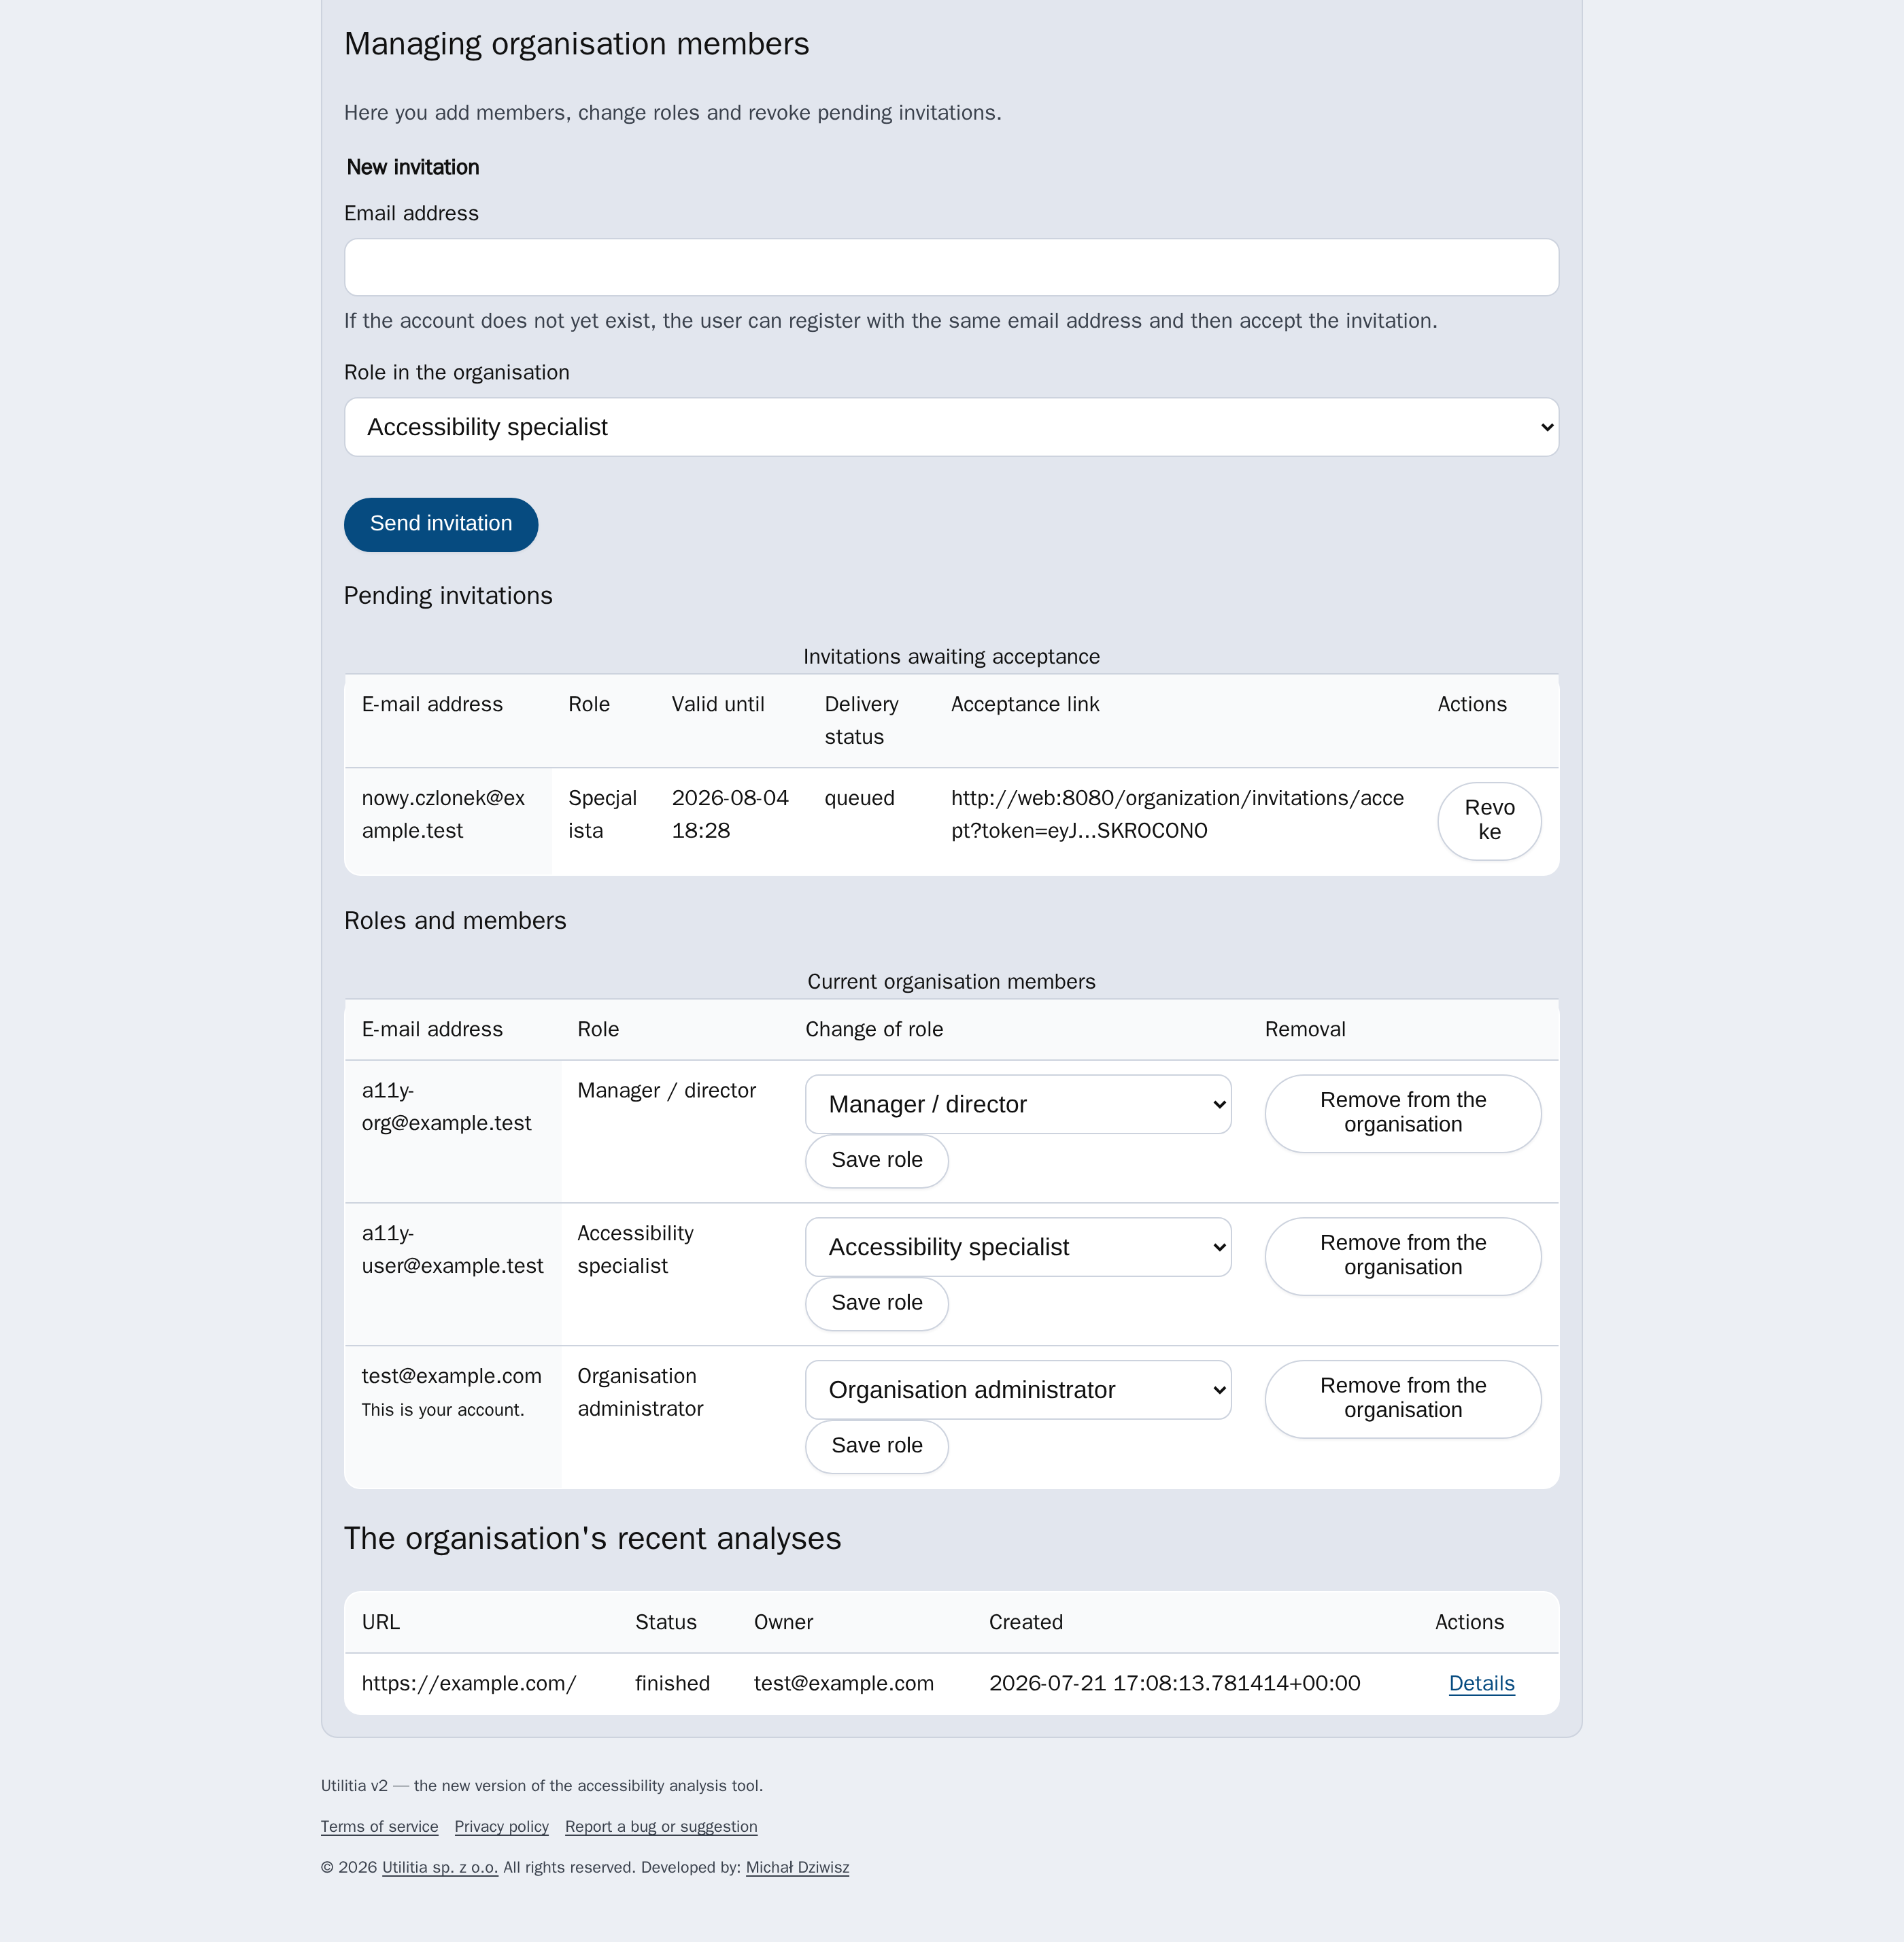
In the Managing organisation members section the organisation administrator can:
- New invitation — enters an e-mail address and chooses a role, then clicks Send invitation,
- Pending invitations — a list with an acceptance link and a Revoke button,
- Roles and members — for each member, a role-change list with a Save role button and Remove from the organisation.
Joining an organisation (accepting an invitation)
- The invited person receives an acceptance link (by e-mail or passed on by the administrator).
- After opening the link they see the Accept invitation screen with the organisation's name, the e-mail address and the assigned role, and a Join the organisation button.
- If an account for that address does not yet exist, you first have to create an account with exactly the same e-mail address, then open the link again and confirm joining.
Analyses run by members may be visible to the people managing the organisation — a scope switch “My analyses” / the organisation's name then appears in the analysis lists.
11. Plan usage and limits
You open the Plan usage page from a link on the home page or from the account section. It shows the current limits, usage and history.
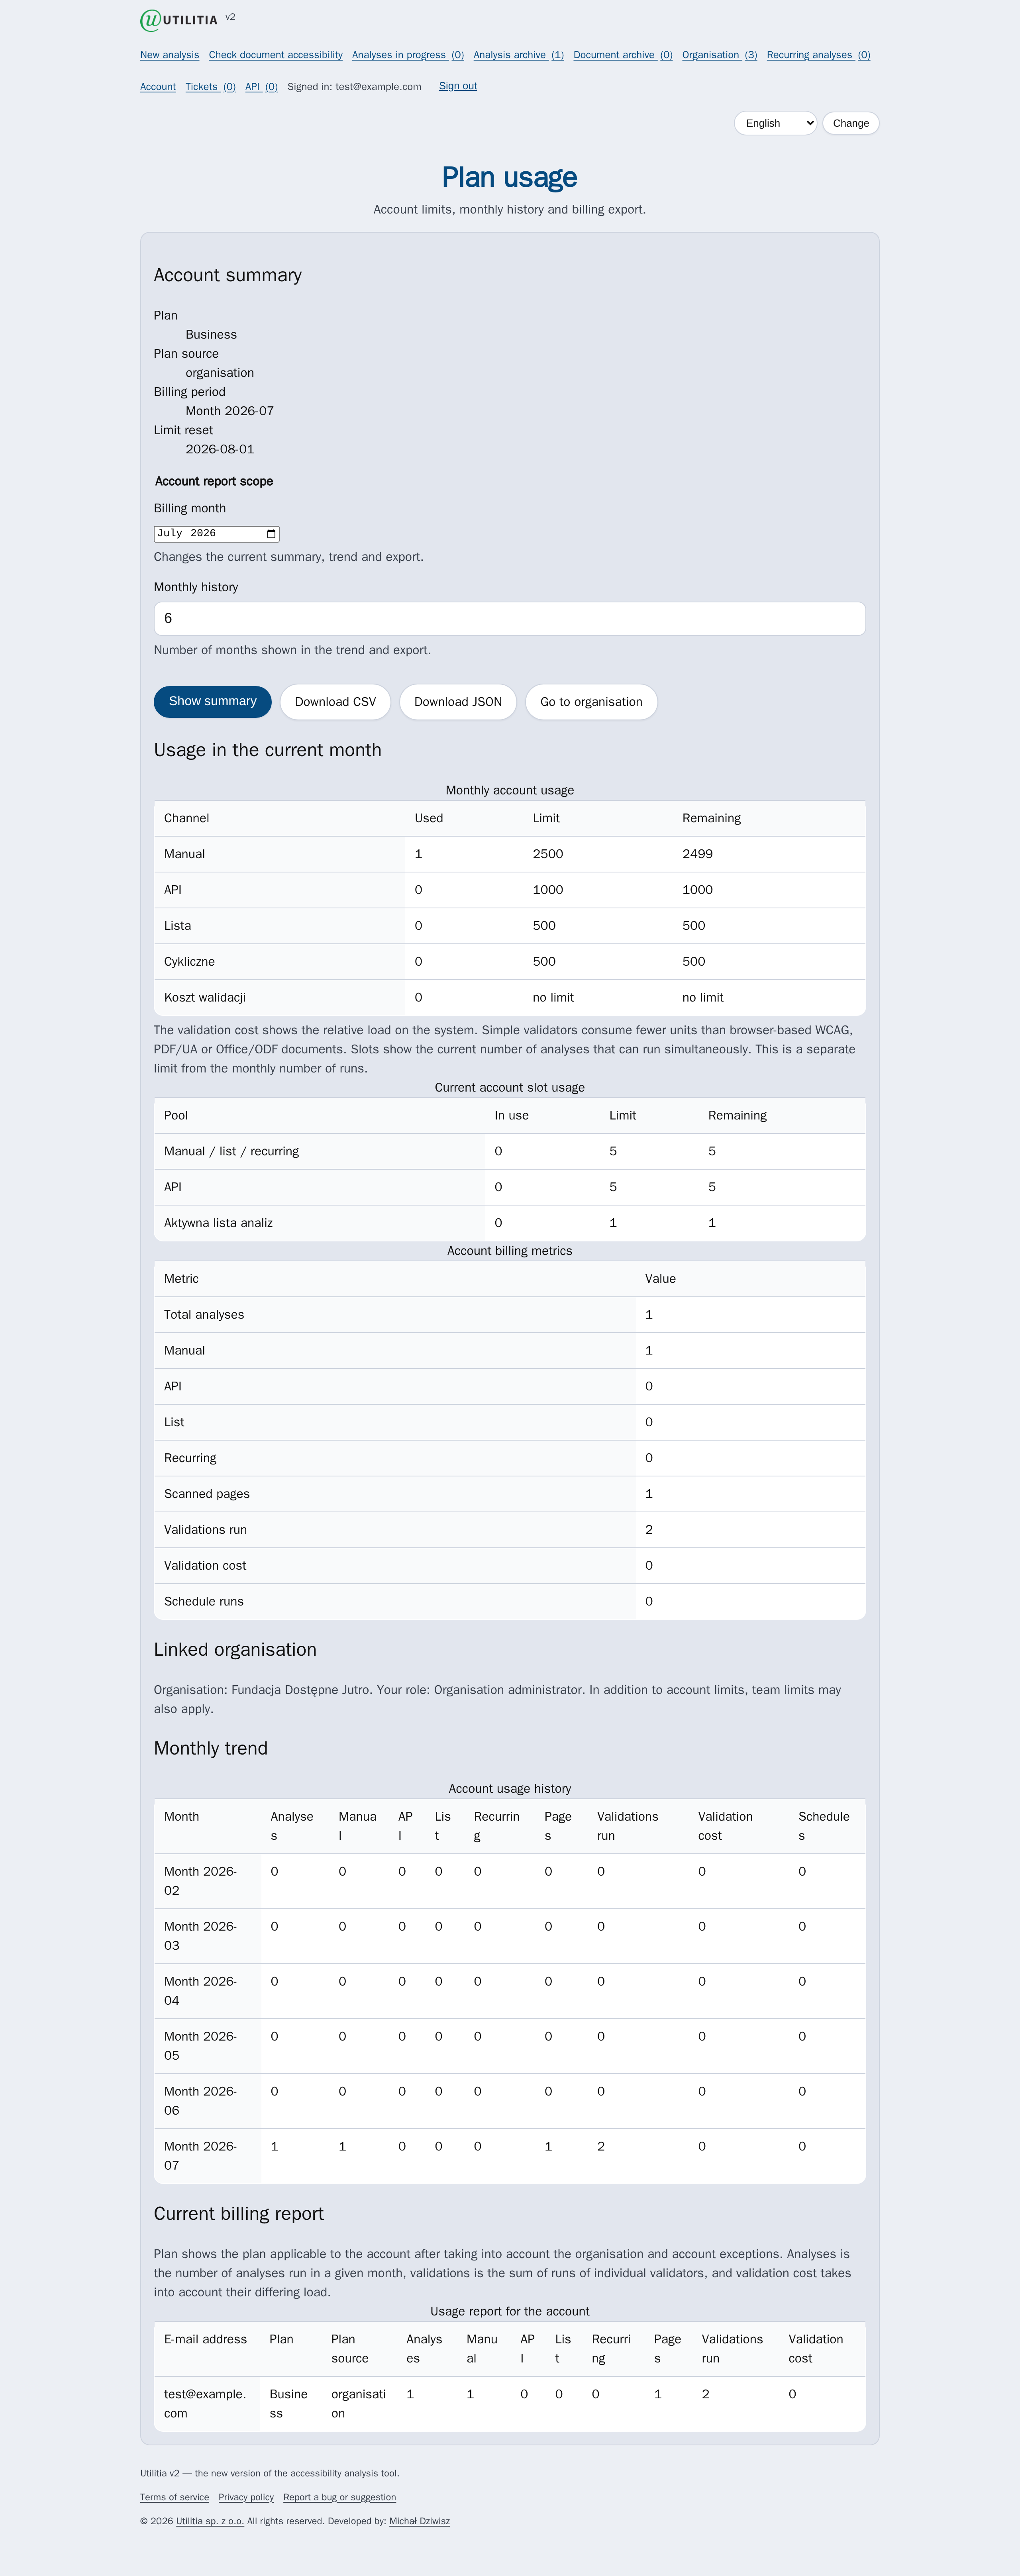
Here you will find:
- the account summary — plan name, plan source, billing period and the date limits reset,
- monthly usage by channel: Manual, API, List, Recurring — with Used / Limit / Remaining columns,
- slots — how many analyses can run at once (separately for the manual/list/recurring channel and for the API) and the limit of the active analysis list,
- metrics and the monthly trend — usage history,
- data export: Download CSV and Download JSON.
The validation cost shows the relative load on the system — simple validators use fewer units than a full WCAG check in the browser or a PDF/Office analysis.
12. API access
If your plan includes the API, an API item appears in the menu. There you can generate API keys and run analyses programmatically.

- Create a named key — its full value is shown only once, so save it in a safe place,
- you pass the key in the request header:
Authorization: Bearer <key>, - when creating it you set the scope (the key's permissions), the validity period (days; 0 = indefinite) and an optional page limit for the key,
- the page contains documentation of the public endpoints (creating an analysis, checking the status, downloading the results),
- analyses run via the API have a separate monthly limit and a separate pool of concurrent slots (see Plan usage).
Key permission scopes
The options include: analyses:read, analyses:write, analyses:list, reports:read, keys:read, keys:write. Give a key only the permissions it really needs.
The most important endpoints
The API base address is /api; the interactive documentation is at /api/redoc, and the OpenAPI schema at /openapi.json.
POST /api/analyses— create a website analysis (fields includeurl,validators(defaultwcag21aa),subpages_limit,viewport_profile),POST /api/analyses/list— analysis of a list of addresses (when the plan allows it),GET /api/analyses,GET /api/analyses/{id}and.../progress,.../validations,.../report— status and results,POST /api/documents— send a document to be checked;GET /api/documents/{id}— the result,GET /api/account/usage— current plan usage.
The available validation profiles include: wcag21aa (default), wcag22a/wcag22aa/wcag22aaa, html, css, pdfua, iris. Typical response codes: 401/403 (invalid key or missing scope), 429 (rate limit exceeded — see the Retry-After header), 413 (file too large).
Treat the API key like a password. Do not put it in public code or in repositories. If a key leaks, delete it and generate a new one.
13. Tickets: bugs and suggestions
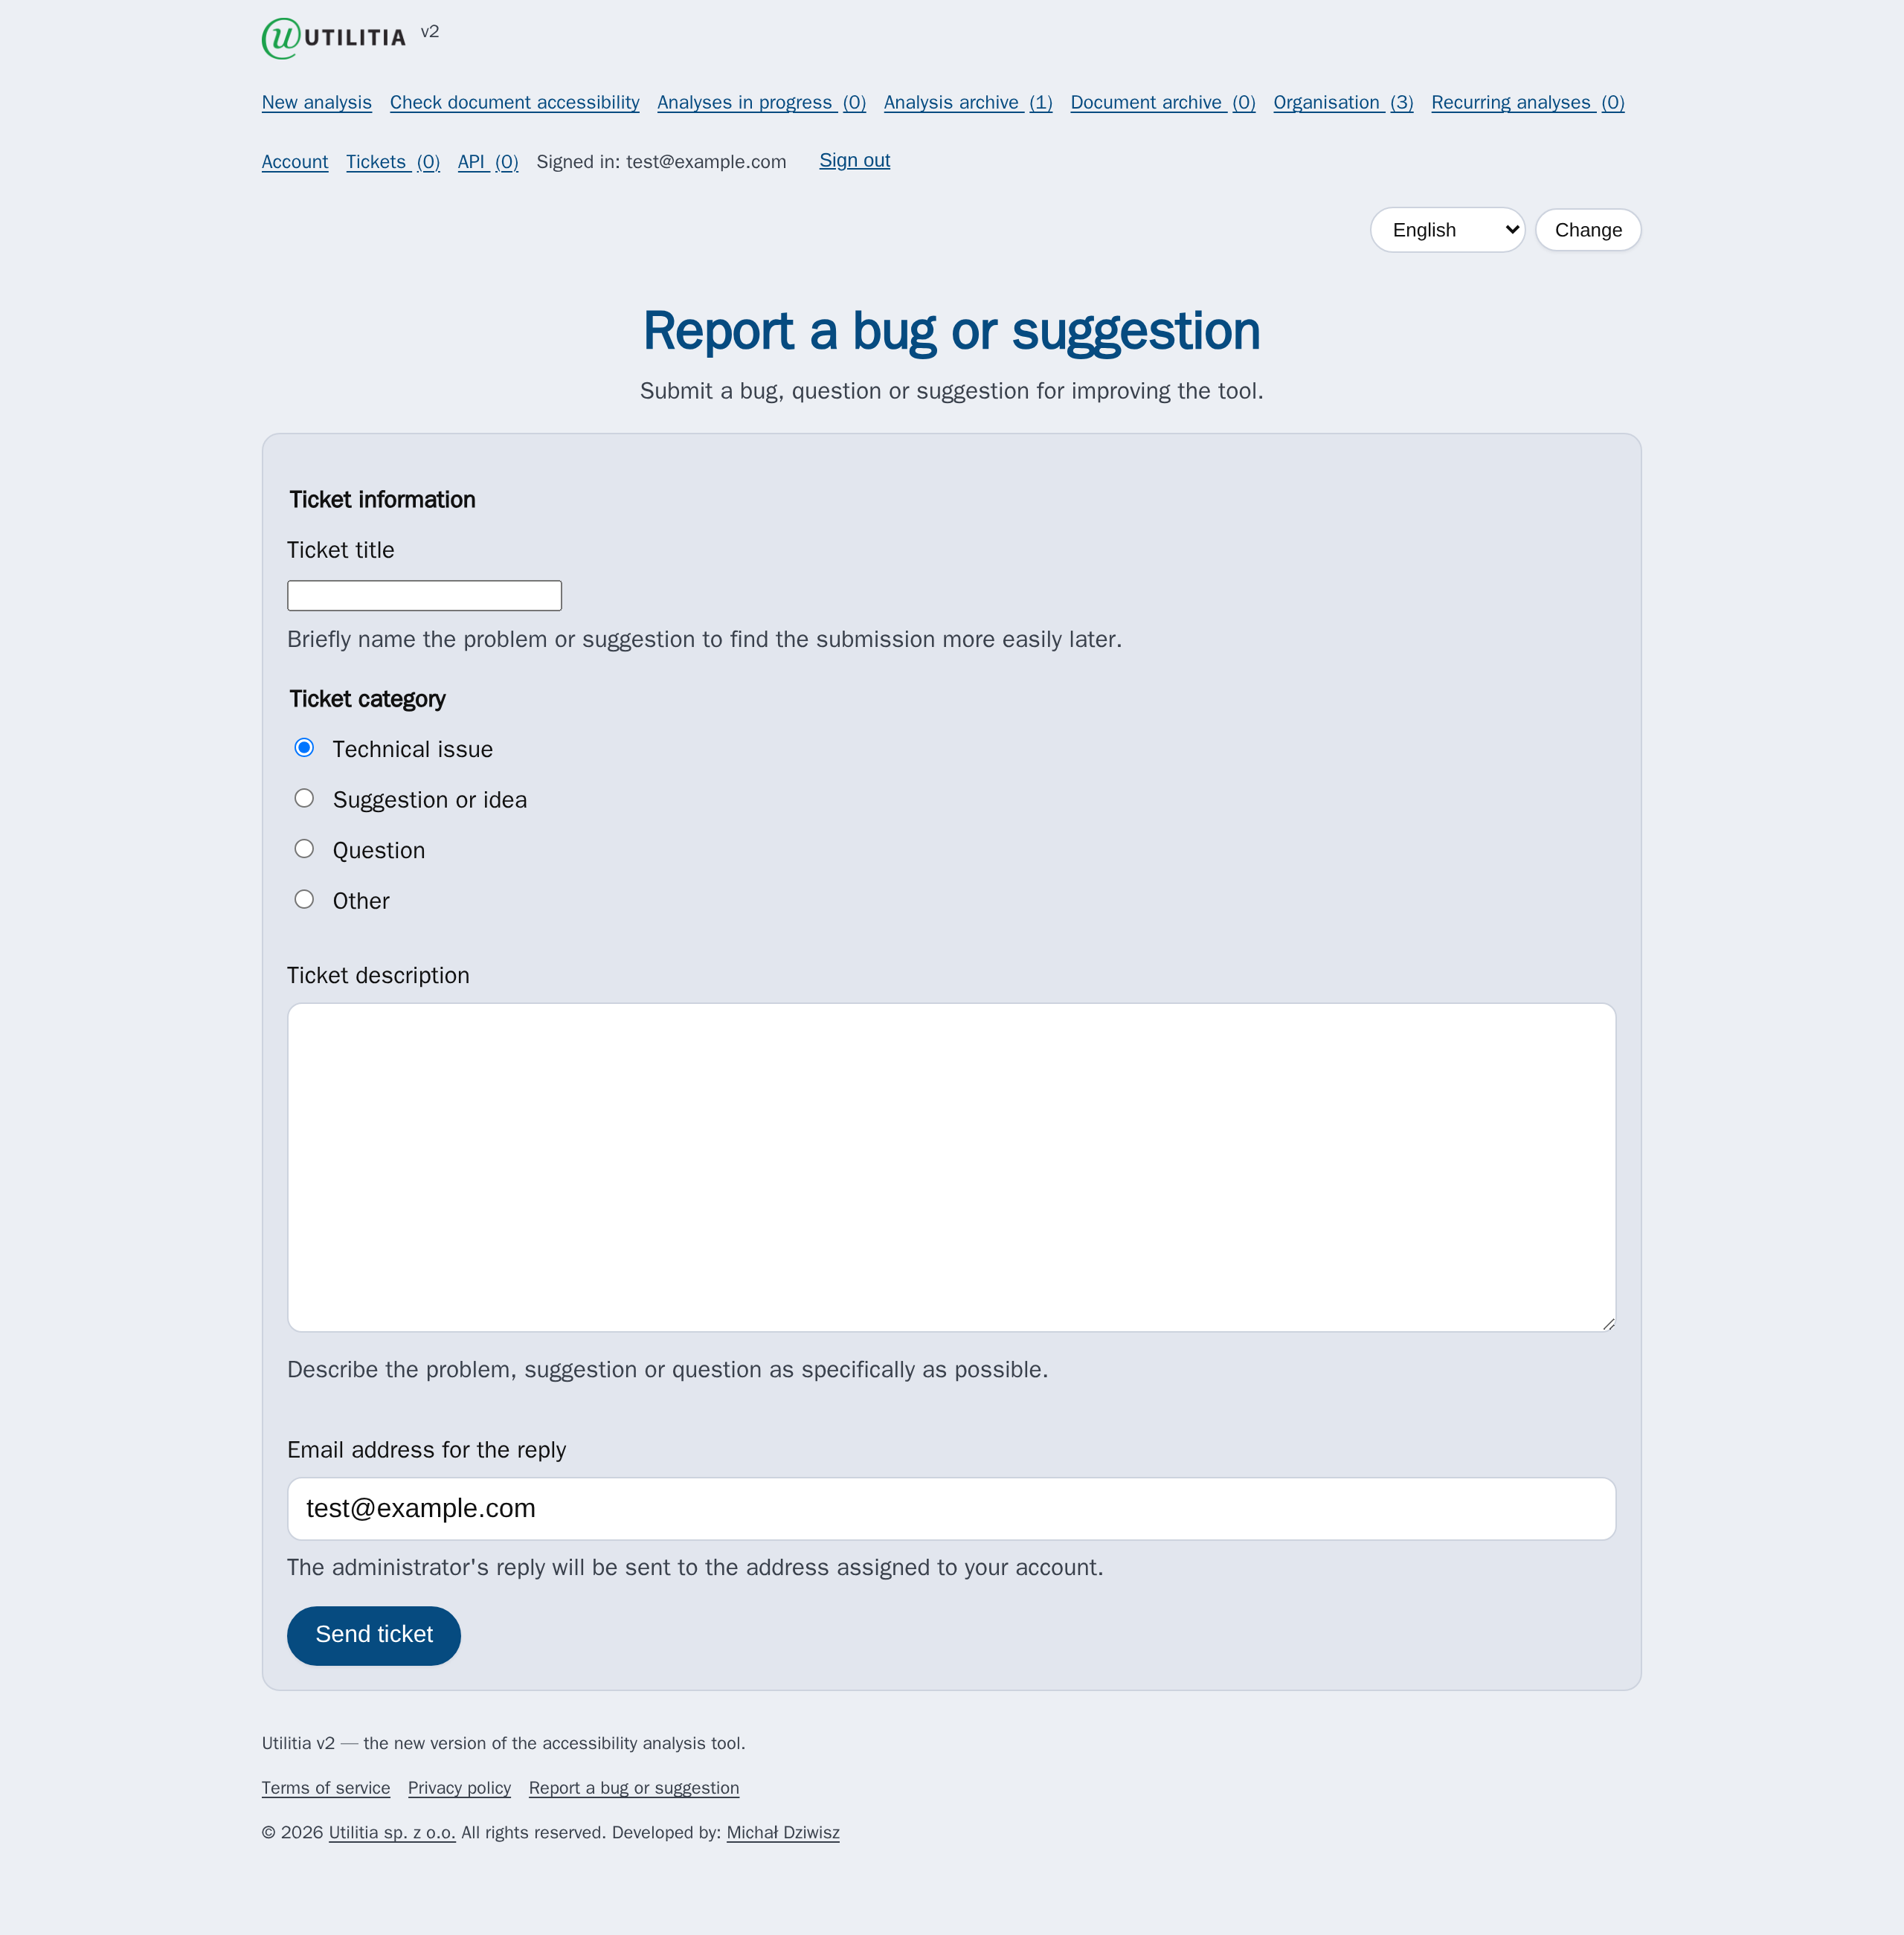
You report problems and ideas with the Report a bug or suggestion link (in the footer) or via the Tickets item in the menu. In the form you enter a title, choose a category (Technical bug, Suggestion or idea, Question or Other) and describe the matter. The support reply will be sent to the e-mail address linked to your account.
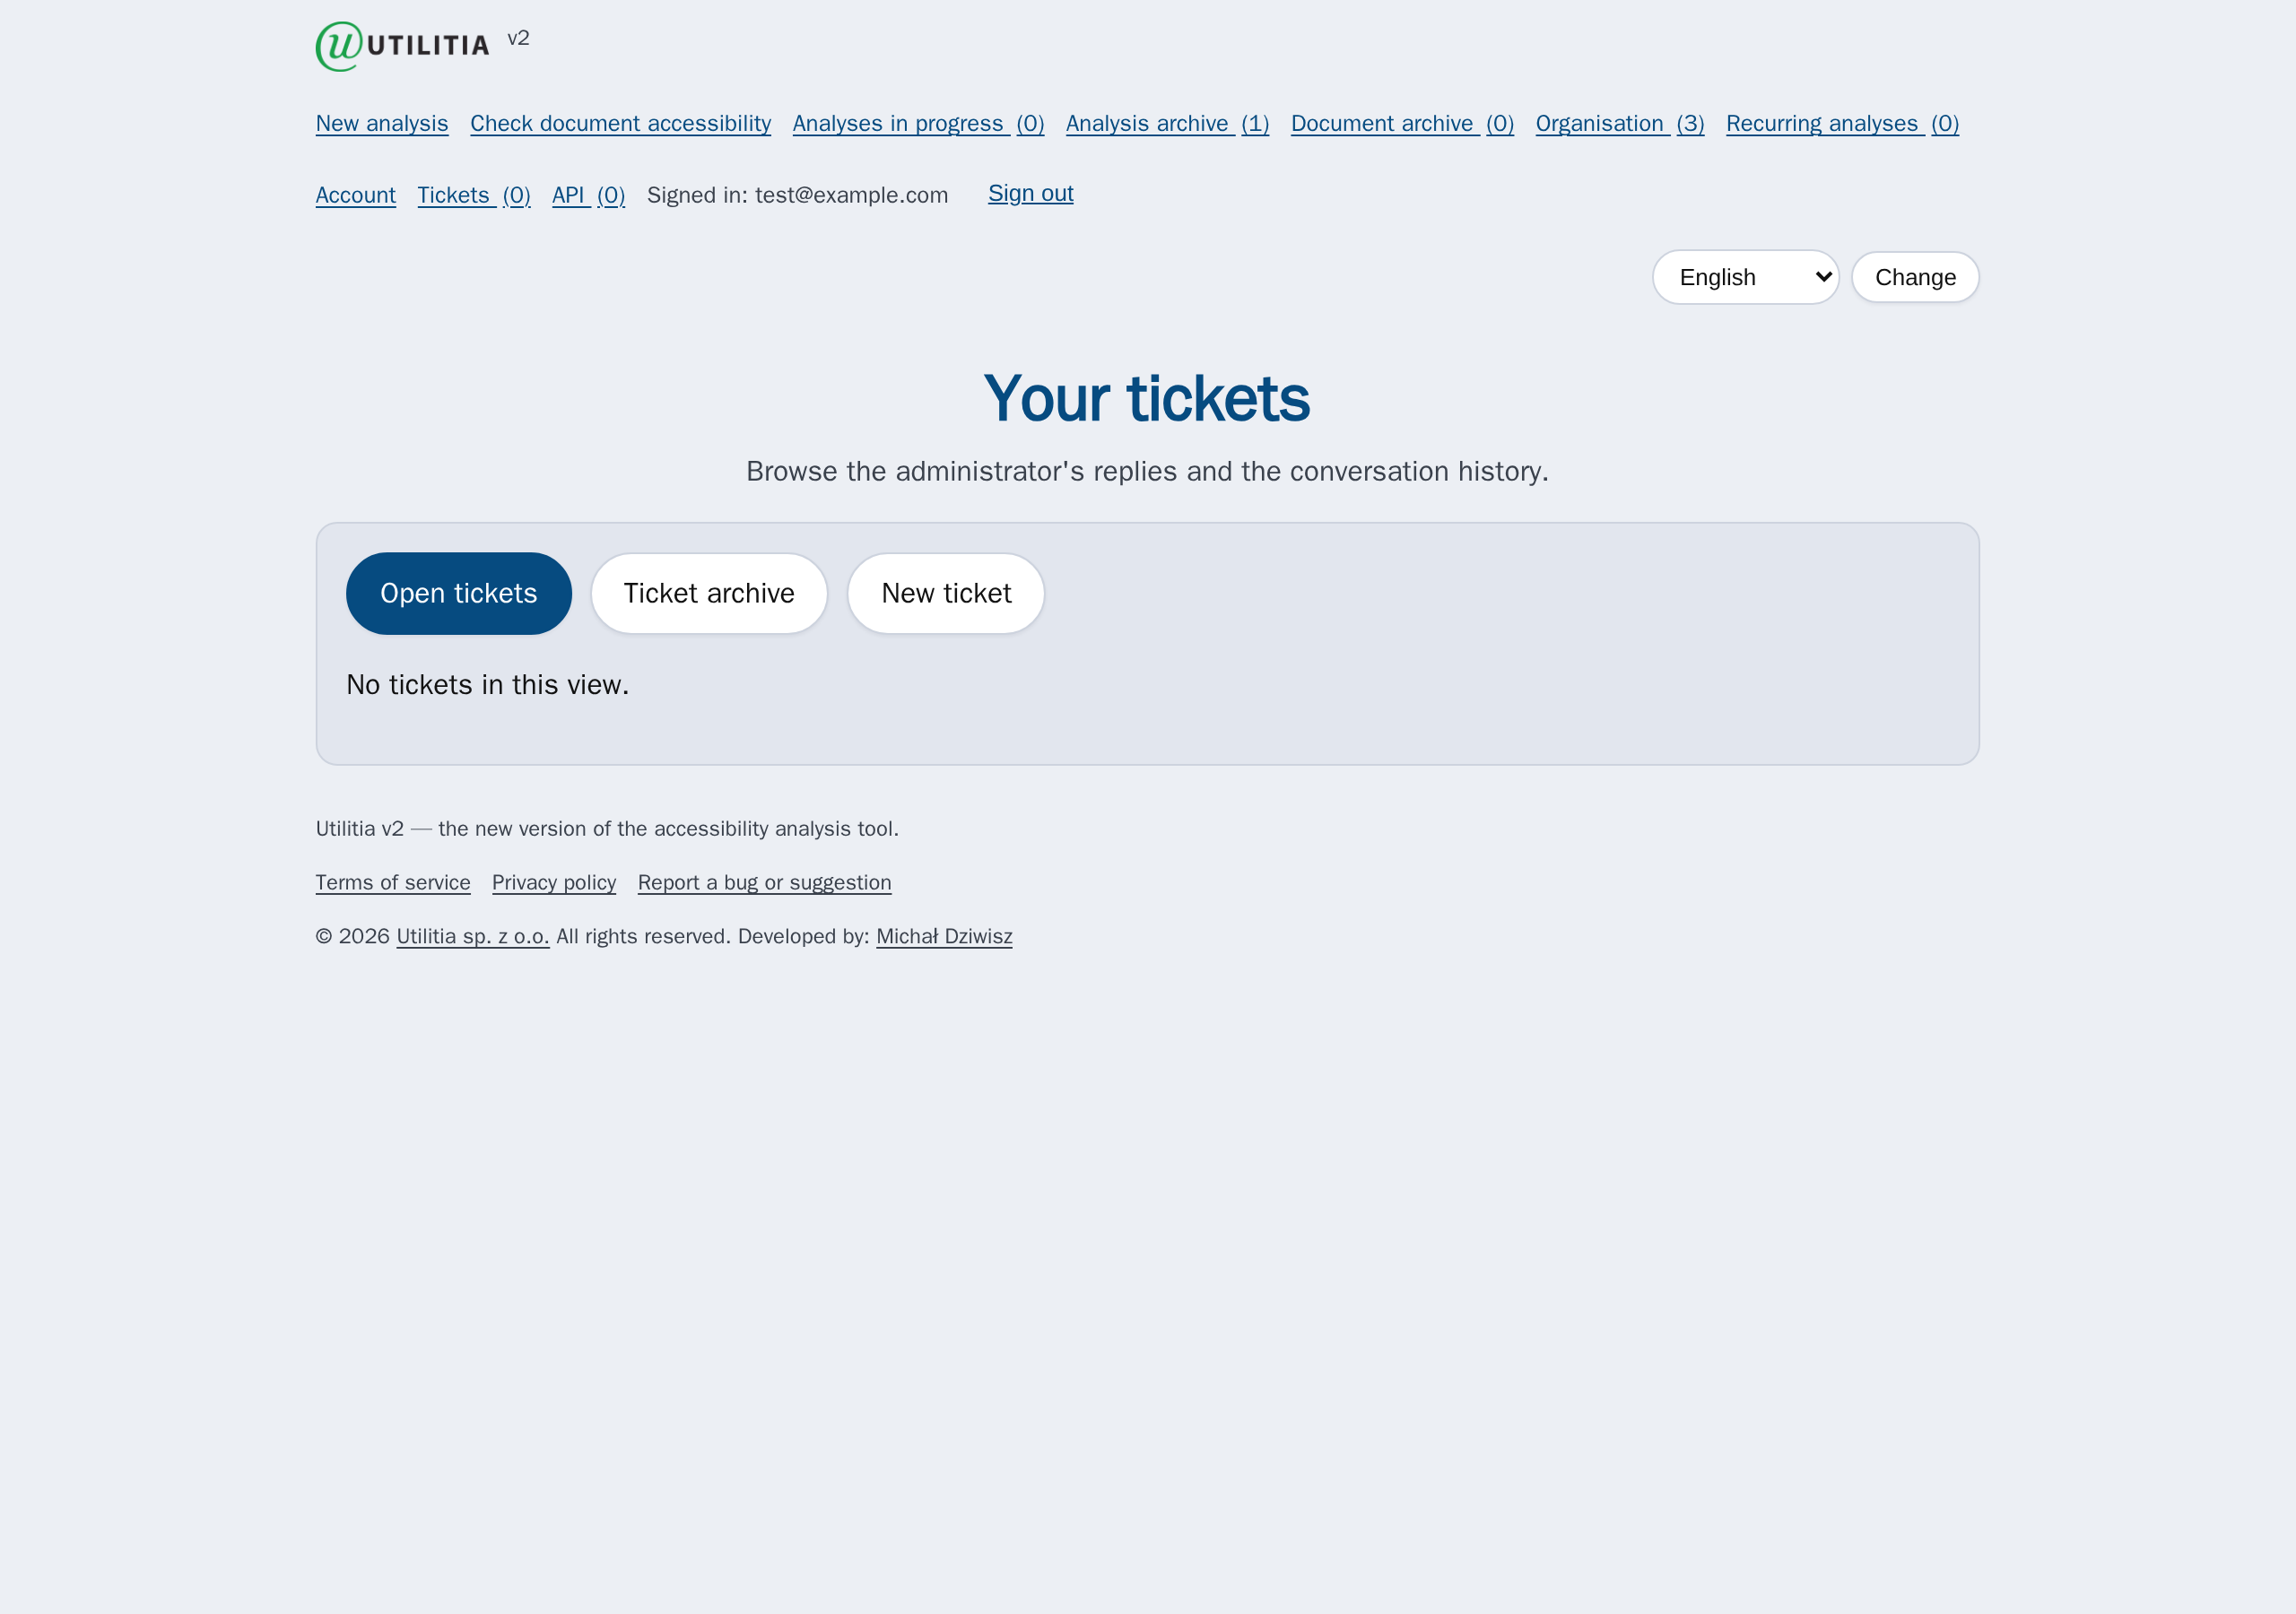
On the Your tickets page signed-in users switch between the Open tickets, Ticket archive and New ticket tabs, can open threads and read support replies. The number next to “Tickets” in the menu indicates open tickets.
14. Interface language and privacy
Language
In the header of every page (top bar, next to the menu) you choose the interface language from a list: Polski, English or Dansk, and confirm with the Change button. The setting is remembered for your session.
Data privacy
Utilitia analyses only the technical aspects of pages and documents related to digital accessibility. The content of the documents you send is not used for any purpose other than the accessibility audit, nor is it aggregated. The details are described in the Terms of service and the Privacy policy (links in the footer).
15. Glossary
- WCAG
- Web Content Accessibility Guidelines — an international standard developed by the W3C. See the official WCAG overview (opens in a new window). Conformance levels: A (basic), AA (standard, most often required), AAA (highest).
- PDF/UA
- The accessibility standard for PDF files (Universal Accessibility). Utilitia checks conformance with the PDF/UA-1 profile.
- Error / Warning / Information
- Message levels in the report. Error — a certain problem; warning — for manual verification; information — a technical matter or format.
- Success criterion
- A single, testable WCAG condition (e.g. 2.4.1 “Bypass Blocks”).
- Validator / engine
- A module that tests a specific aspect: axe-core and IBM Equal Access (WCAG), VNU (HTML/CSS), veraPDF (PDF/UA), IRIS (flashes).
- View of the analysed page
- The browser-window resolution at which the page is tested (desktop, tablet, phone or a custom width).
- Slot
- A place for one analysis running in parallel. A separate limit from the monthly number of runs.
- Basic Auth
- The browser's built-in login prompt that protects a page, shown before the page loads.